A few days ago, I received a requirement to trigger Azure AI Foundry agents by creating a new API from scratch essentially as a low-code solution. While exploring different approaches, I came across the Azure Agent Service Connector with Logic Apps. It exposes API endpoints and makes it easy to trigger agents through the connector.
In this blog, I will explain how you can use the Agent Service Connector with Logic Apps to create a no-code API and trigger agents directly. I will also show how it can be used within agent workflows to orchestrate and trigger multiple agents seamlessly.
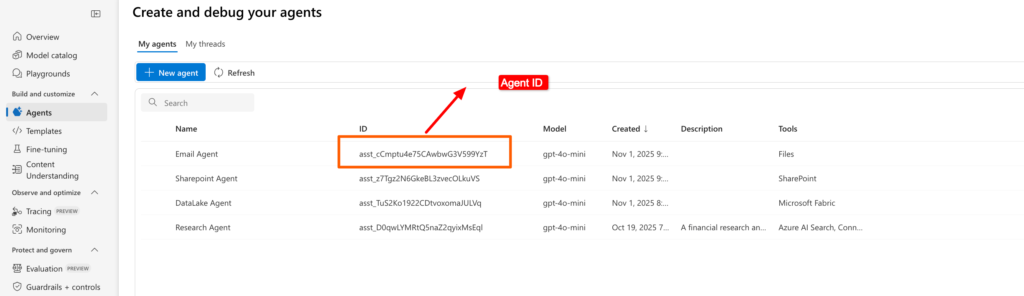
Suppose you have created several agents in Azure AI Foundry, and there is a need to invoke these agents through APIs. Each agent has its own unique Agent ID, which can be used to identify and trigger the required agent programmatically.
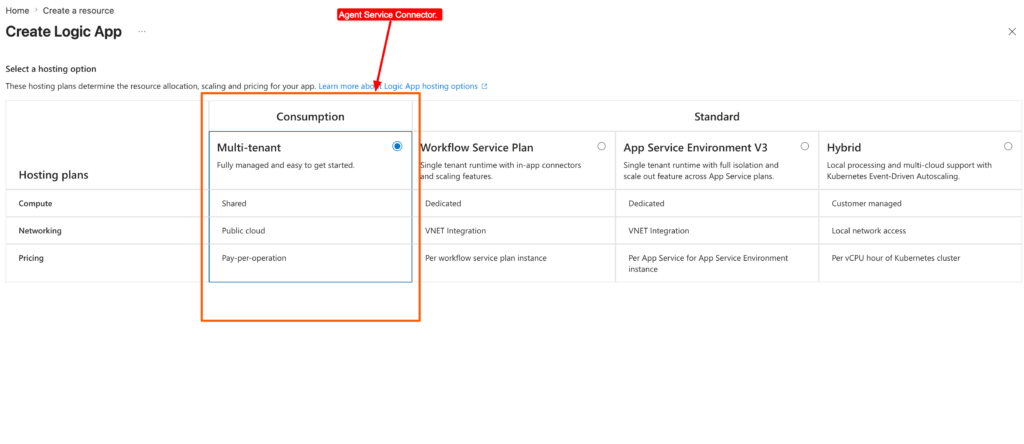
Step 1: Let’s create a logic app connector using Consumption – multi-tenant type and Provide all required information.
Step 2: Now let’s assign the required RBAC permissions. First, make sure the system-assigned identity is enabled. Go to the Identity section and turn it on before proceeding and copy the Object (principal) ID.
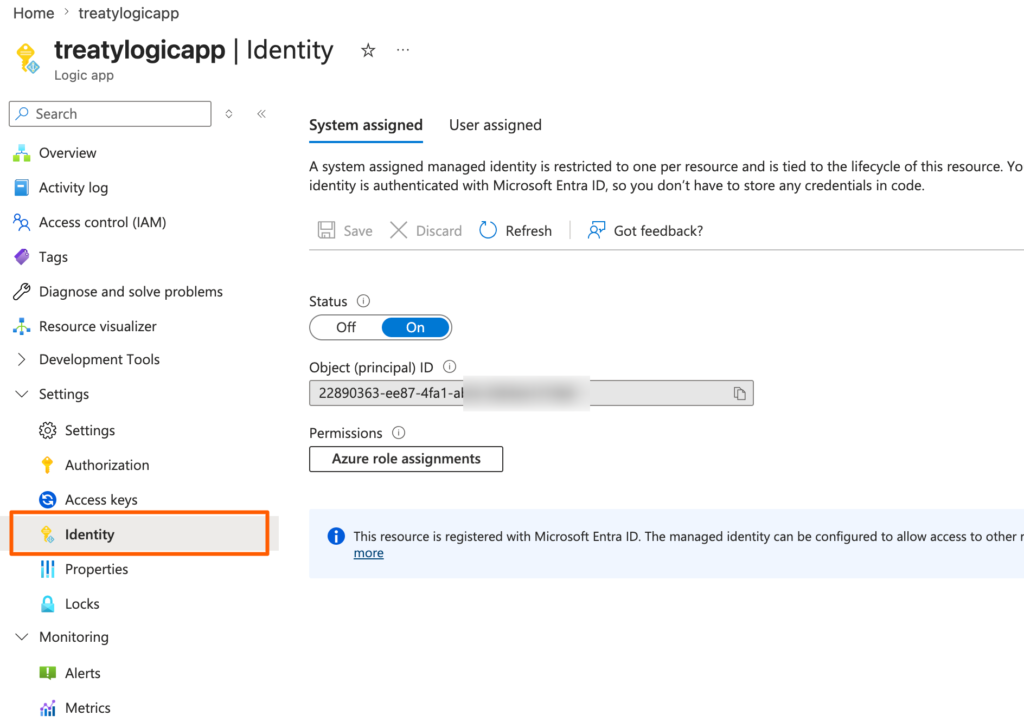
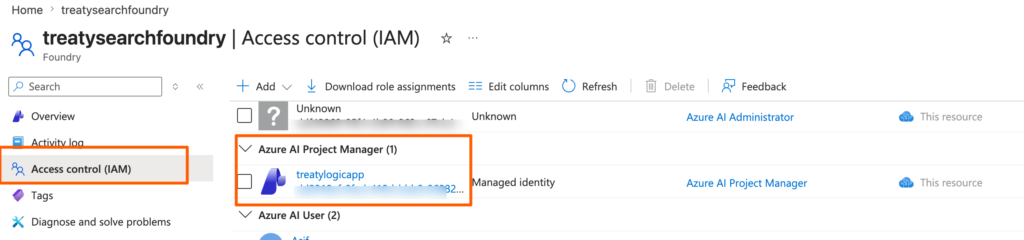
Now, assign this Object ID to the Azure AI Foundry project that contains the agent you want to use. This step is required to establish the connection between the Logic App and Azure AI Foundry. The connection will work only when this Object ID is granted access to the Azure AI Foundry project with the Azure AI Project Manager role.
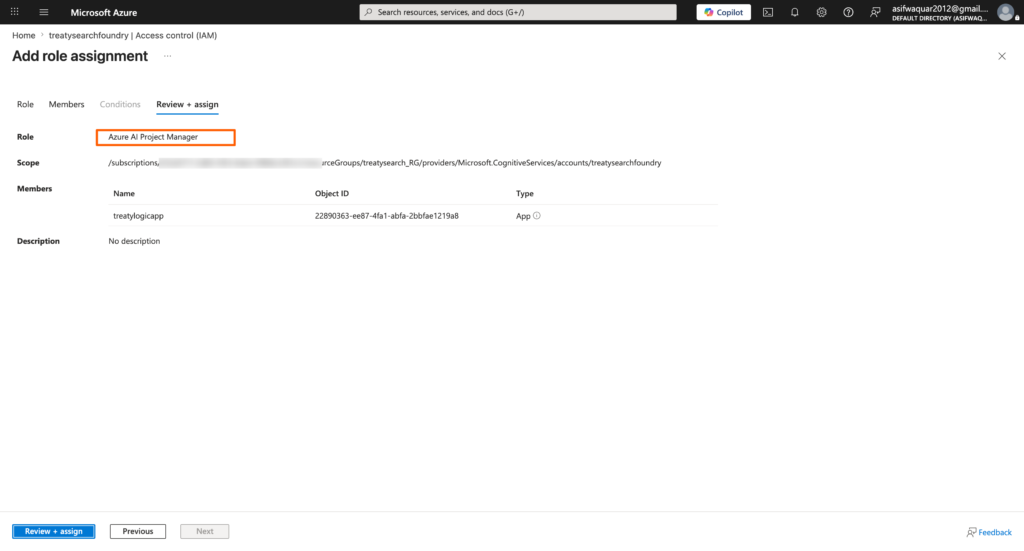
Assign the Azure AI Project Manager role to the AI Foundry project for the Logic App’s Object ID.
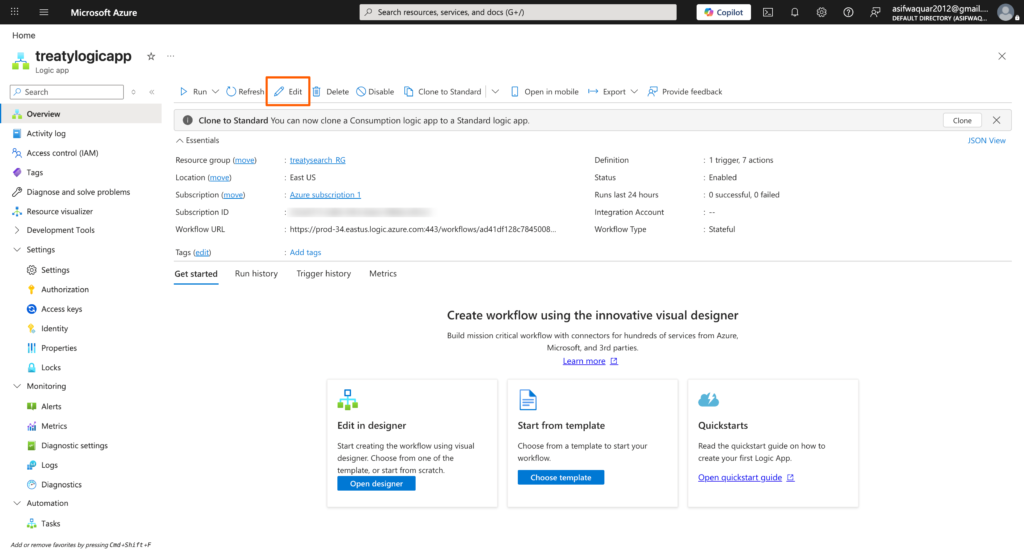
Step 3: Once the logic app is created and permission assigned. Go to edit option.
Step 4: Now create the http action to get the end point.
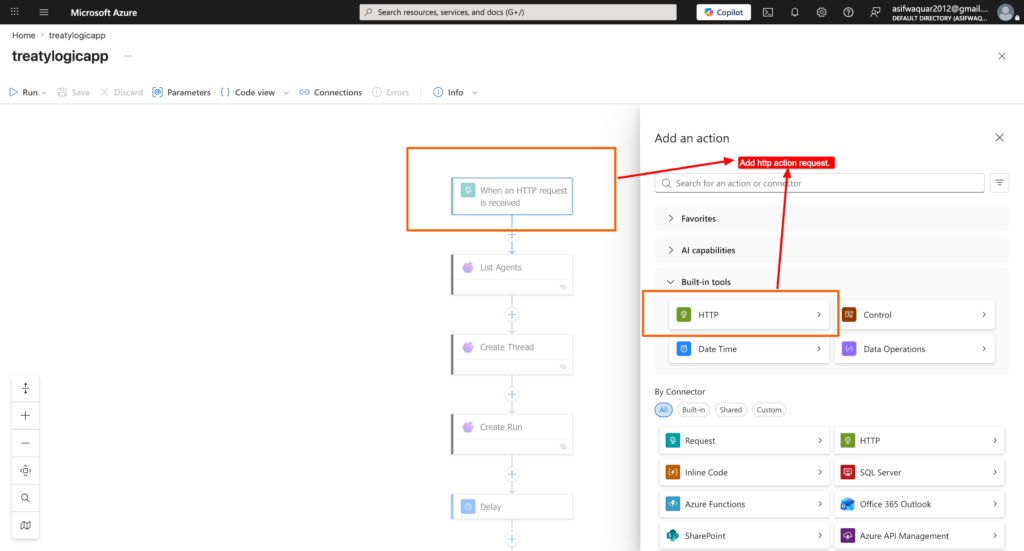
Step 5: Add Foundry Agent Service connectors to list all the agents.
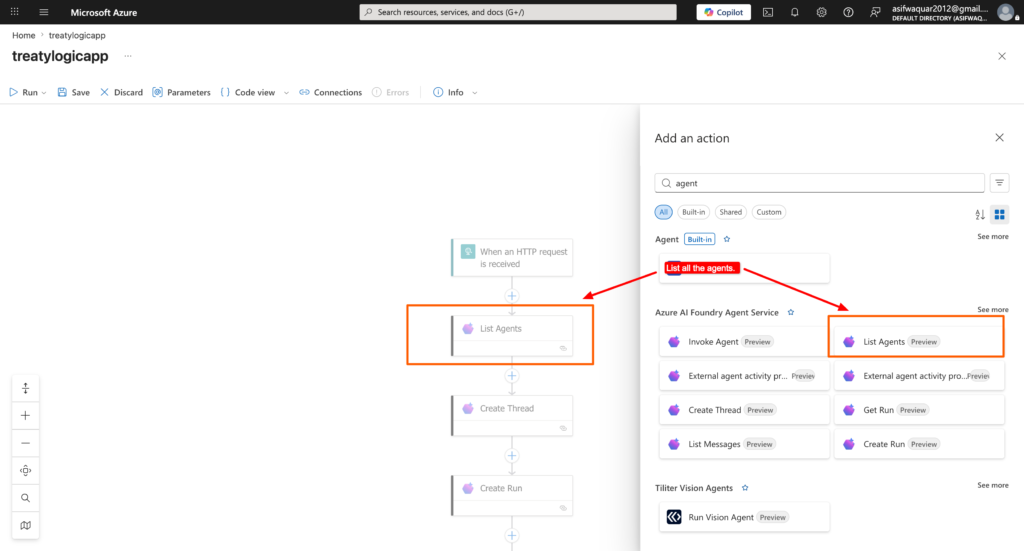
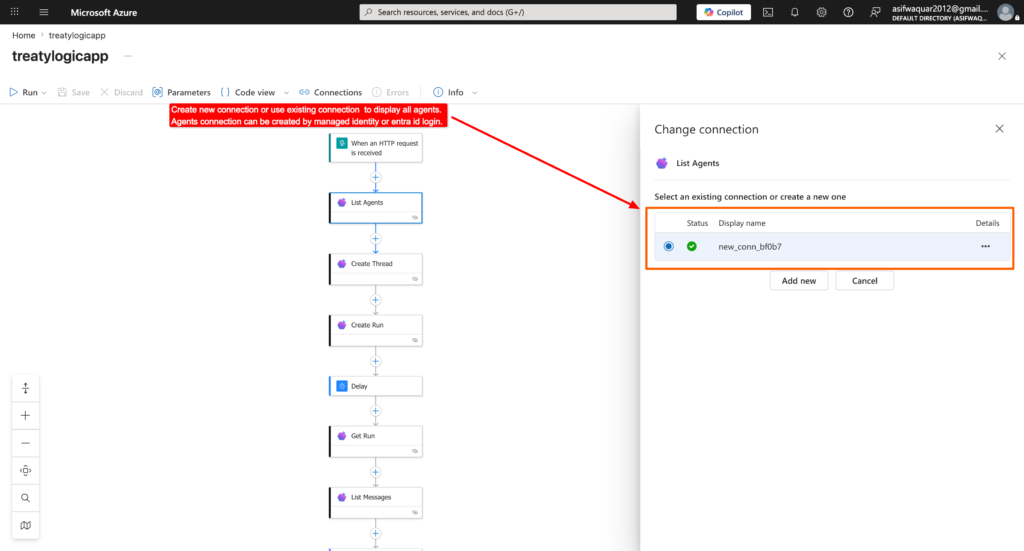
Add connection: You can managed identity and entra id to established the connection.
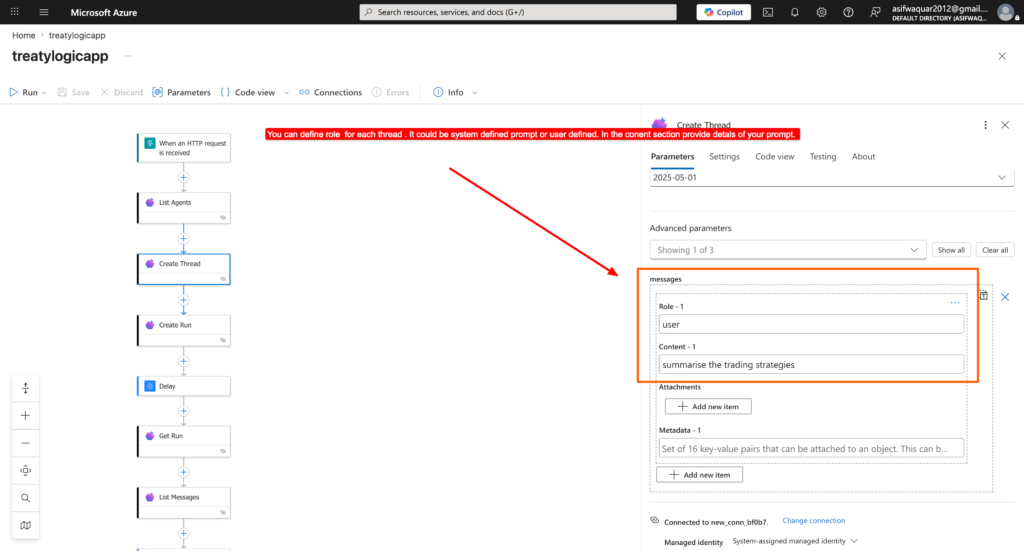
Step 6 : If you want to create a new thread for each new event of your trigger. For each thread you can choose the user (system, user) and provide the detailed prompt or instructions.
It acts as the workspace where the AI interaction will happen. It generates a unique thread_id and stores future messages and responses inside that thread. Without a thread, the assistant has nowhere to maintain context. eg. A new support email arrives. You create a thread so the AI can process only that email.
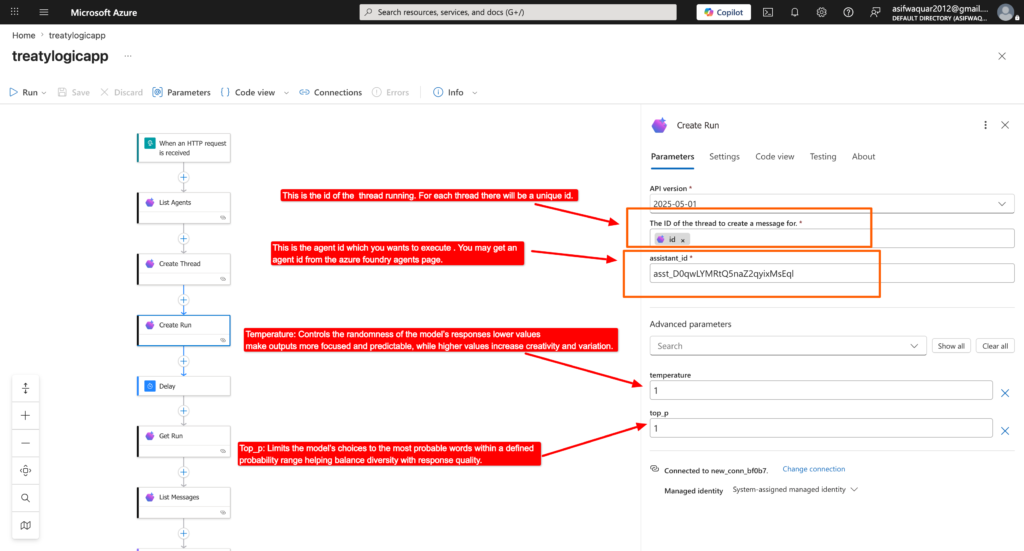
Step 7 : For each conversation thread, when you create run. This tells the assistant to execute against the thread using Agent ID and thread id.
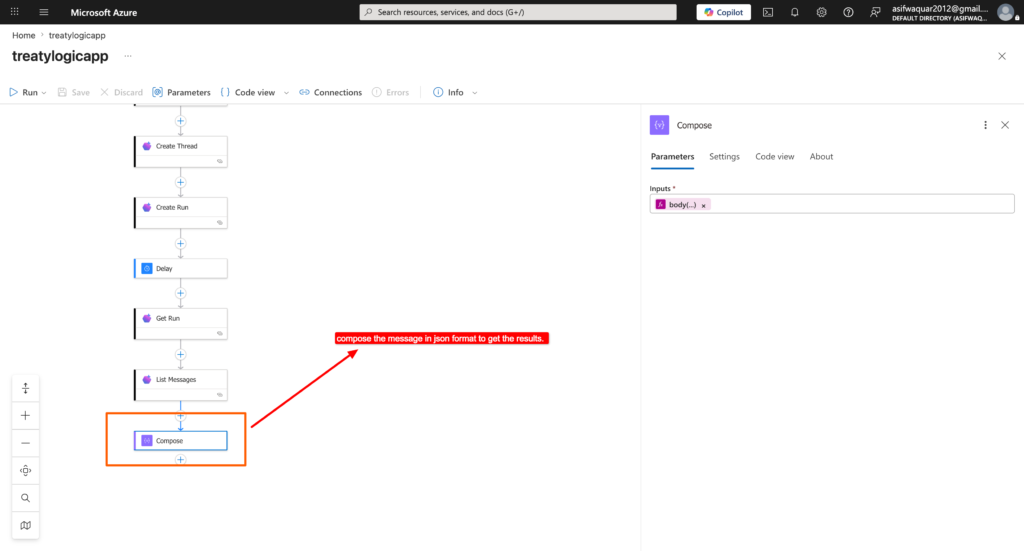
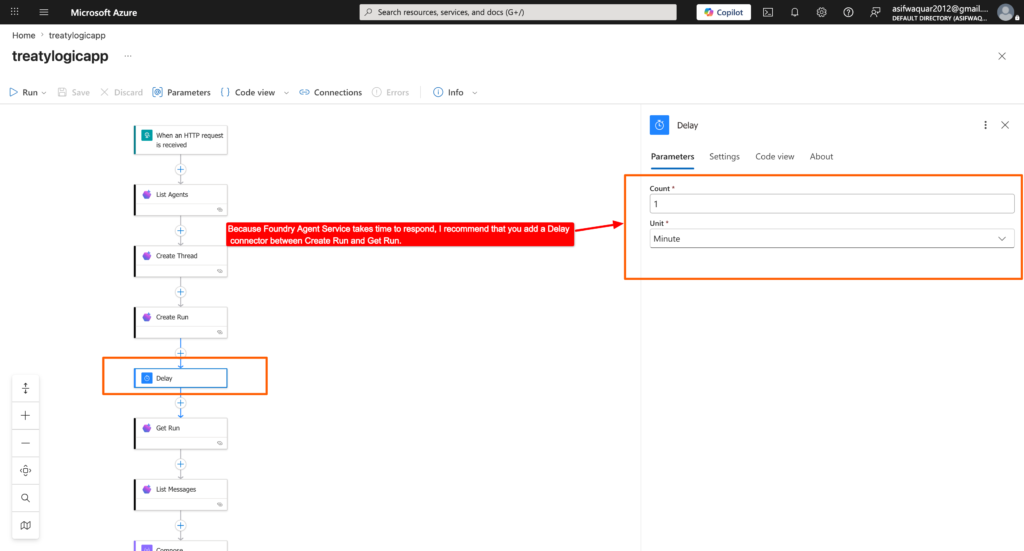
Step 8: Foundry Agent Service takes time to respond, that’s why add a Delay connector between Create Run and Get Run
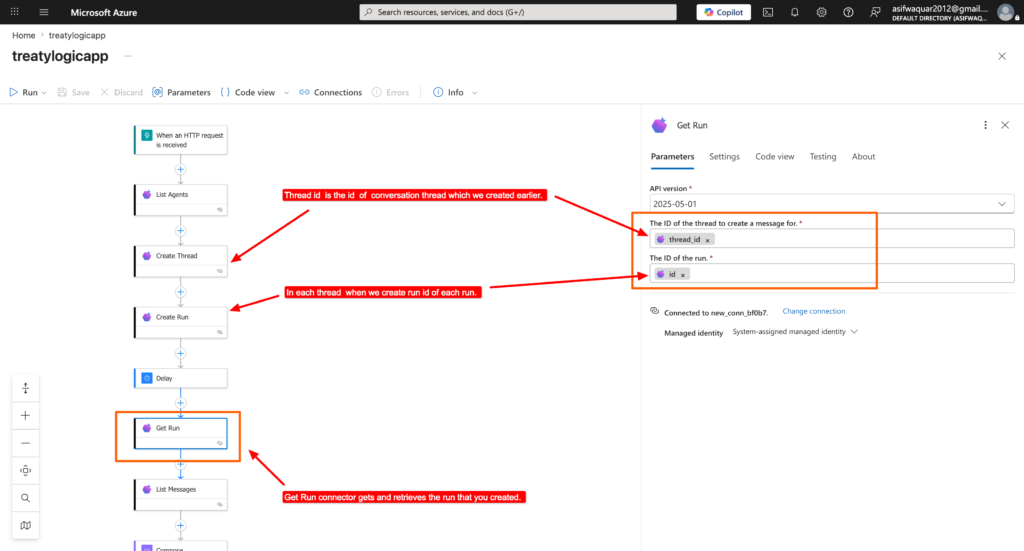
Step 9: Checks the status of the run using Get Run with help of thread_id and run id.
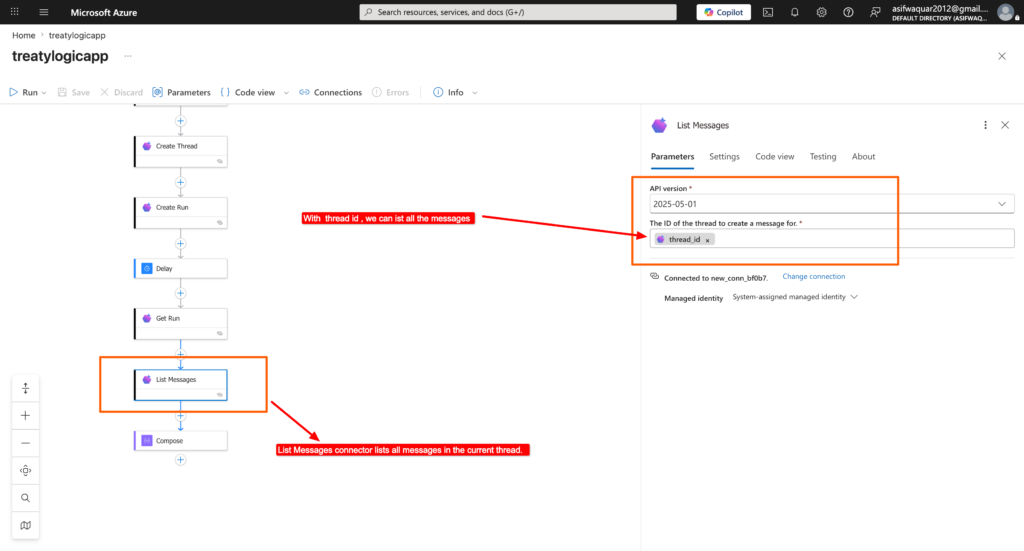
Step 10: Fetches the conversation messages from the thread using thread_id .
Example : Imagine ordering food online:
- Create Thread = open a new order ticket
- Create Run = send order to kitchen
- Get Run = check if cooking is done
- List Messages = receive the prepared meal
Step 11: Compose the message in json format to return.