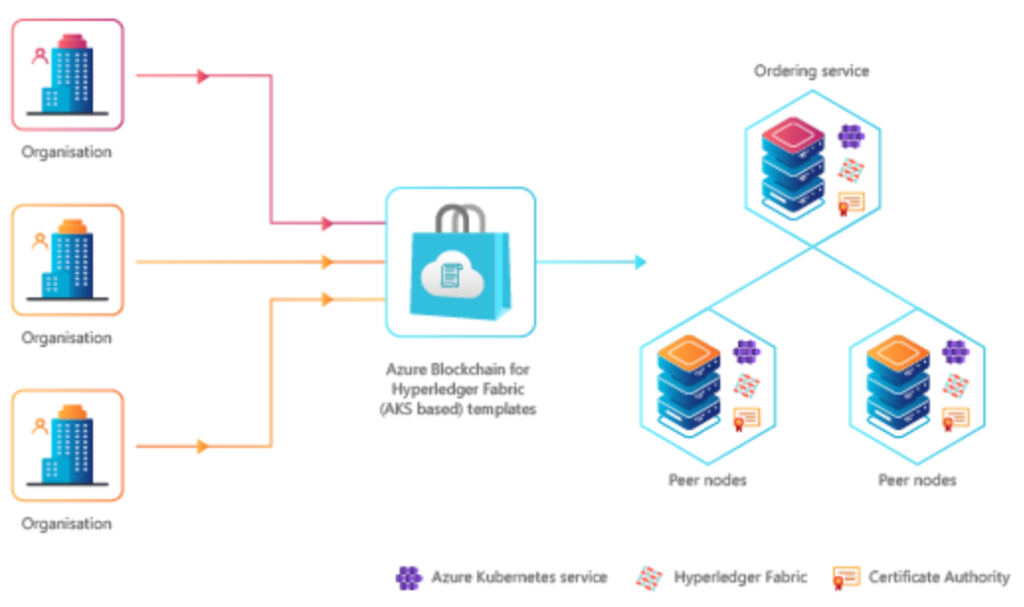
In this blog ,we are going to discuss details about Azure Kubernetes Service (AKS) template to create your first Hyperledger Fabric (HLF) consortium network on Microsoft Azure. It will be continuation of my first two blogs (Part-1 & Part -2) of this series . Azure Kubernetes Service (AKS) template allows you to deploy the HLF blockchain network .
Prerequisite :-
1- Azure Subscription ,If you do not have an Azure subscription, you can get a free Microsoft Azure account here .
2- The version supported by this template is Hyperledger Fabric 1.4.4 .
Let’s configure our Hyperledger Fabric Blockchain network by following steps.
- Deploy the orderer/peer organization
- Build the consortium
- Run native HLF operations

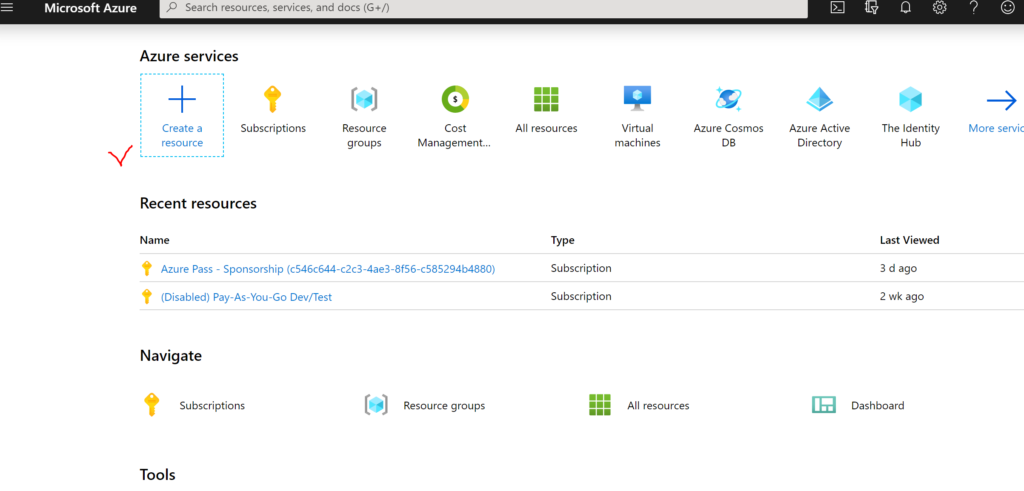
Step- 1 – Login to Azure portal . Choose create resource option.

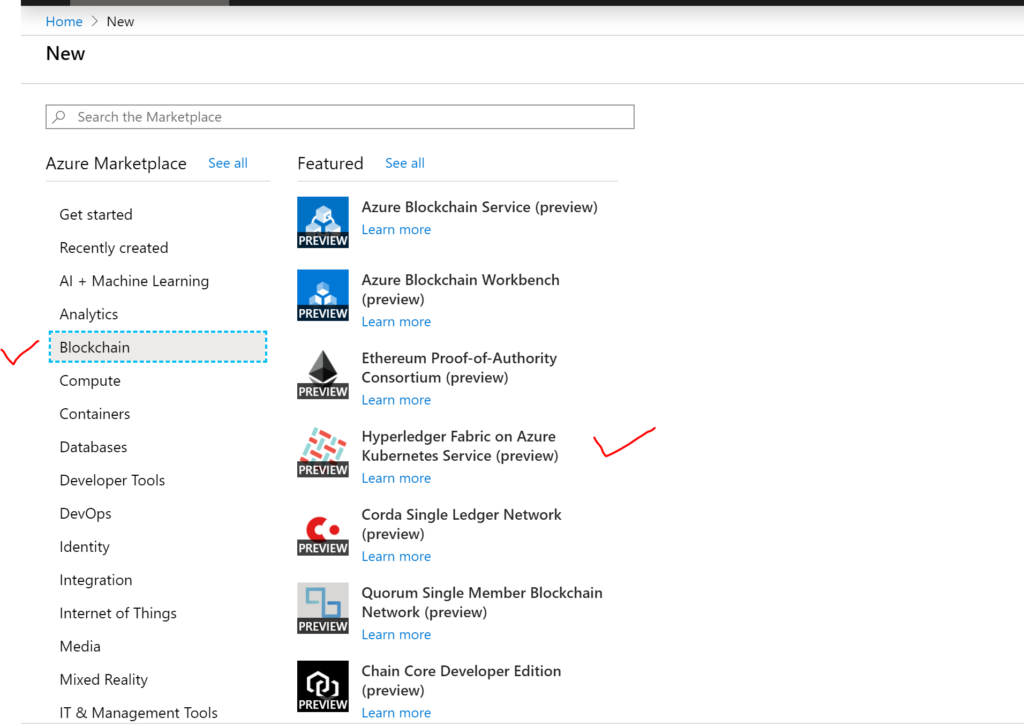
Step-2 – Choose Blockchain category and our target template — Hyperledger Fabric on Azure Kubernetes Service — will be shown. It’s available in preview mode (Azure customers for evaluation purposes).

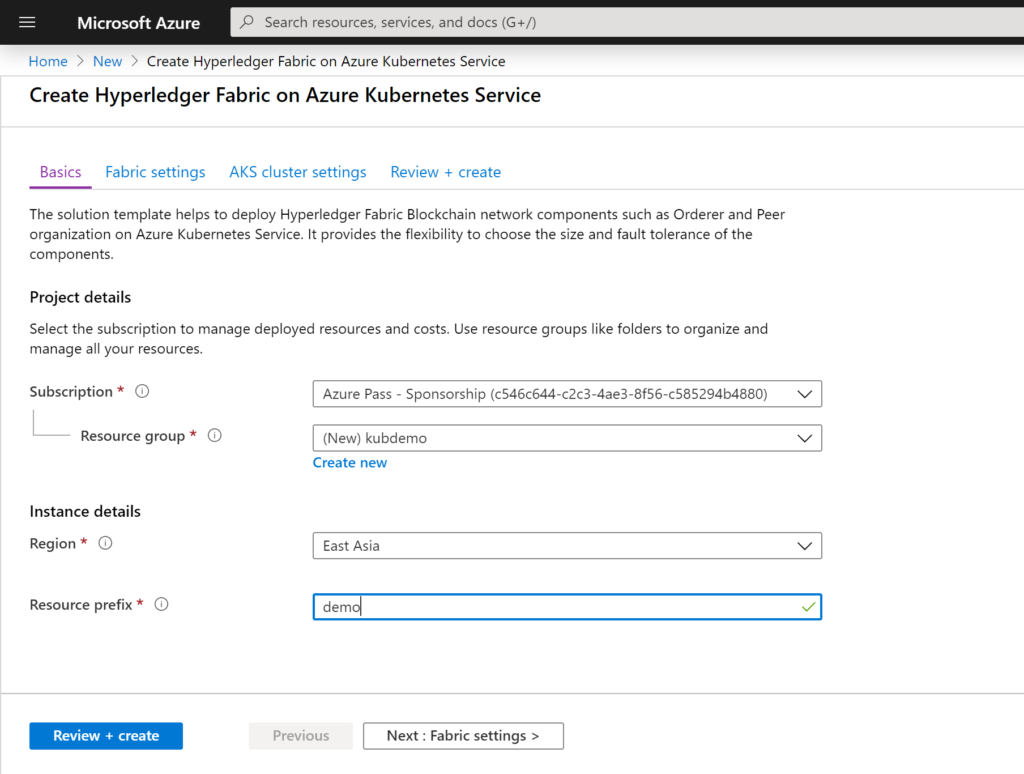
Step-3 -The template deployment screen will be shown.Provide the required information as below:

- Subscription: Select the subscription you want to use in order to deploy the HLF network;
- Resource group: You can create a new resource group or choose an existing one. As you may know, a resource group will group all your resources that will be deployed as part of this template;
- Region: Select the Azure region where you want to deploy the Azure Kubernetes cluster for your HLF network;
- Resource Prefix: Prefix for the naming of resources that will be deployed.
Step-4 Choose Next: Fabric Settings button below screen will be shown.
- Organization Name: The name of the Fabric network founder organization.
- Fabric network component: You can choose either Ordering Service or Peer Nodes depending on the Blockchain network node you want to deploy. We’re going to start with Ordering Service but later we’ll deploy a Peer Node as well. The next option explains the differences between them and the related options for each;
- Number of nodes: Ordering service allows 3,5 or 7 at most. For Peer Nodes you can define from 1 up to 10 nodes at most;
- Fabric username: Enter the username that will be used for the Fabric CA authentication;
- Fabric CA password: Enter the password for the Fabric CA authentication;
- Confirm password: Confirm the Fabric CA password;
- Certificates: You can use your own self-signed root certificates to configure the Fabric CA. If so, the couple of options below are shown. Otherwise, keep the default Fabric CA option;
- Root Certificate: Select the file with the root certificate (.pem files);
- Root Certificate private key: Select the file with the private key of the root certificate (.pem file).

Step-5 – Select AKS cluster settings .

- Kubernetes cluster name: The name of the AKS cluster that is created. This field is prepopulated based on the resource prefix provided, you can change if necessary.
- Kubernetes version: The version of the Kubernetes that will be deployed on the cluster. Based on the region selected in the Basics tab, the supported versions available may change.
- DNS prefix: Domain Name System (DNS) name prefix for AKS cluster. You’ll use DNS to connect to the Kubernetes API when managing containers after creating the cluster.
- Node size: The size of the Kubernetes node, you can choose from the list of VM Stock keeping unit (SKUs) available on Azure. For optimal performance, we recommend Standard DS3 v2.
- Node count: The count of the number of Kubernetes nodes to be deployed in the cluster. We recommend keeping this node count at least equal or more than the number of HLF nodes specified in the Fabric settings.
- Service principal client ID: Enter the client ID of an existing service principal or create a new, which is required for the AKS authentication. See, steps to create service principles.
- Service principal client secret: Enter the client secret of the service principal provided in the service principal client ID.
- Confirm client secret: Confirm the client secret provided in the service principal client secret.
- Enable container monitoring: Choose to enable AKS monitoring, which enables the AKS logs to push to the Log Analytics workspace specified.
- Log Analytics workspace: Log analytics workspace will be populated with the default workspace that is created if monitoring is enabled.
After providing all the above details, select the Review + create tab.
The review and create triggers the validation for the values you provide
If your arguments are correct, HLF will be setup for ordering service .
Step- 6 Now we have to deploy a Peer node. The steps are similar to the ones above, except for the Fabric Network Component option on the Fabric settings tab, where now we have to select the Peer Nodes option instead of Ordering service.
Note that we have a few different options that have to be informed now as shown below:

Click Review + create again, provided that it’s also OK, click Create.

My programmer is trying to persuade me to move to .net from PHP.
I have always disliked the idea because of the costs.
But he’s tryiong none the less. I’ve been using Movable-type on various websites
for about a year and am anxious about switching to another platform.
I have heard good things about blogengine.net. Is there a
way I can transfer all my wordpress posts into it?
Any help would be really appreciated!
Hi ,
I haven’t tried to blogengine.net but you may try some wordpress migration plugin which exports your blog data into xml
and import into blogengine .
If you need further assistance please check https://blogengine.io/support/.
thank you
Howdy! This is my first comment here so I just wanted to give a quick shout out and say I truly enjoy reading your blog posts.
Can you suggest any other blogs/websites/forums
that deal with the same subjects? Thanks a ton!
Hi ,
You may try some courses on edx ,pluralsight as given below .
https://github.com/asifwaquar/blockchain-resources
https://www.edx.org/course/blockchain-understanding-its-uses-and-implications
https://www.edx.org/course/introduction-to-hyperledger-blockchain-technologie
https://www.pluralsight.com/courses/ethereum-blockchain-developing-applications
thank you
I needed to thank you for this good read!! I absolutely enjoyed every bit
of it. I’ve got you book marked to check out new stuff you post…
thank you very much for your feedback.
I think what you posted made a ton of sense. However, what about this?
suppose you wrote a catchier title? I am not suggesting your information isn’t good., but what if you added a post title that makes people
desire more? I mean Create Hyperledger Fabric consortium
using Azure Kubernetes Service (AKS) Template -Part-3 – BLOG is
kinda boring. You might glance at Yahoo’s home page and see how they create post titles to grab people to open the links.
You might try adding a video or a picture or two to get people
excited about everything’ve got to say. Just my opinion, it would make your posts a little livelier.
thank you very much for valuable feedback . we will try to add video recordings soon and improve naming of title.
Greetings! Very useful advice within this post! It’s the little changes that will
make the most important changes. Thanks for sharing!
thank you very much for your feedback , we will try to improve .