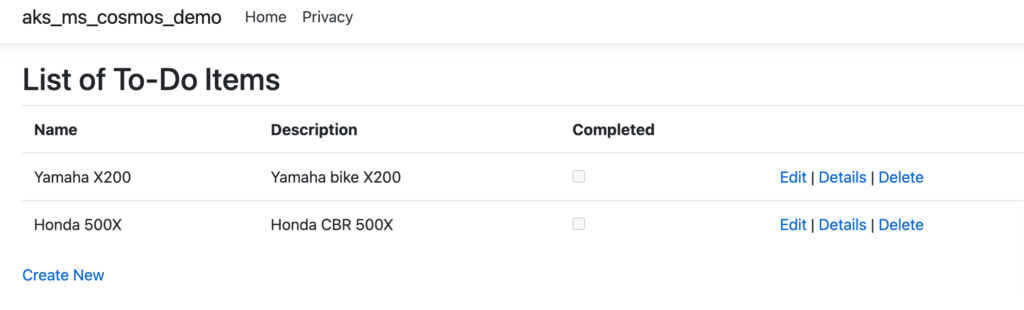
In our previous blog, we discussed several methods for securing our connection strings. In the demo section, we demonstrated how to secure a connection string using Azure Key Vault and App Registration on a local machine.
In today’s blog, we will delve deeper into the topic by explaining how to create an Azure DevOps Classic Editor pipeline and secure its connection using a variable group in DevOps. Additionally, we will discuss how to connect to Azure Key Vault for enhanced security.
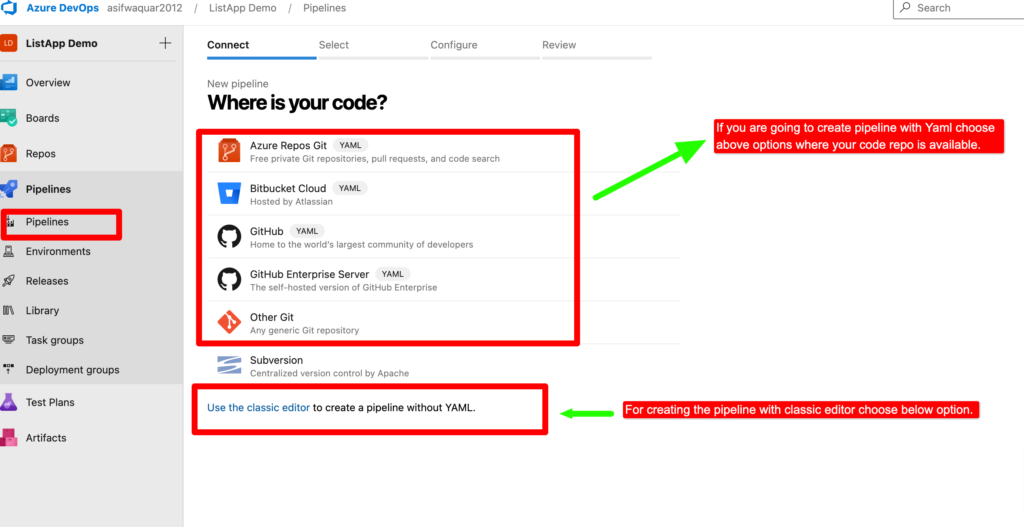
Step 1– To get started, let’s create an Azure DevOps project with the name “Name of your project”. Once the project is created, we can create a new pipeline by selecting the pipeline option.
We have two options for creating a pipeline: classic editor pipeline and pipeline through YAML. The classic editor pipeline is the traditional way of creating a pipeline, while pipeline through YAML is the latest method. You can choose the option that best suits your needs. I am going to show using classic editor pipeline however you can create same pipeline using yaml. Steps will be same.
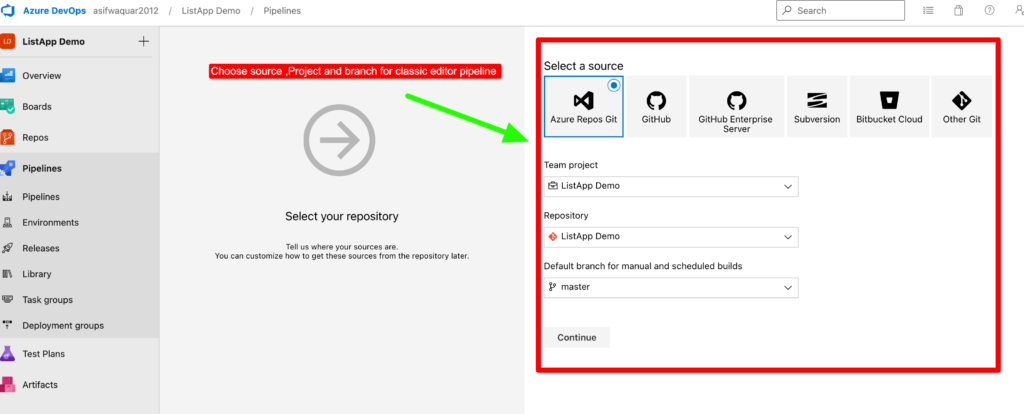
Step 2– Choose source repository ,project and branch of the project.
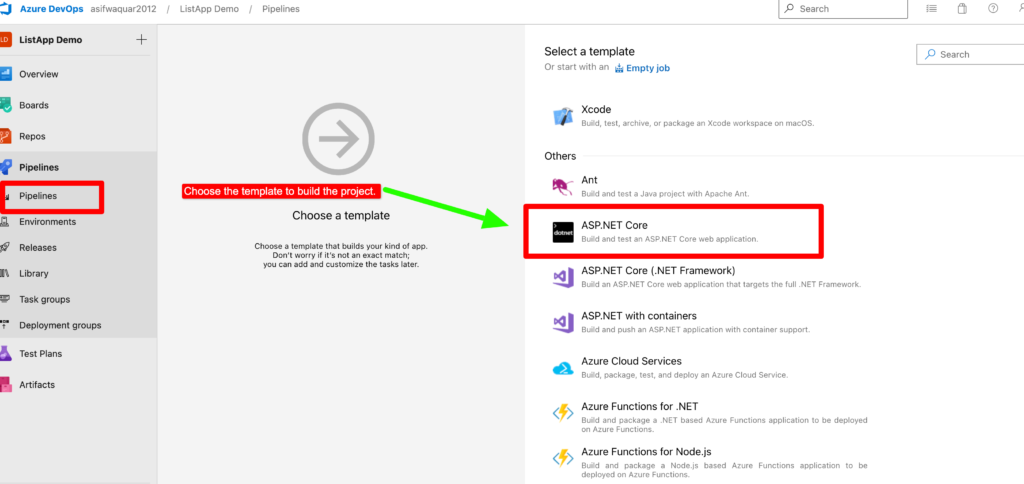
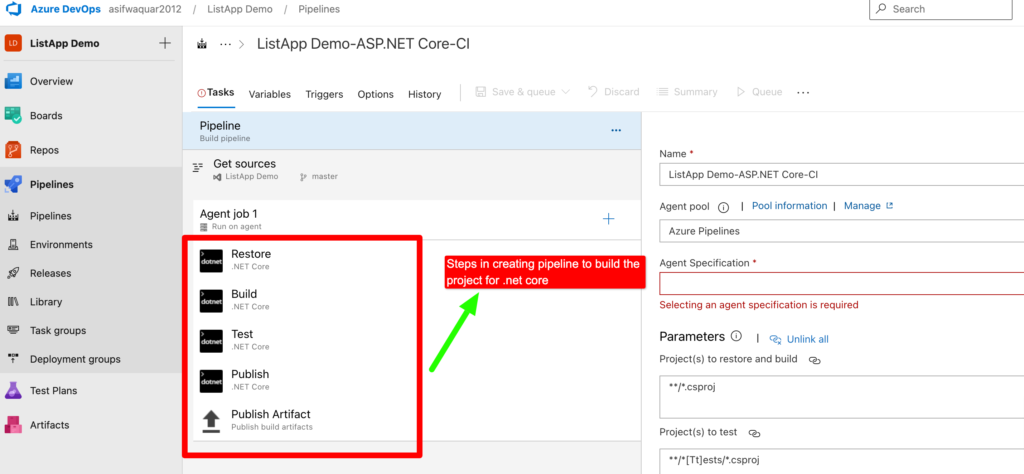
Step 3– When creating a new pipeline, you will be presented with several predefined templates to choose from, depending on the type of project you are working on. For instance, if you are working on an ASP.NET Core project, you can select the ASP.NET Core template.
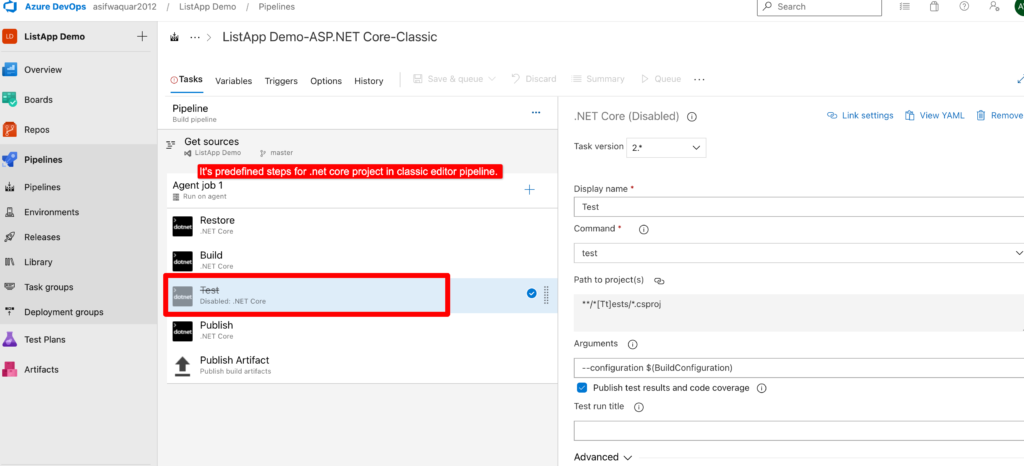
Step 4– Below are the given steps to build .net core project. I am going to disable test because for this project I don’t have any test
Step 5– We are not going to use test. So let’s disable it.
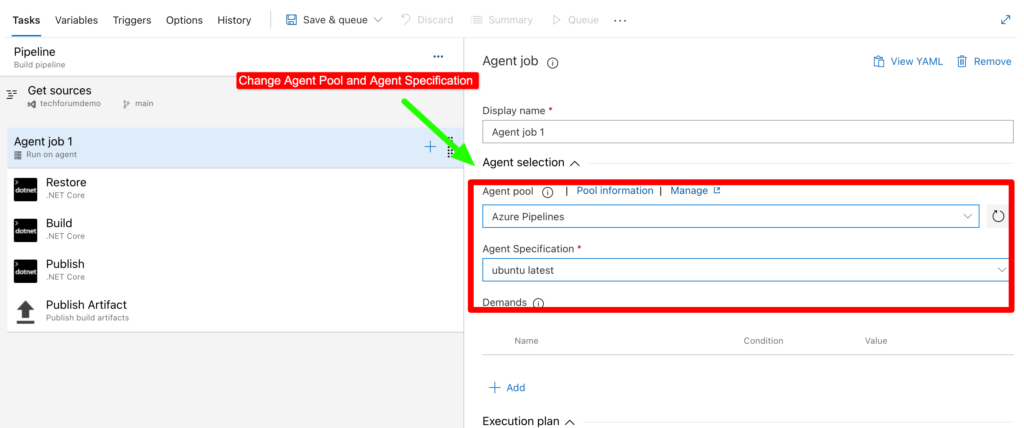
First Let’s Check for agent job section and modify agent section and agent specification.
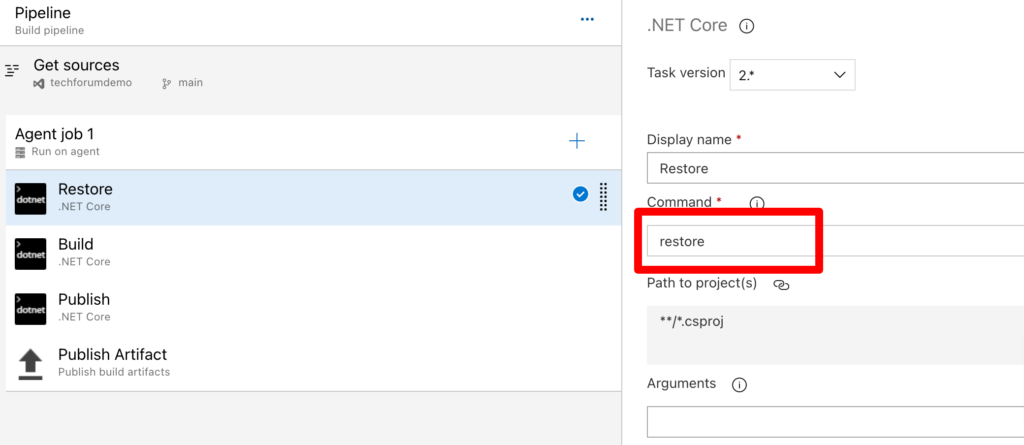
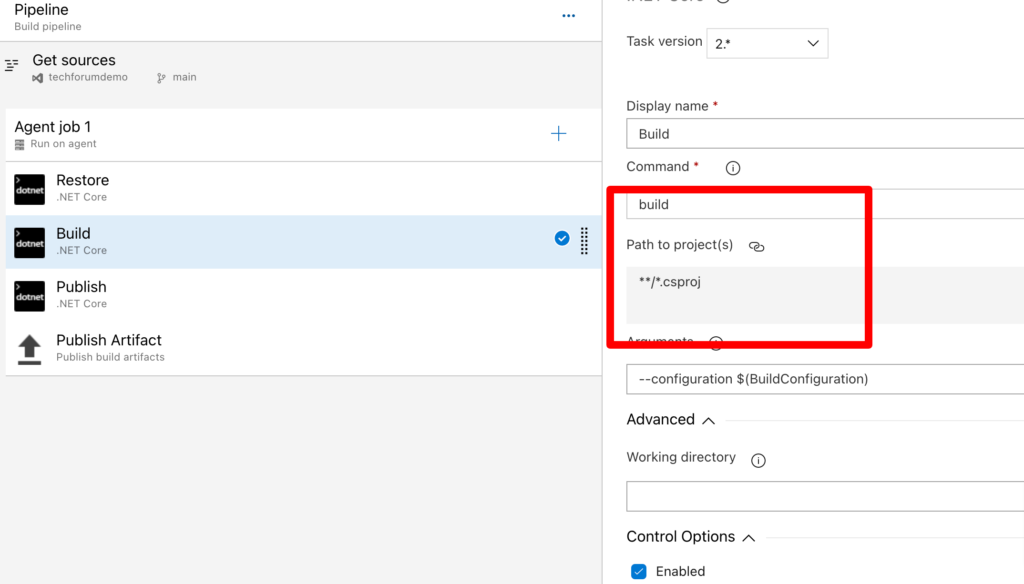
Now let’s check tasks in agent job.In the first restore task we don’t need to modify anything thing.
Now let’s check build section. In this section also we don’t need to modify any section.
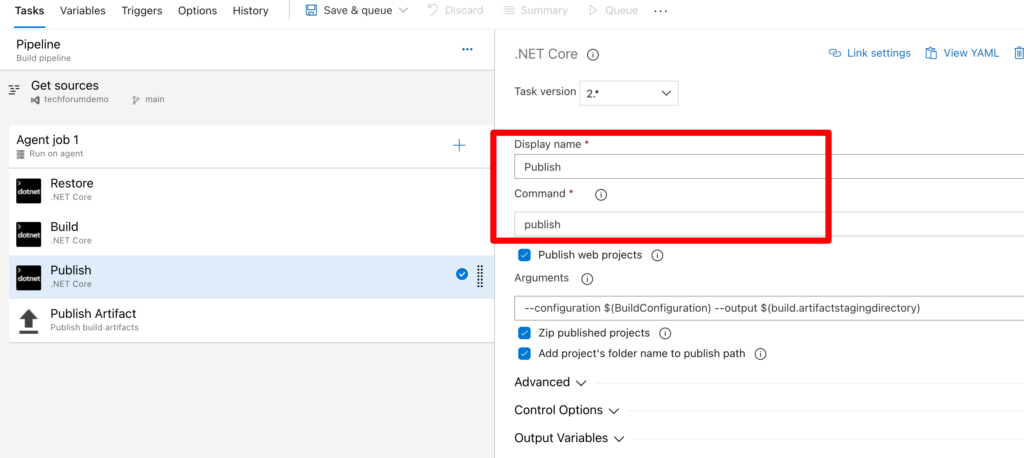
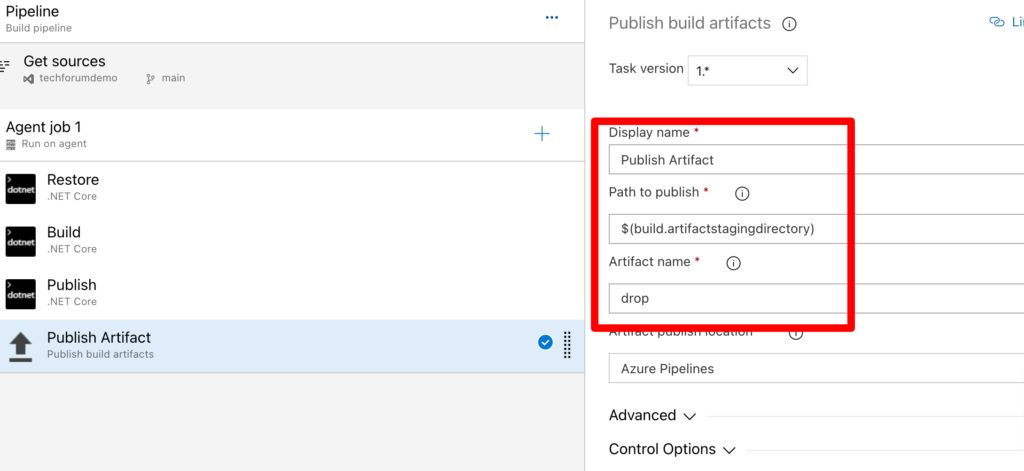
Same apply to publish and publish artifacts tasks . No change required.
Save the Pipeline.
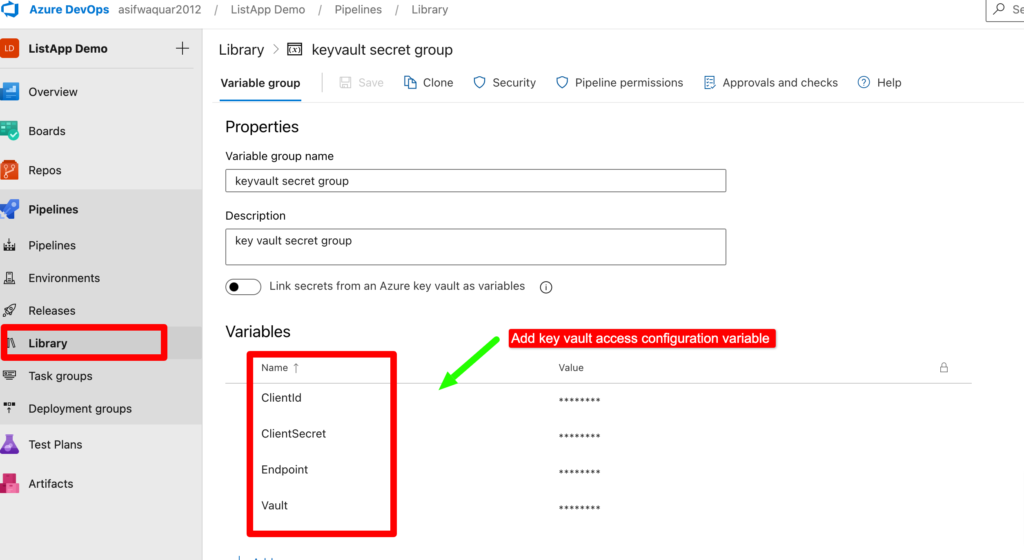
Step 5– Now to access the key vault with an app registered, we need to create a variable group in Azure DevOps to store the registered app’s client ID, client secret, Azure Key Vault name, and endpoint.
Creating a variable group allows us to securely store and manage sensitive information separately from the pipeline code. This ensures that our connection strings and other secrets are kept confidential and not exposed in the pipeline logs.
Once the variable group is created, we can reference the values in our pipeline code by calling the variable name, rather than hardcoding the values in the pipeline definition. This helps to maintain flexibility and reusability of our pipeline code.
Overall, creating a variable group in Azure DevOps is an essential step towards ensuring the security of our pipeline and application.
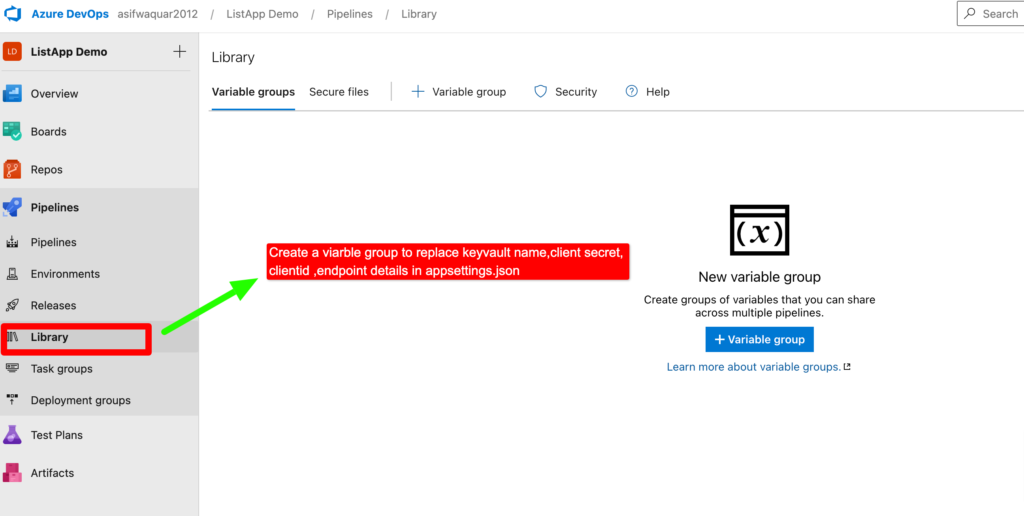
Step 6– To access the Key Vault with a registered app, we need to add the app’s client ID, client secret, Key Vault name, and endpoint to the variable group.
This can be done by navigating to the project settings in Azure DevOps, selecting the “Library” option, and then selecting “Variable groups”. From there, you can create a new variable group and add the required variables.
Once the variables are added to the variable group, they can be referenced in the pipeline code using the variable names. This allows us to easily manage and update the values without having to modify the pipeline code itself.
By securely storing these values in the variable group, we can ensure that our pipeline and application are protected from potential security threats.
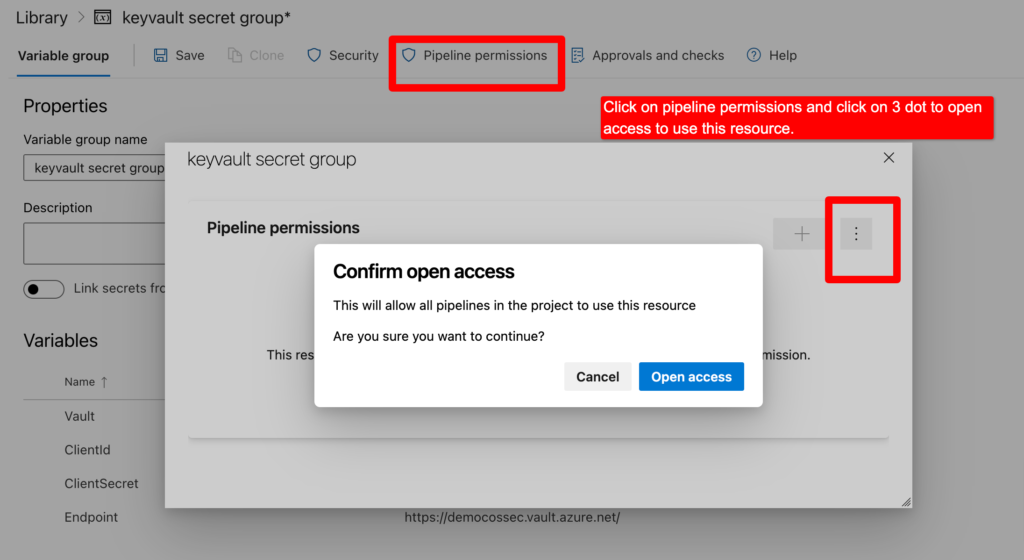
Step 7 – Provide permission to access the pipeline. By click on pipeline permission then click on three dots and allow open access to all pipelines. You can also choose for selected project using + button and add project.
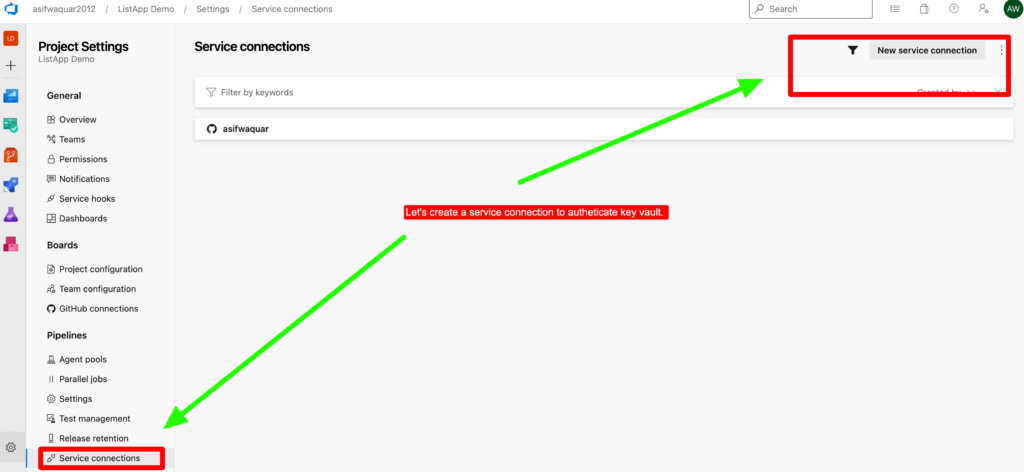
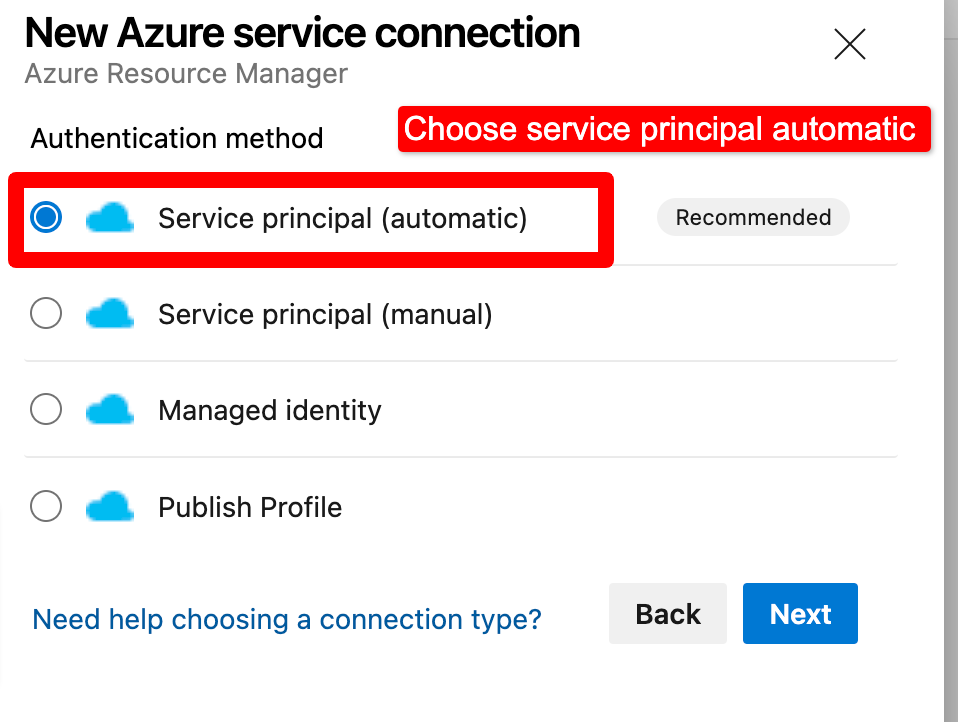
Step 9– To securely connect to Azure Key Vault without exposing the subscription key, we need to create a service connection in Azure DevOps.
A service connection is a secure way to connect to an external service or resource, such as Azure Key Vault, without exposing any sensitive information, such as access keys or secrets.
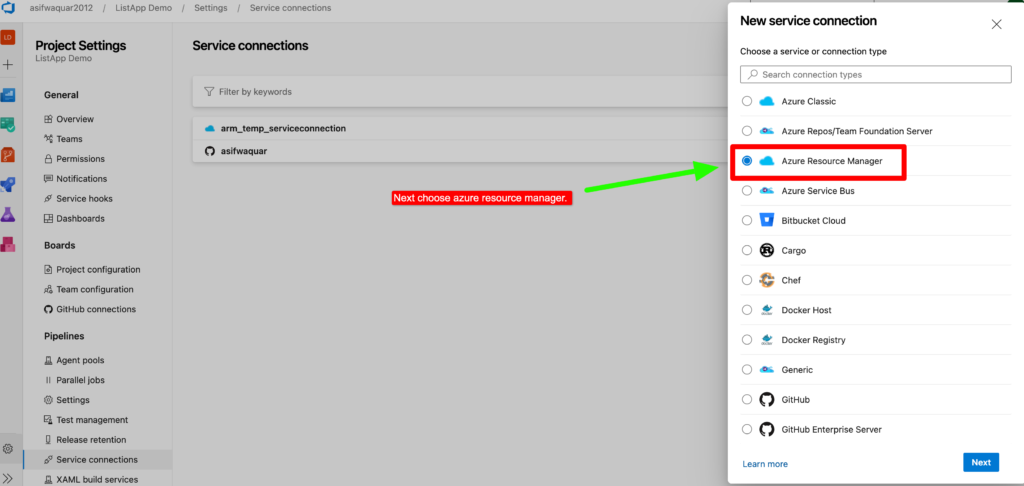
To create a service connection, we need to navigate to the project settings in Azure DevOps, select the “Service connections” option, and then select “New service connection”.From there, we can select the appropriate service type, which in this case is “Azure Resource Manager“, and follow the prompts to authenticate and connect to the Azure Key Vault.
Once the service connection is created, we can reference it in our pipeline code to securely access the Key Vault without exposing any sensitive information.
Overall, creating a service connection is a crucial step in ensuring the security and integrity of our pipeline and application.
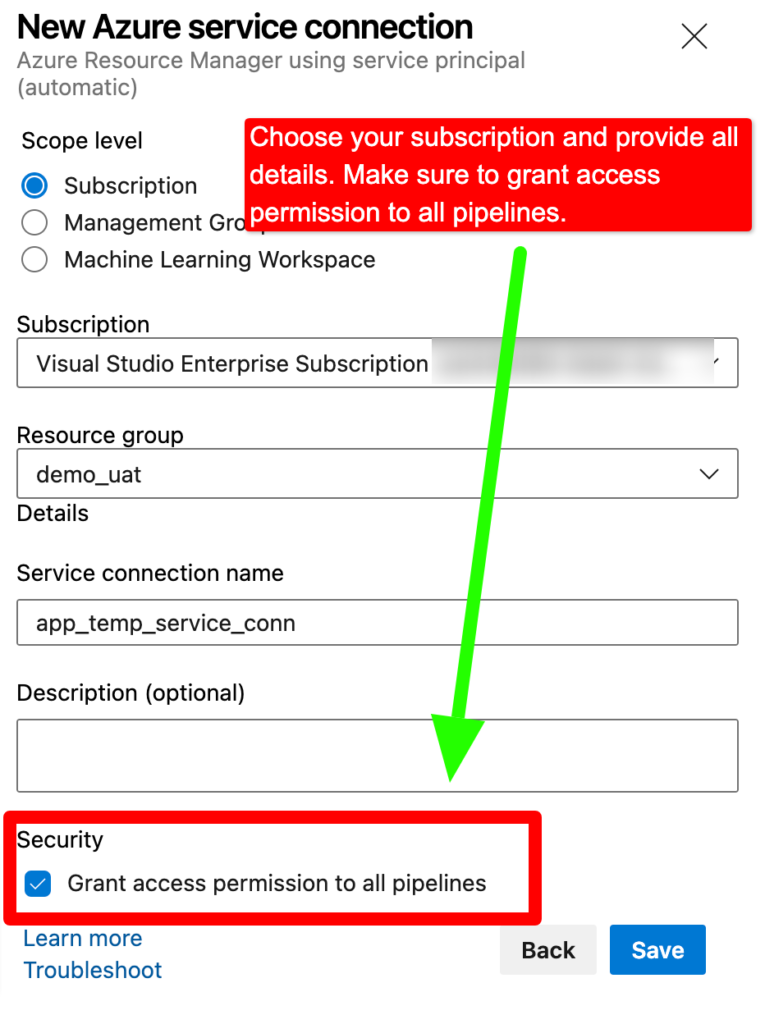
Note– Make sure to grant access permission to all pipelines for service connection.
Step 7 – Let’s go back to the build pipeline of the ASP.NET Core project. So far, we have created a pipeline that can build and publish the .NET Core project. However, to run the project, it needs the app credentials to connect with Azure Key Vault, which we have saved as variables in the Azure DevOps pipeline variable group.
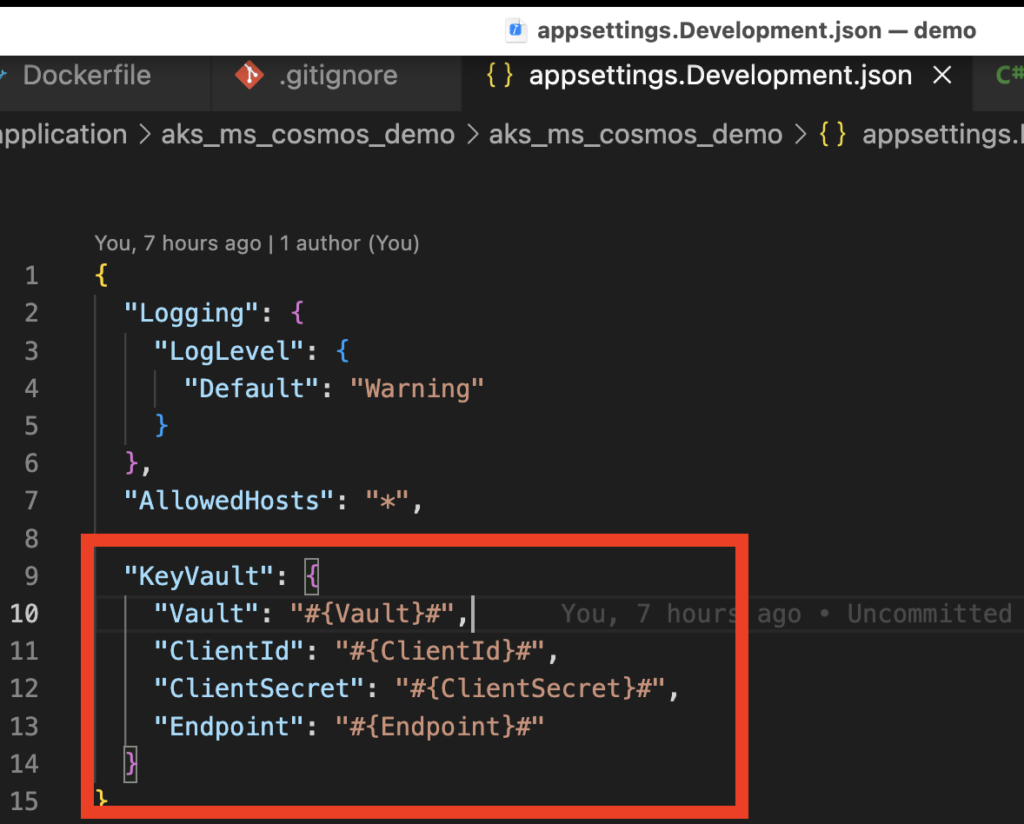
But before that we need to replace appsettings.Development.json to appSettings.json because appsettings.Development.json we have saved KeyVault variable format as given below.
{
  "Logging": {
    "LogLevel": {
      "Default": "Warning"
    }
  },
  "AllowedHosts": "*",

  "KeyVault": {
    "Vault": "#{Vault}#",
    "ClientId": "#{ClientId}#",
    "ClientSecret": "#{ClientSecret}#",
    "Endpoint": "#{Endpoint}#"
  }
}
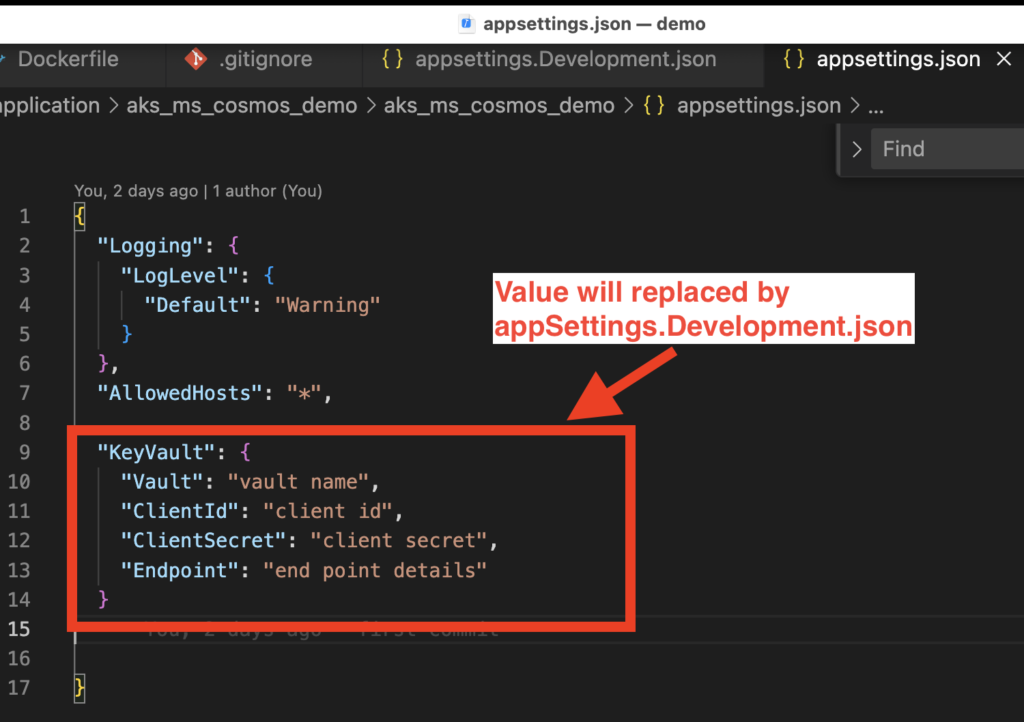
below example of appSettings.json (which will be replaced)
Powershell script to replace appSettingsDevelopment.json to appSettings.json
Copy-Item $(System.DefaultWorkingDirectory)\application\aks_ms_cosmos_demo\aks_ms_cosmos_demo\appsettings.Development.json $(System.DefaultWorkingDirectory)\application\aks_ms_cosmos_demo\aks_ms_cosmos_demo\appsettings.json -Force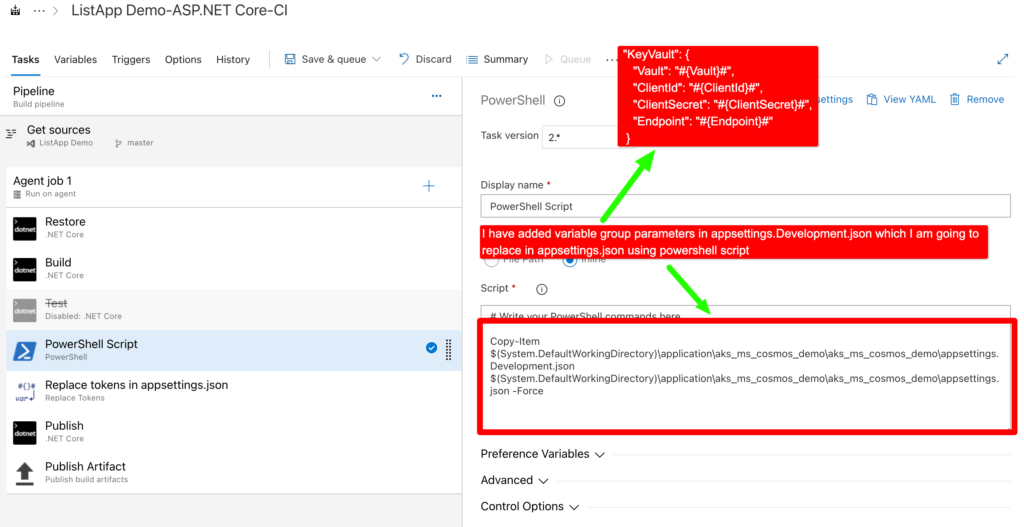
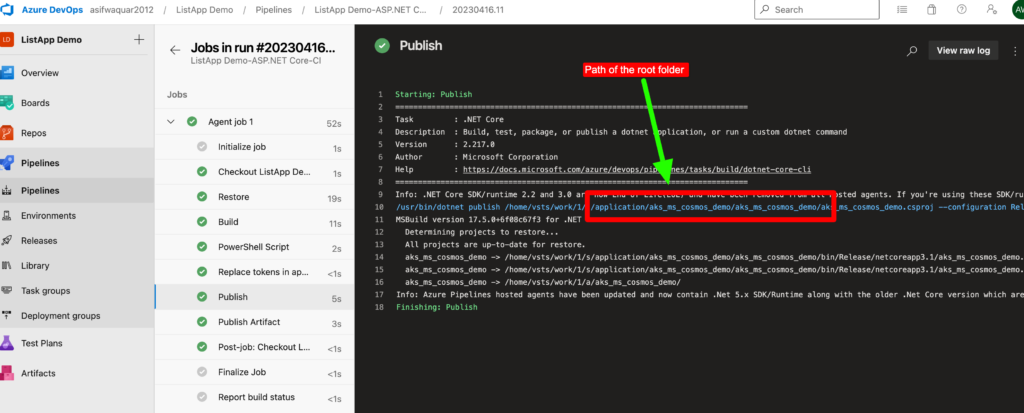
Note – In copy script Path of the root folder can be found if you have build pipeline before or you can go directly to files of your folder and copy from there.
Step 8 – In previous step we have copied appSettingsDevelopment.json to appSettings.json to copy variable names in main appSettings.json.
Now in this step we will retrieve those variables and replace them in the appsettings.json file in the project, we can use the “Replace Tokens” feature in Azure DevOps pipeline. This feature replaces the variable values saved in Azure DevOps pipeline with the appsettings variable name.
Using this feature, we can create a new pipeline task that will retrieve the required variables from the Azure DevOps pipeline variable group and replace them in the appsettings.json file. This will allow our application to securely connect to Azure Key Vault without exposing any sensitive information.
Overall, using the “Replace Tokens” feature in Azure DevOps pipeline is a powerful way to manage sensitive information in our pipeline and ensure the security of our application.

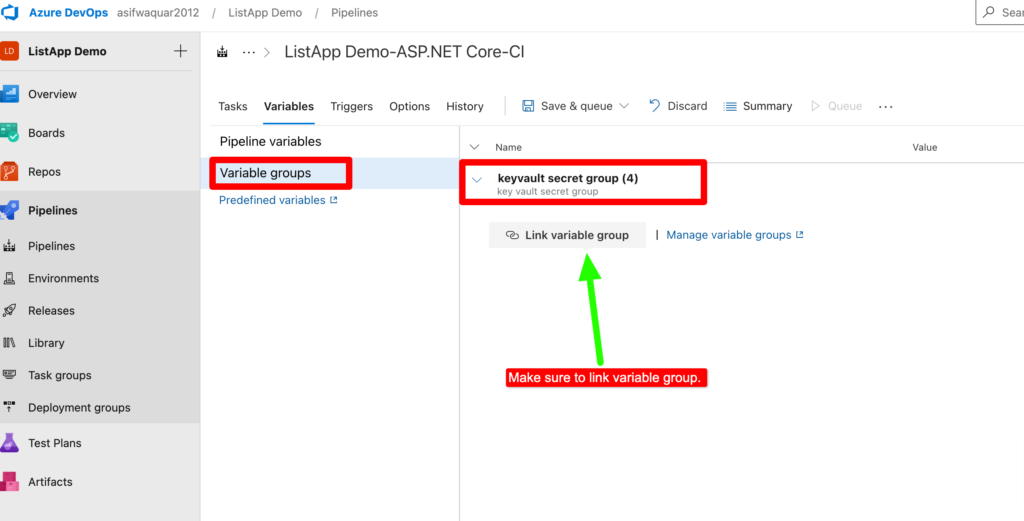
Note- To retrieve the variable token and replace it in the pipeline, the pipeline variables must have access to the variable group where the variables are stored.
Choose Pipeline-> Variables -> Link variable group
Now we are ready to run the pipeline. Save and run the pipeline.
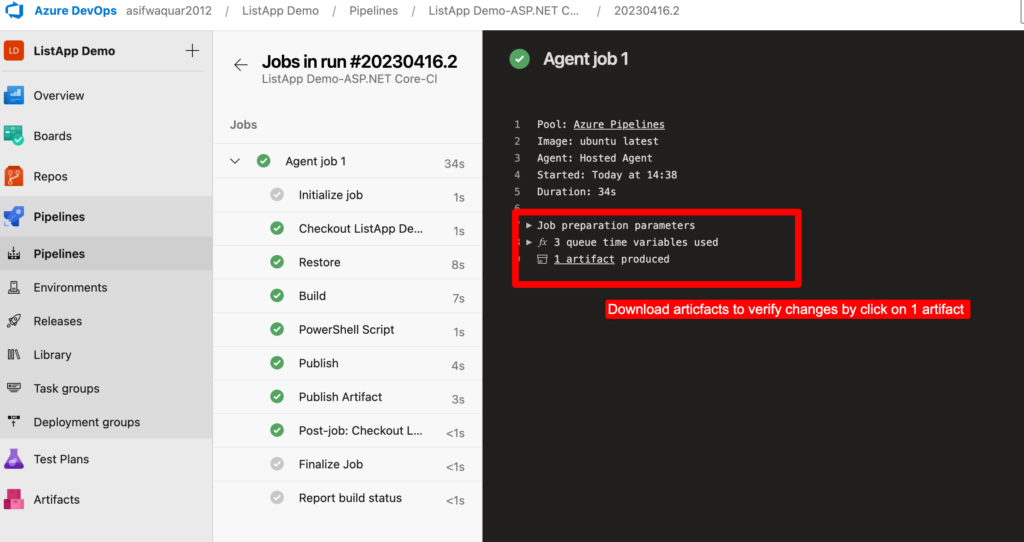
After pipelined run successfully .You can download artifacts by click on them.
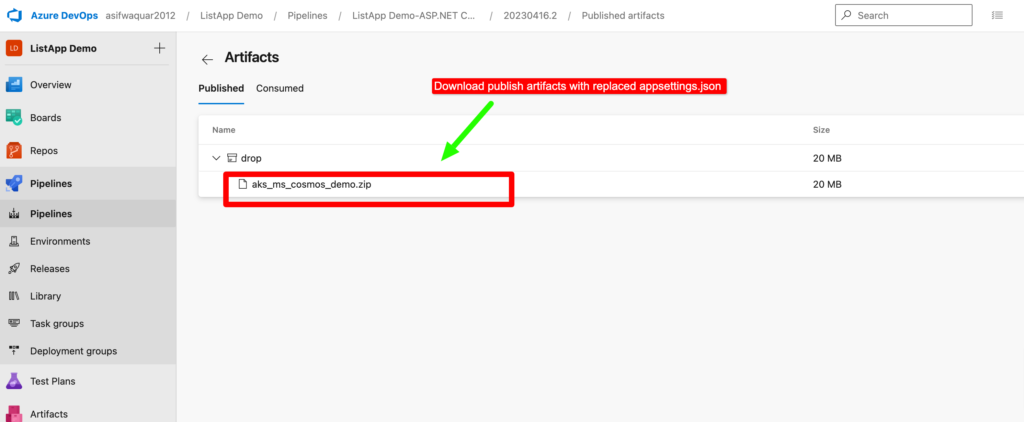
Verify token values replaced in appSettings.json
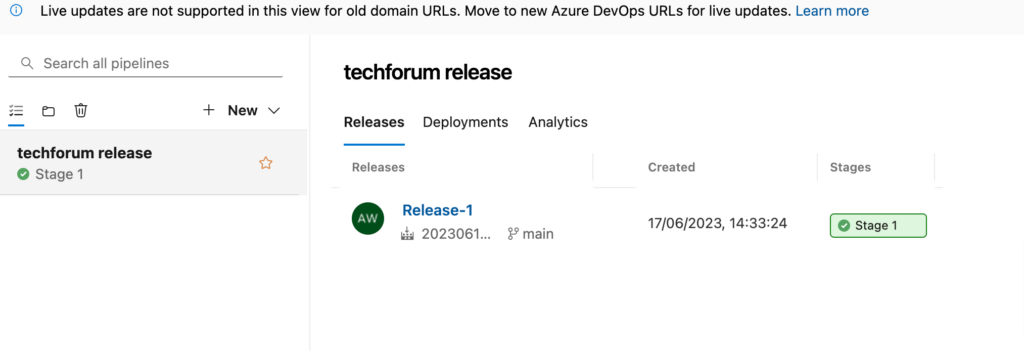
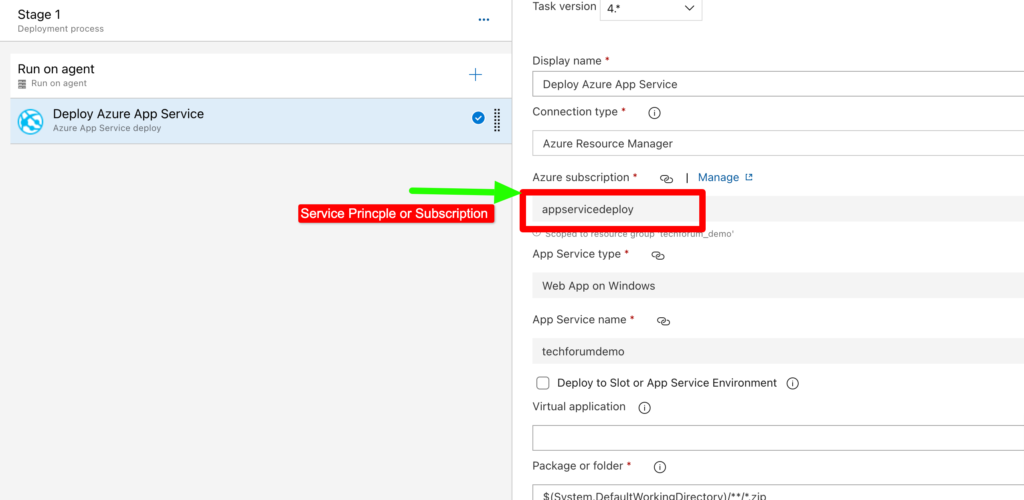
Step 9– Now our app is ready with connecting string value retrieve from Azure Key Vault with Build Pipeline. Our next step is to deploy this app in app service using Release pipeline. Let’s Create Release pipeline to deploy build artifacts to app service.
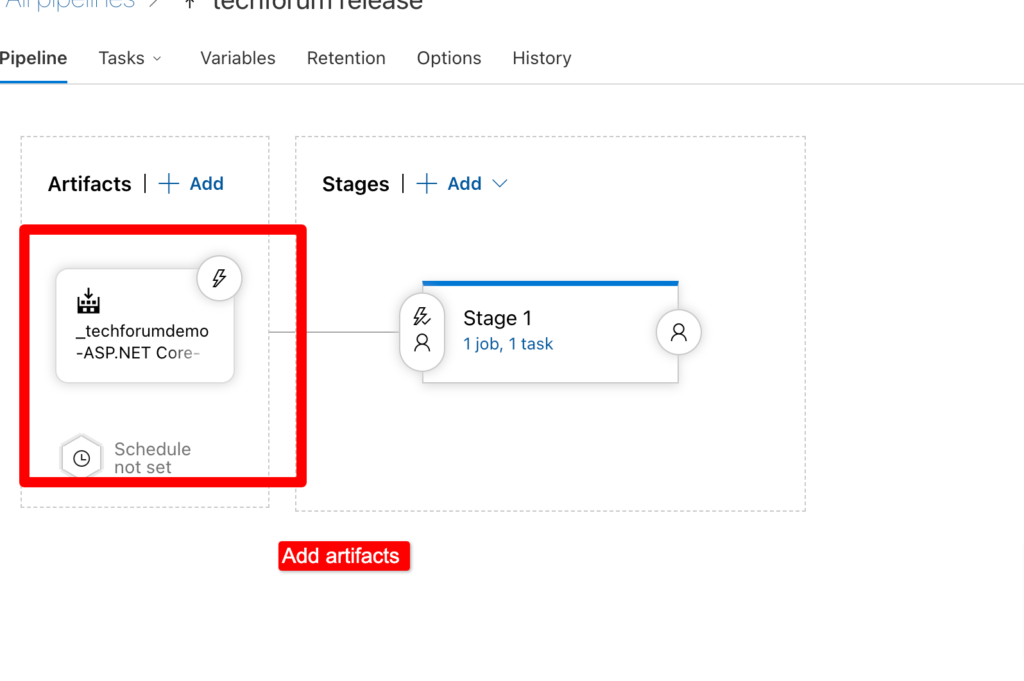
To create release pipeline first create new release pipeline and choose add artifacts option. Choose your public artifacts.
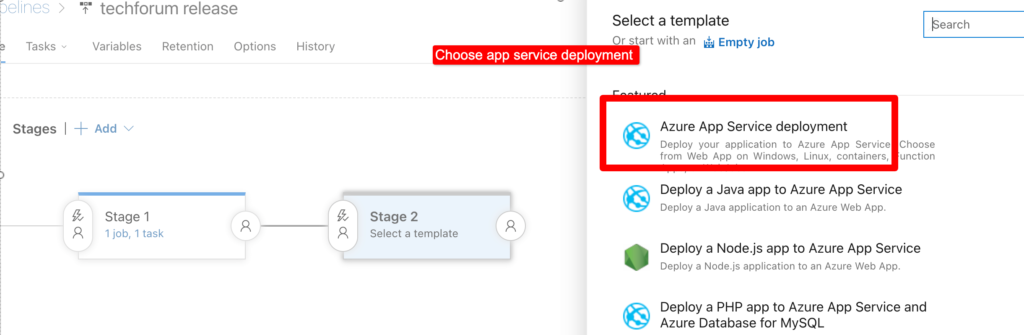
In stages you can deploy app to Dev/ET/Prod as per requirement. Click on stage and choose app service deployment.
Choose app service by providing details of service principal or subscription.
Run the pipeline .
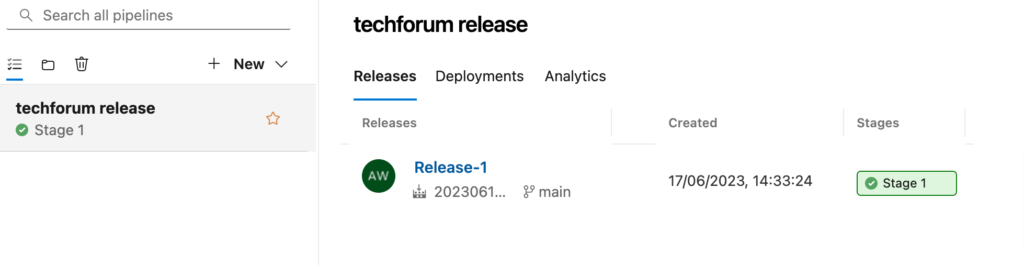
Deploy Success.