
This blog post will provide a step-by-step guide on how to export an App Service Certificate from the Azure Portal and set up a password for it in Windows using PowerShell.
When creating an App Service Certificate in the Azure Portal, you may not always use it for the App Service itself. Instead, you might use it for an Azure VM or an on-premises VM. Additionally, you may need to upload the certificate to other Azure resources, such as Azure Application Gateway.
However, after exporting the App Service Certificate from the Azure Portal, you may find that you need a password to use it in other resources. By default, the exported certificate does not have a password, which means you need to set one up manually.
In this article, we will show you how to export the App Service Certificate and set up a password for it in Windows using PowerShell, so that you can easily use it in other Azure resources.
Step1– Let’s create the App Service Certificate by going Azure Portal -> SearchBox-> App Service Certificate and by details such as resource name, certificate name and SKU (If you want to create certificate only for main domain choose standard but if you want to certificate for main domain and subdomain choose wildcard SKU)

Step 2– Let’s configure Azure Key Vault to store certificate by choosing certificate configuration.

Step 3 – Choose option select key vault and create key vault or choose existing.

Step 4– If it’s new key vault provide all details and click on create.

Step 5 – Now next step, let’s verify domain ownership.

Step 6– Copy domain verification token and add TXT records domain dns recordset to verify domain ownership.

Step 7– In my case my domain is purchased from Godaddy. Go to Godaddy DNS settings.

Step 8 – Click on Add more records and choose Type ‘TXT’ , Name ‘@‘ , Value ‘Domain Verification Token copied from Azure in Step 6‘ ,TTL ‘Default’

Step 9– Click save and refresh in Azure after few mins domain ownership will be verified.

Step 10 – After domain ownership verified. You will see below message in green color.

Step 11– Next step is to export the certificate. You can do in two ways either click on open key vault settings and download latest version or you can use powershell to export certificate.
To export with power-shell use below cmd (Function Export-AppServiceCertificate) from given link and apply below given cmd.
Export-AppServiceCertificate -loginId [email protected] -subscriptionId yoursubid -resourceGroupName resourceGroupNameOfYourAppServiceCertificate -name appServiceCertificateName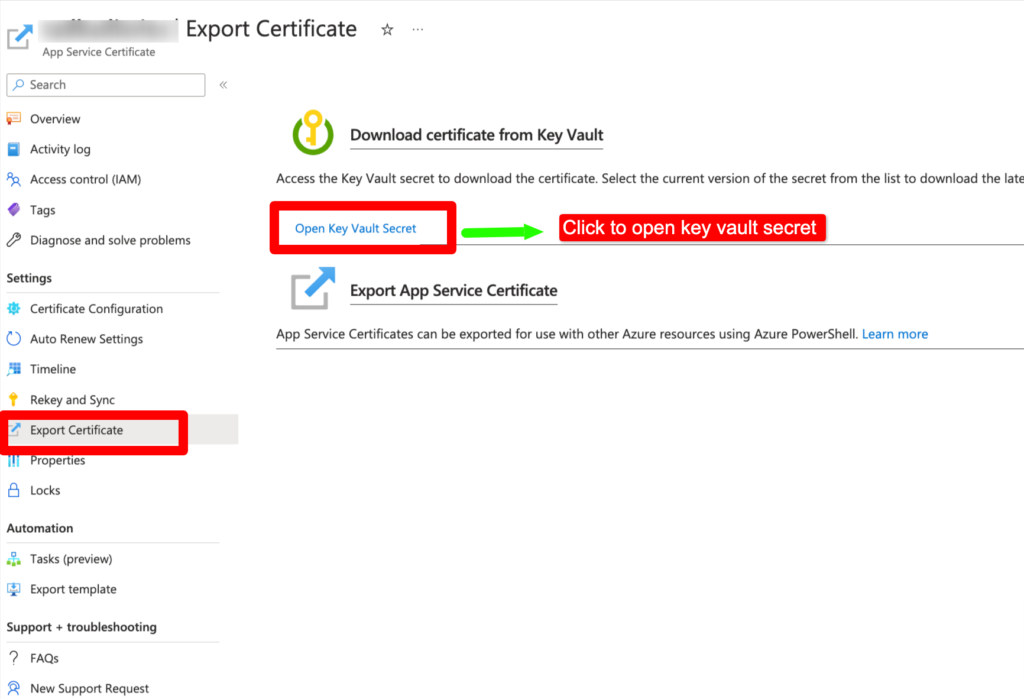
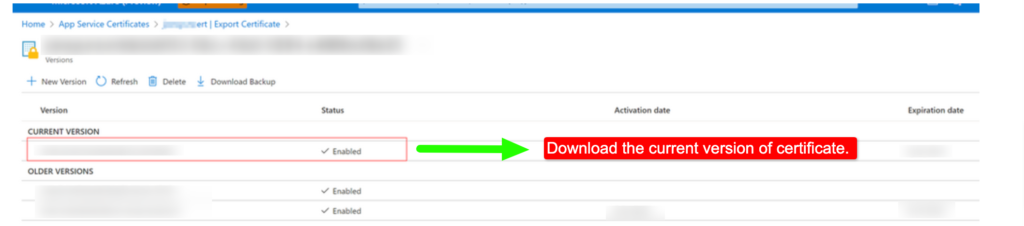
Step 12– In my case, I choose to download directly from Azure Key Vault latest version. Click on Open Key Vault Secret and You will be redirected to below page. Choose current version certificate to download or you can download previous version certificate as well.
Note– Certificate will be in pfx format which contains certificate and private key both (pfx=cer+key) . If you need to convert certificate in cer format you can use openssl to convert as explain given below steps (Step 26-27) .
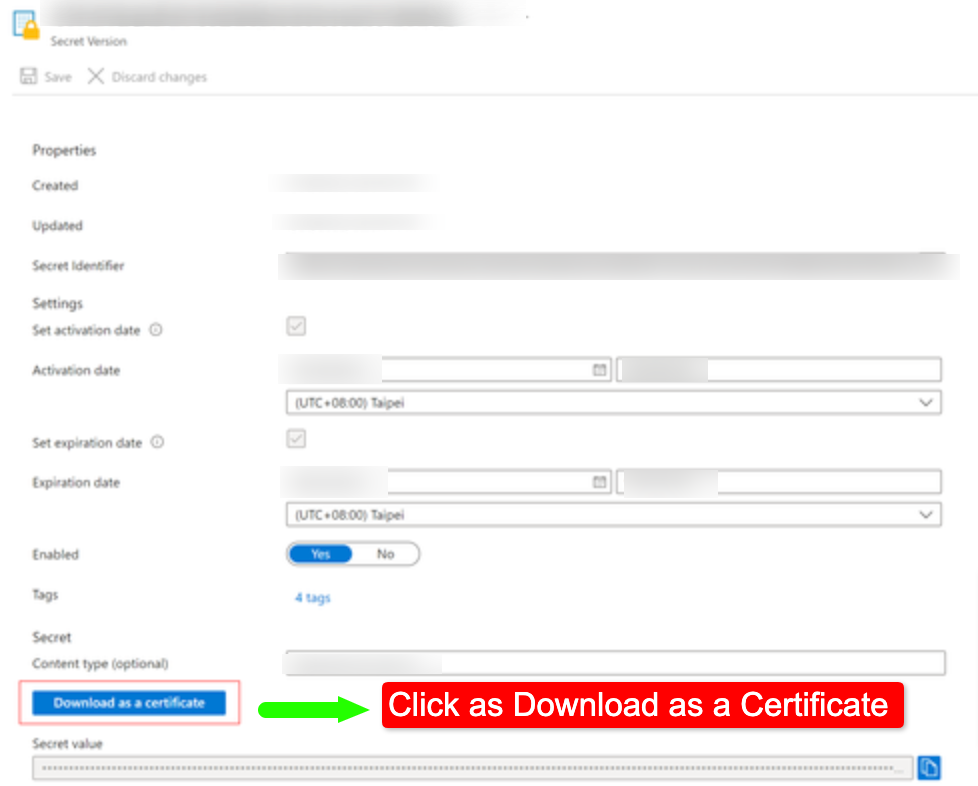
Step 13– After click on current version certificate you will see below page . Choose Download as certificate.
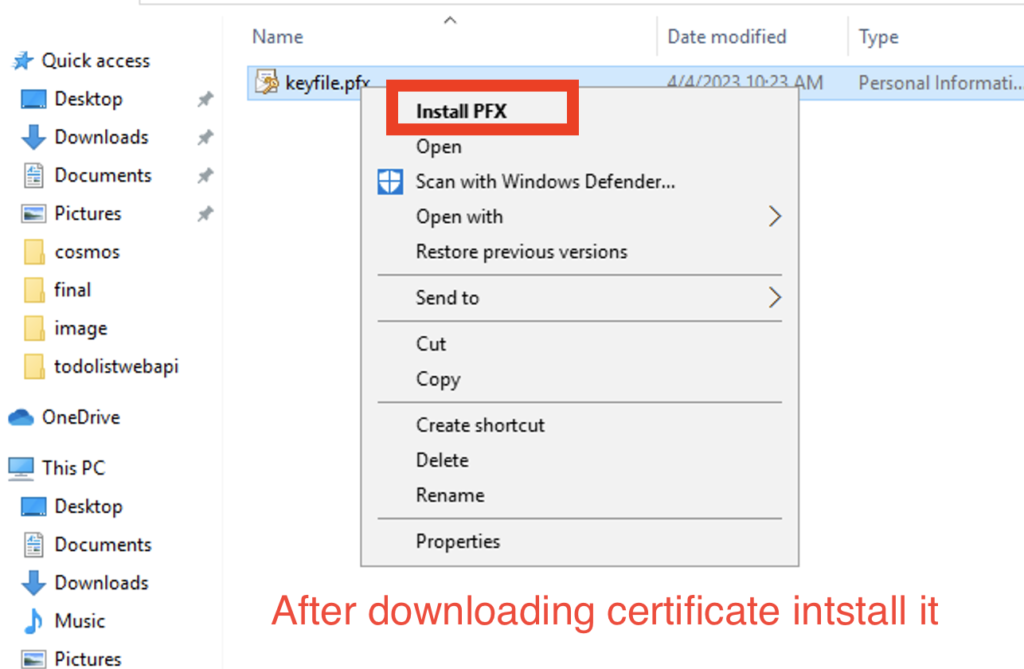
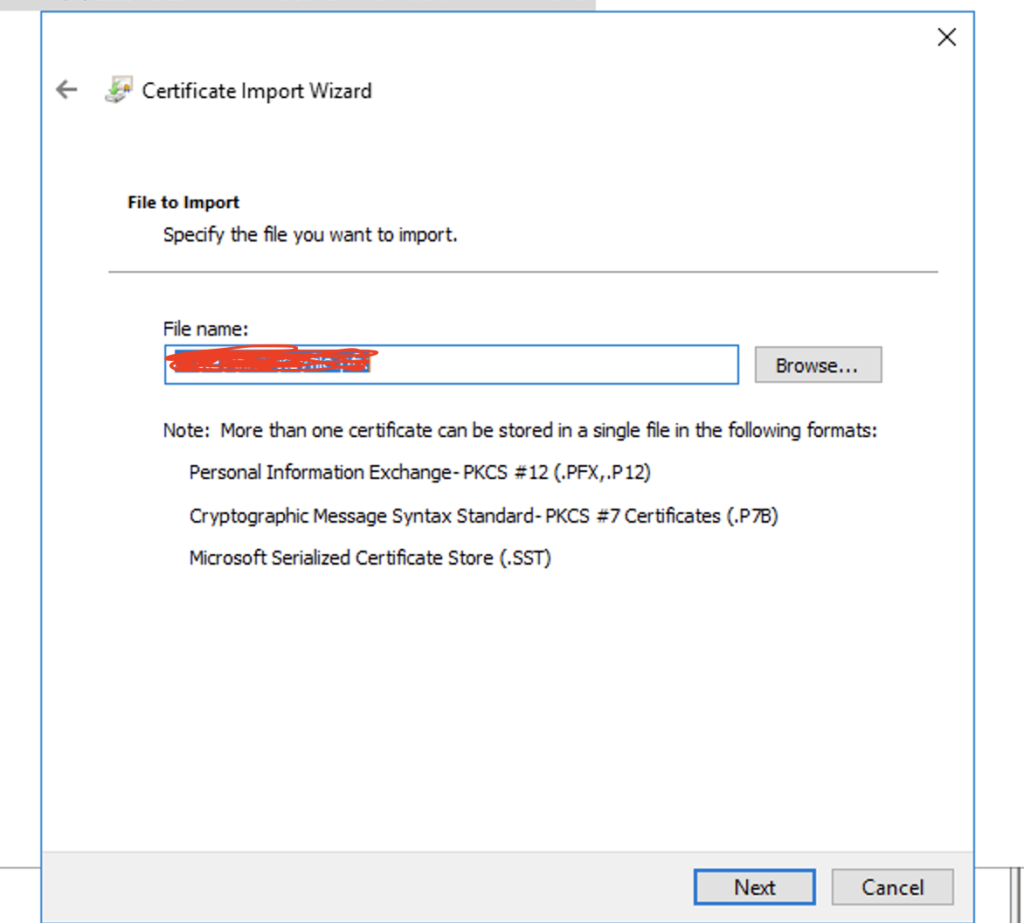
Step 14– Right click on the download .pfx certificate and click “Install PFX”
Step 15 – Select “Current User” and Make sure that select the correct .pfx file
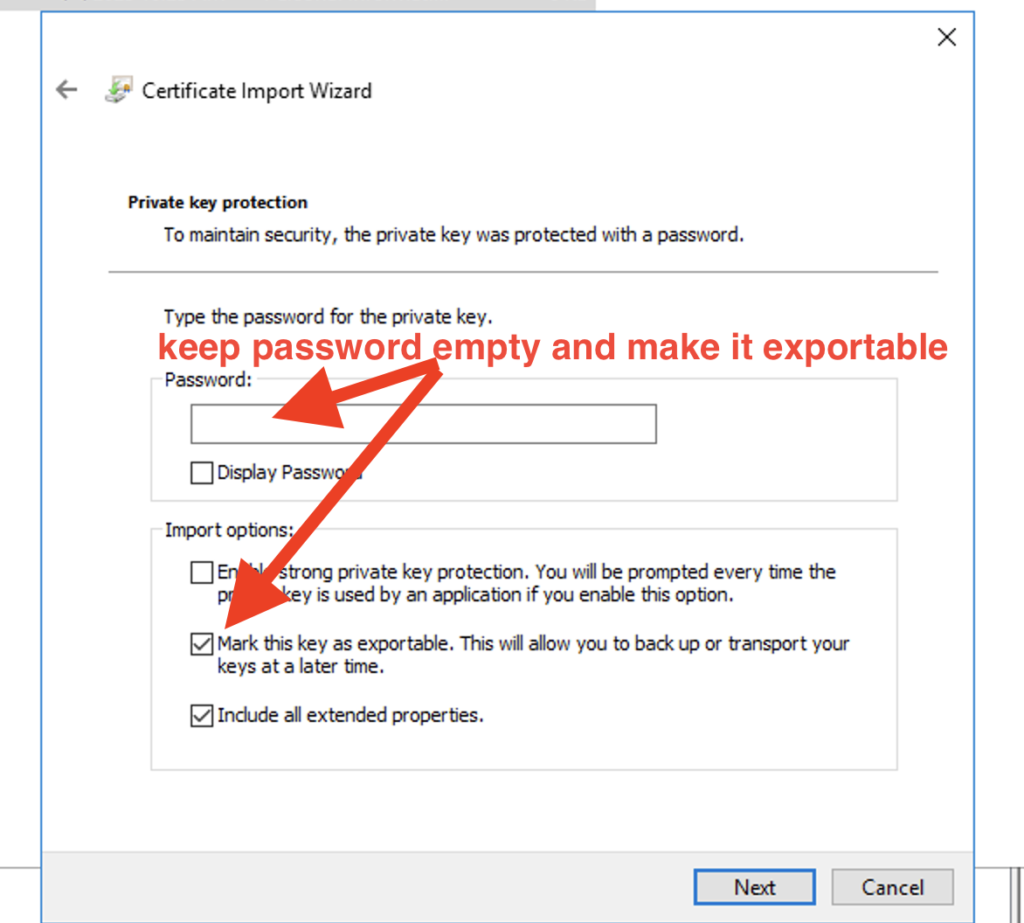
Step 16- Keep the password empty and check the “Mark this key as exportable. This will allow you to backup or transport your keys at a latter time” checkbox.
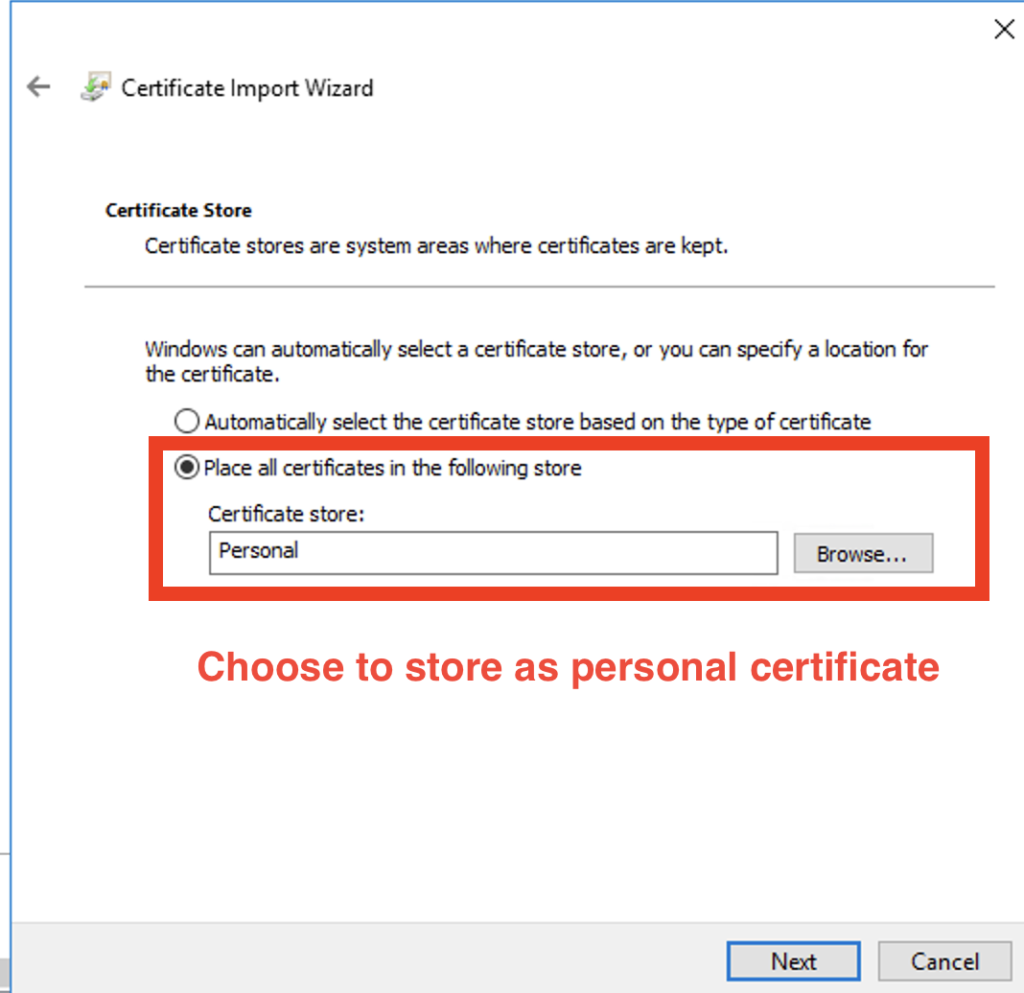
Step 17- Select “Place all certificates in the following store” and Choose “Personal” for Certificate store.
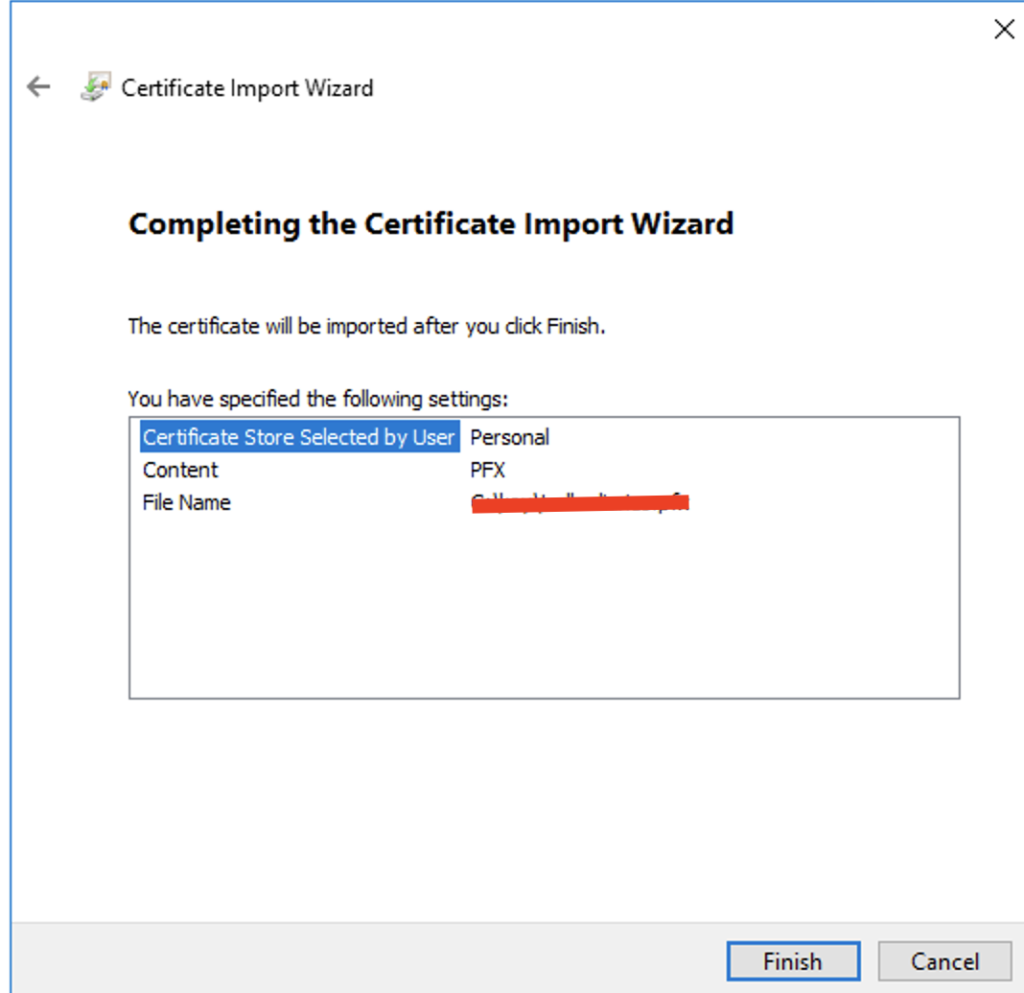
Step 18– Click finish to import the certificate.
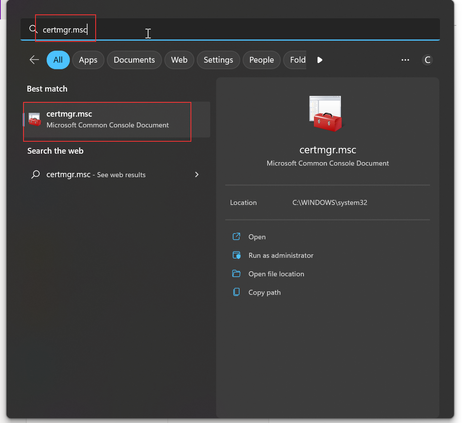
Step 19– Open Certificate Manager by searching “certmgr.msc” in Windows
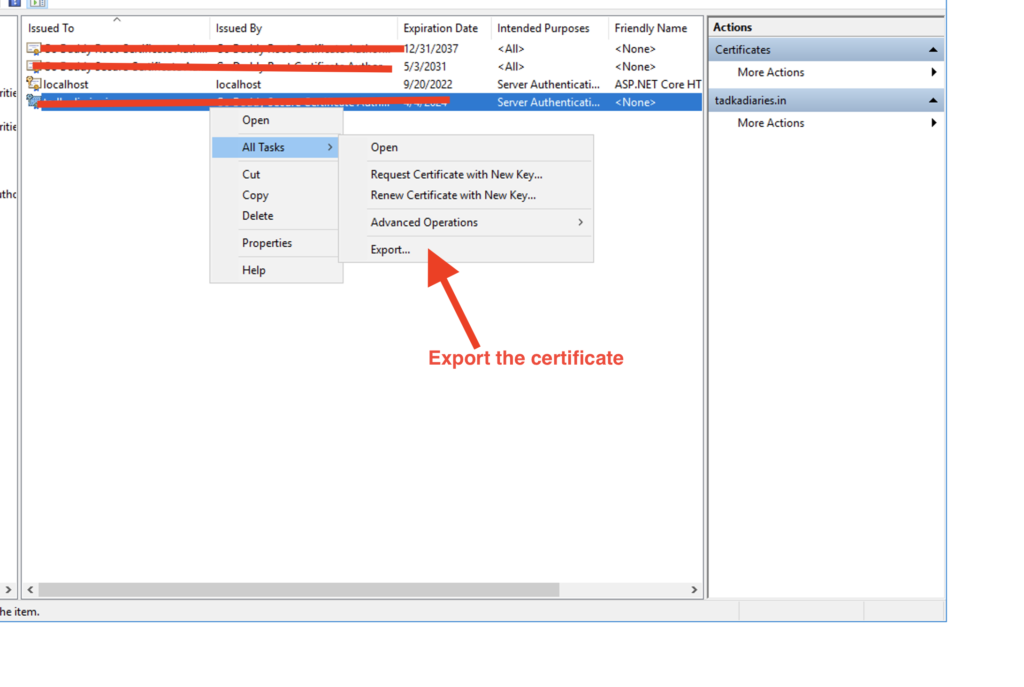
Step 20– Select “Certificates – Current User” -> “Personal” -> “Certificate”. Then right click on the target certificate and select “All Tasks” -> “Export..”
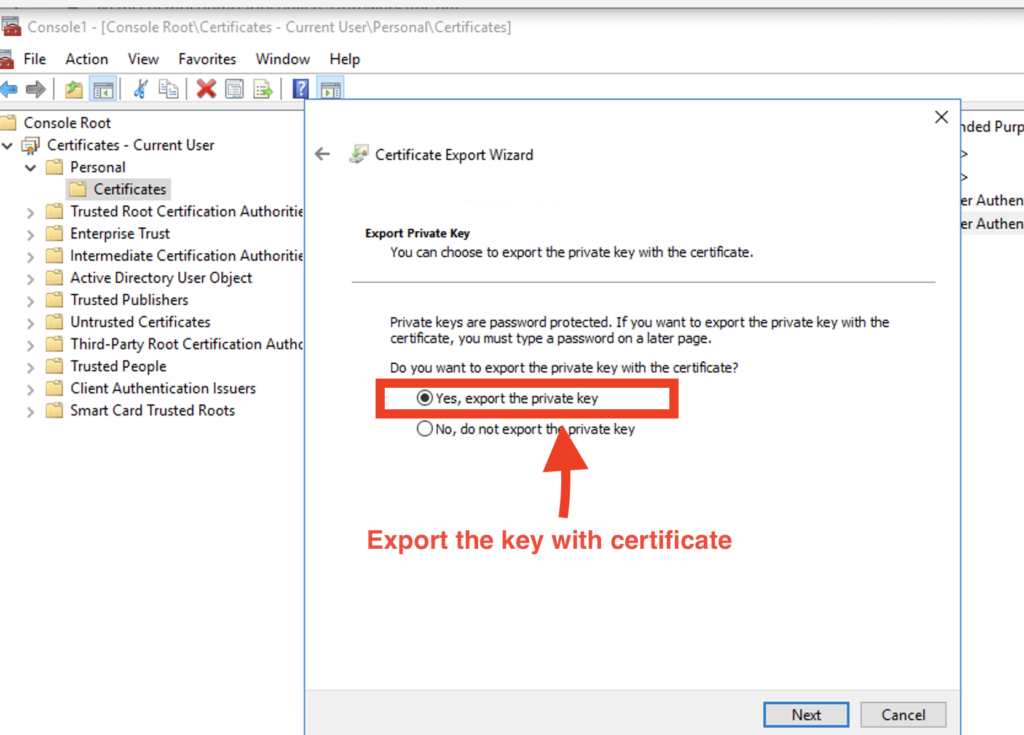
Step 21– Choose “Yes, export the private key”
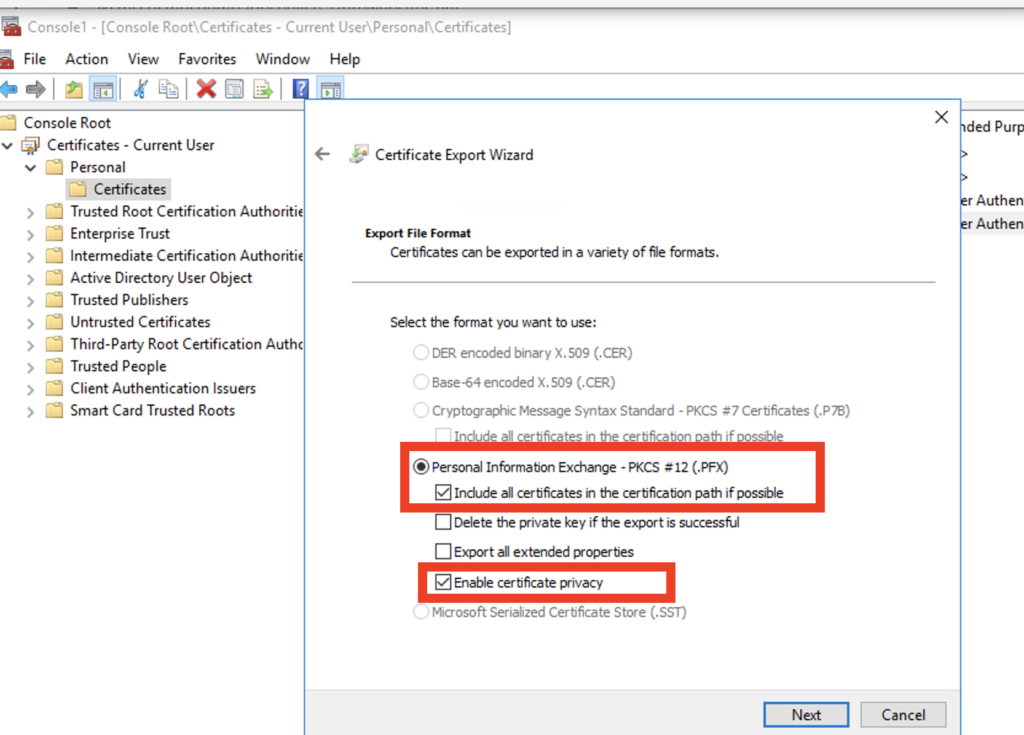
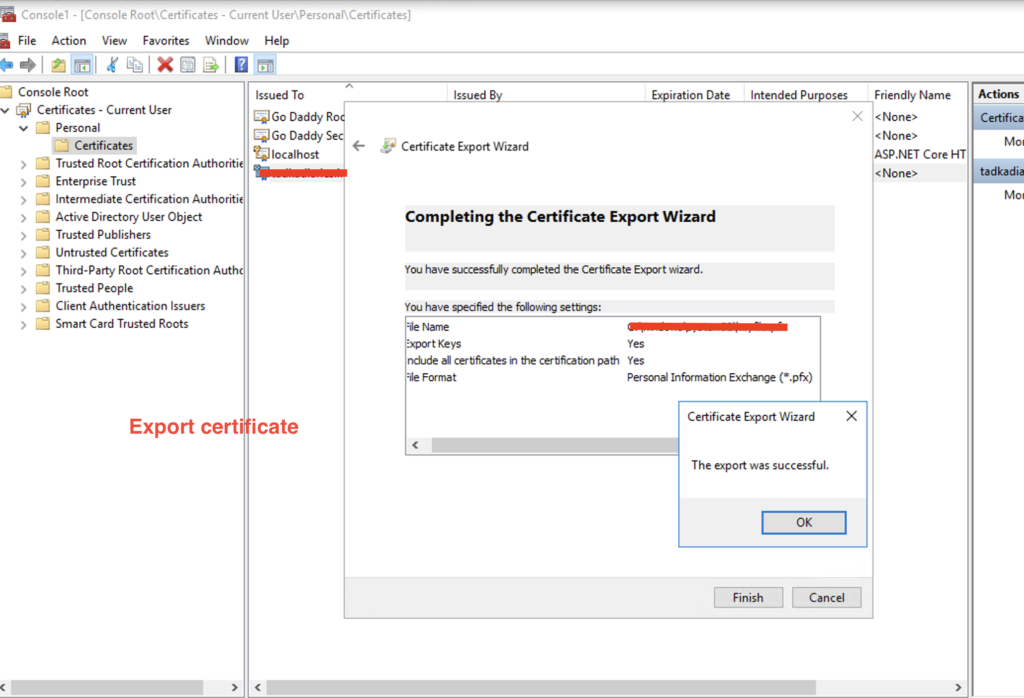
Step 22-Choose “Personal Information Exchange – PKCS #12 (.PFX)” and make sure check the “Include all certificates in the certification path if possible” and “Enable certificate privacy”
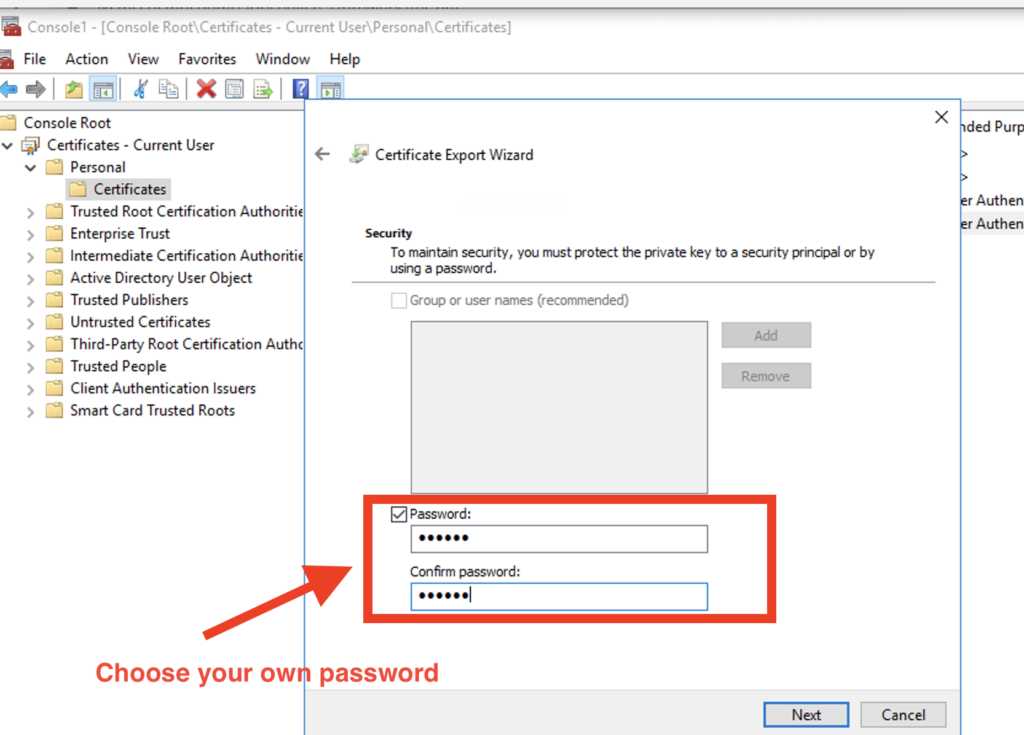
Step 23– Select the “Password” and enter the password
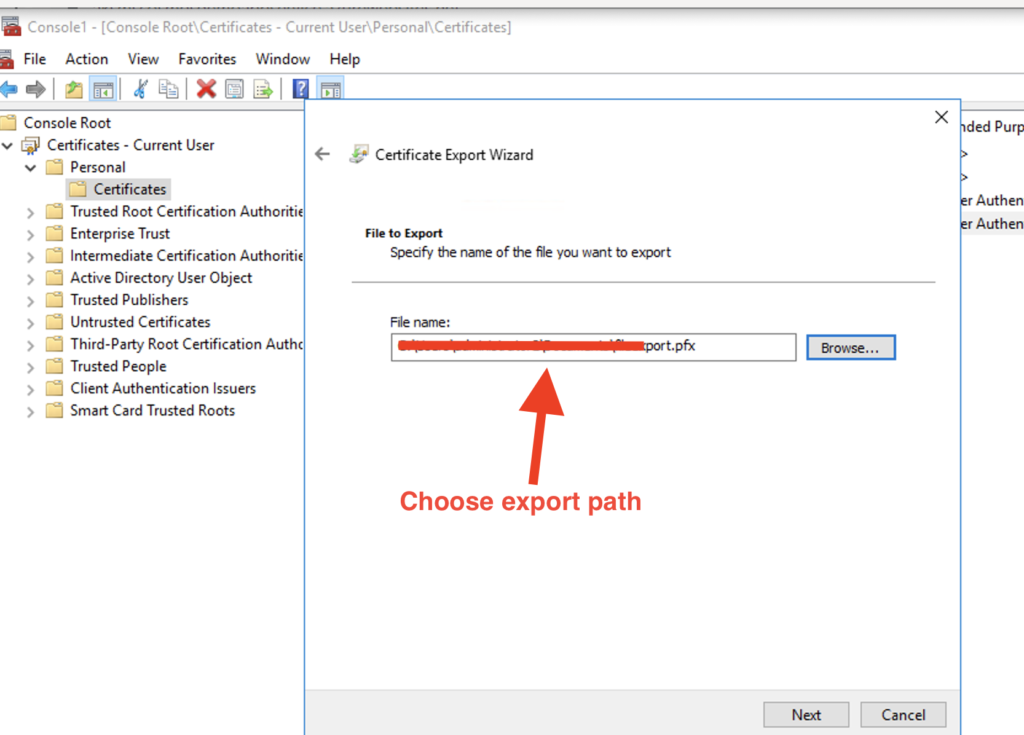
Step 24– Give a filename to save this certificate.
Step 25– Click “Finish”
Step 26– If you want to convert .pfx certificate format to .cer format. Use below open ssl command to convert. Enter the password setup in step 23
openssl pkcs12 -in currentcertificate.pfx -clcerts -nokeys -out newcsrformatcertificate.cer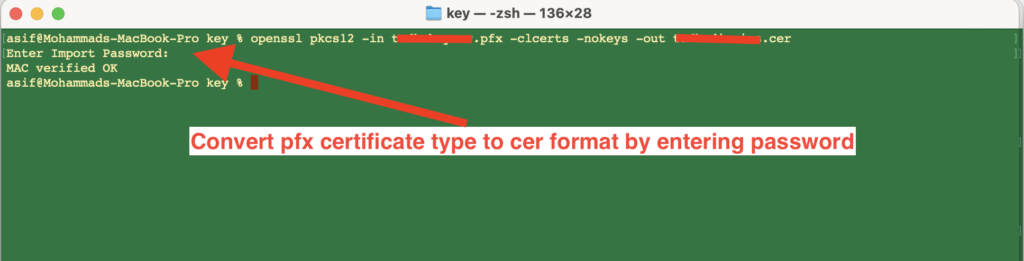
Step 27– Retrieve the private key of certificate from .pfx file using open ssl by entering password which was setup in step 23.
openssl pkcs12 -in currentcertificate.pfx -nocerts -out getprivatekey.key
Finish,Upload cer format of certificate using private key.