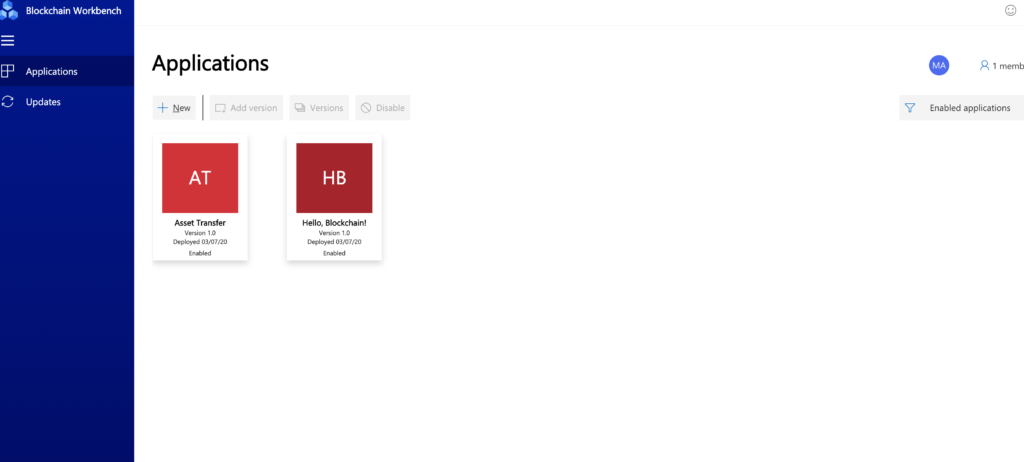
Step-1
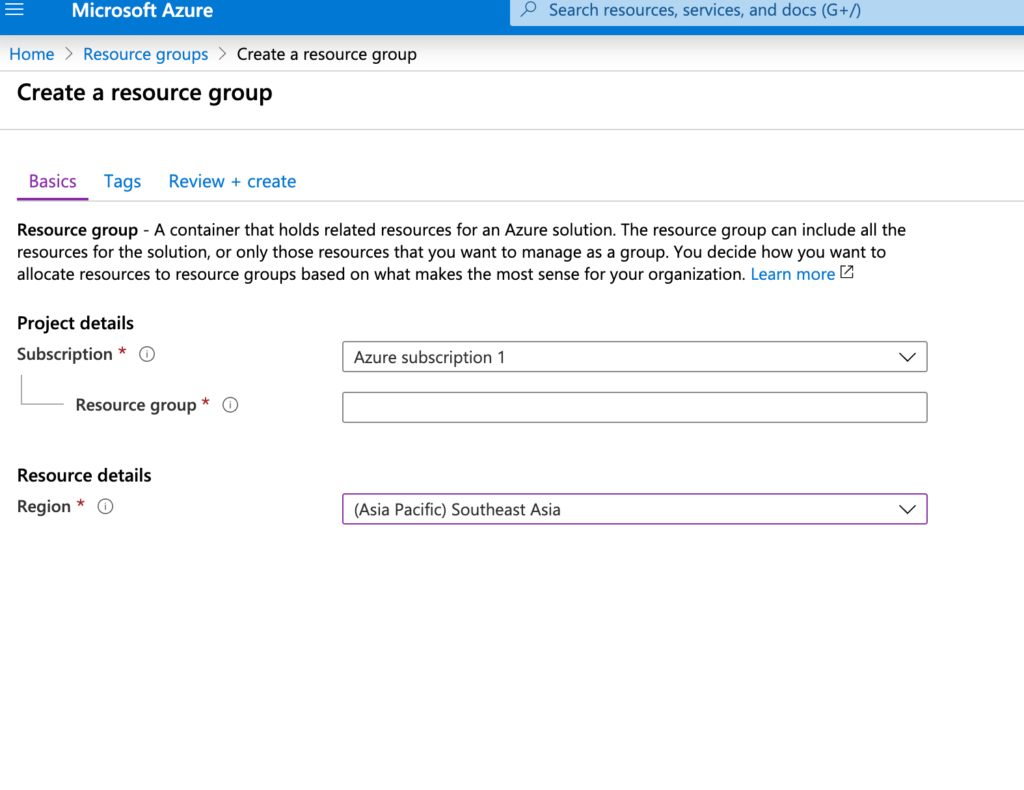
Login to Azure using the https://portal.azure.com . Navigate to the Resource Group.
Create New Resource Group by Clicking on + Add icon to top.
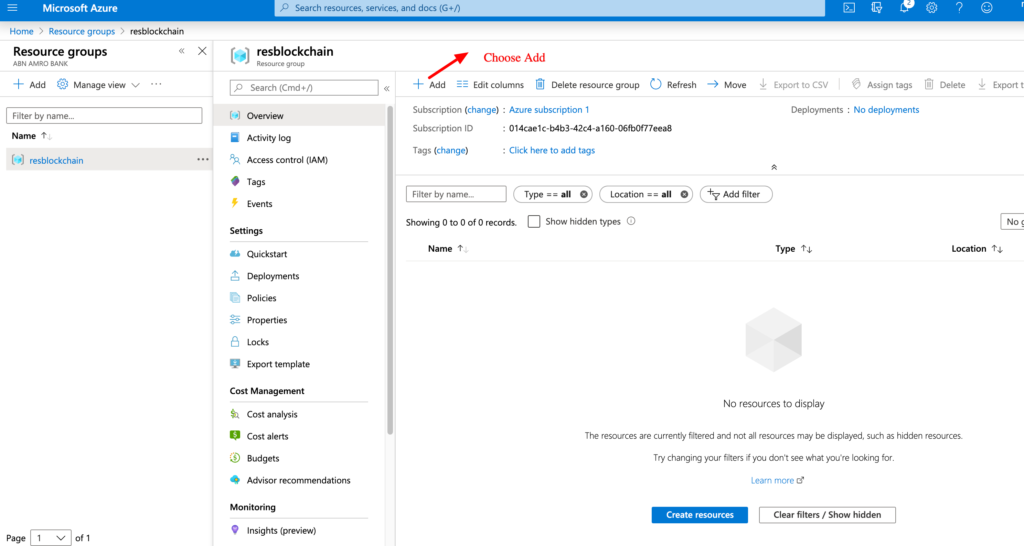
Step-2 Successfully after creation you will see the resblockchain resource group. It is not mandatory to create resource group, this is just to organize all the resources we create to group into one group. Easy to maintain in future.
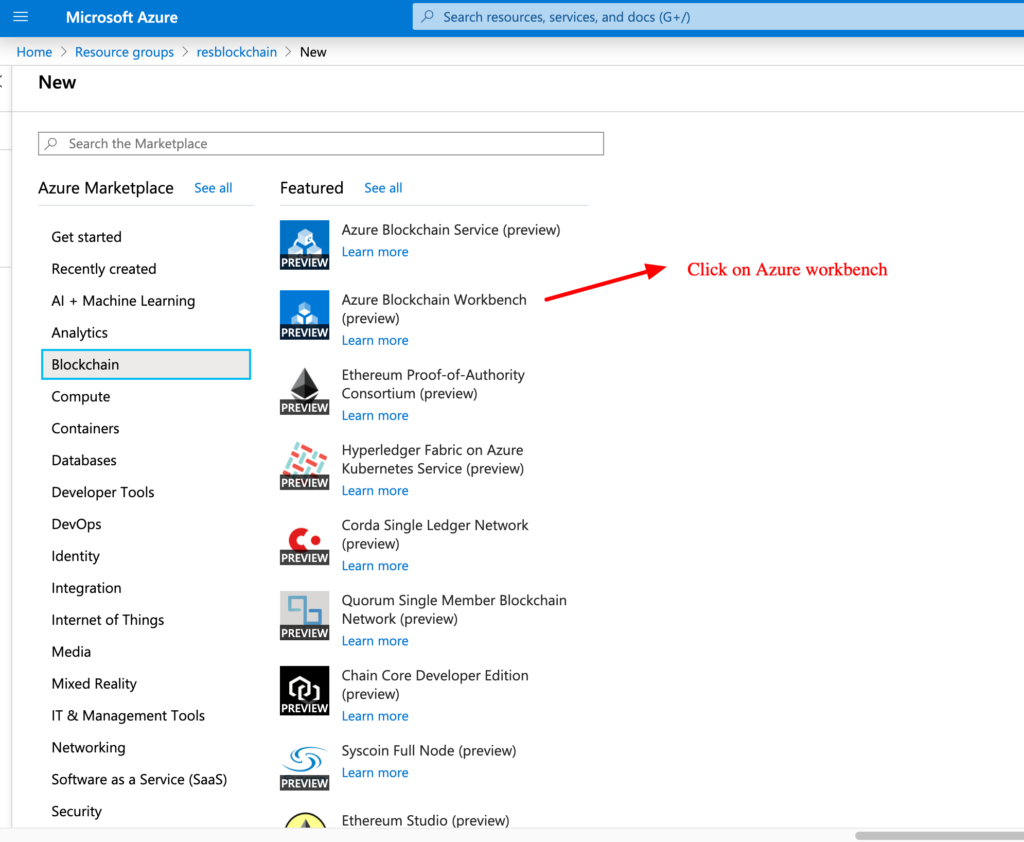
Step-3 Once the Add button is clicked you will have search option. Type Blockchain in the search box and filter by blockchain. You will see Azure Blockchain Workbench. Click that option
Step-4
Enter the details needed on the next screen to create the Azure Blockchain Workbench
There are 4 steps in creation of the Azure Blockchain Work Bench
Step 1 Basics
Step 2 Advanced Settings
Step 3 Summary
Step 4 Buy
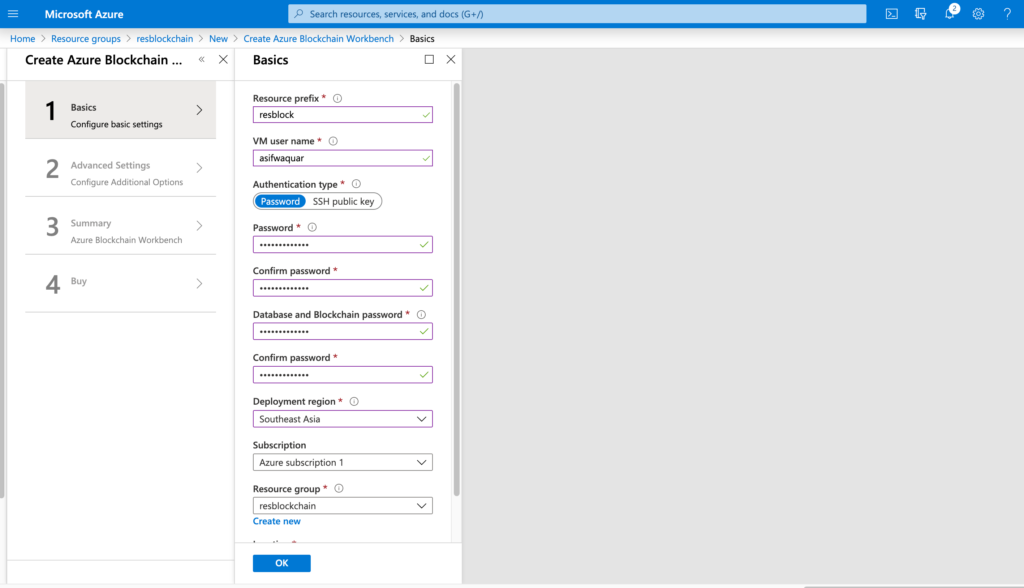
Step-5 Select VM Size ,Blockchain network choose new if you are creating new network but there is option to join existing network also . Suppose if you have any existing ethereum network. You can provide end points by choosing use existing option.
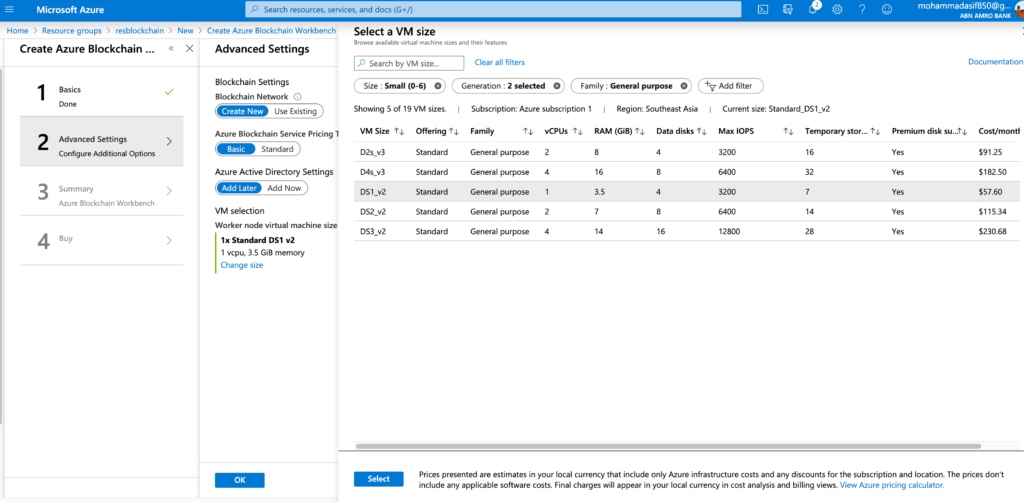
Step-6 -Click on Ok button at the bottom of page to accept these values.
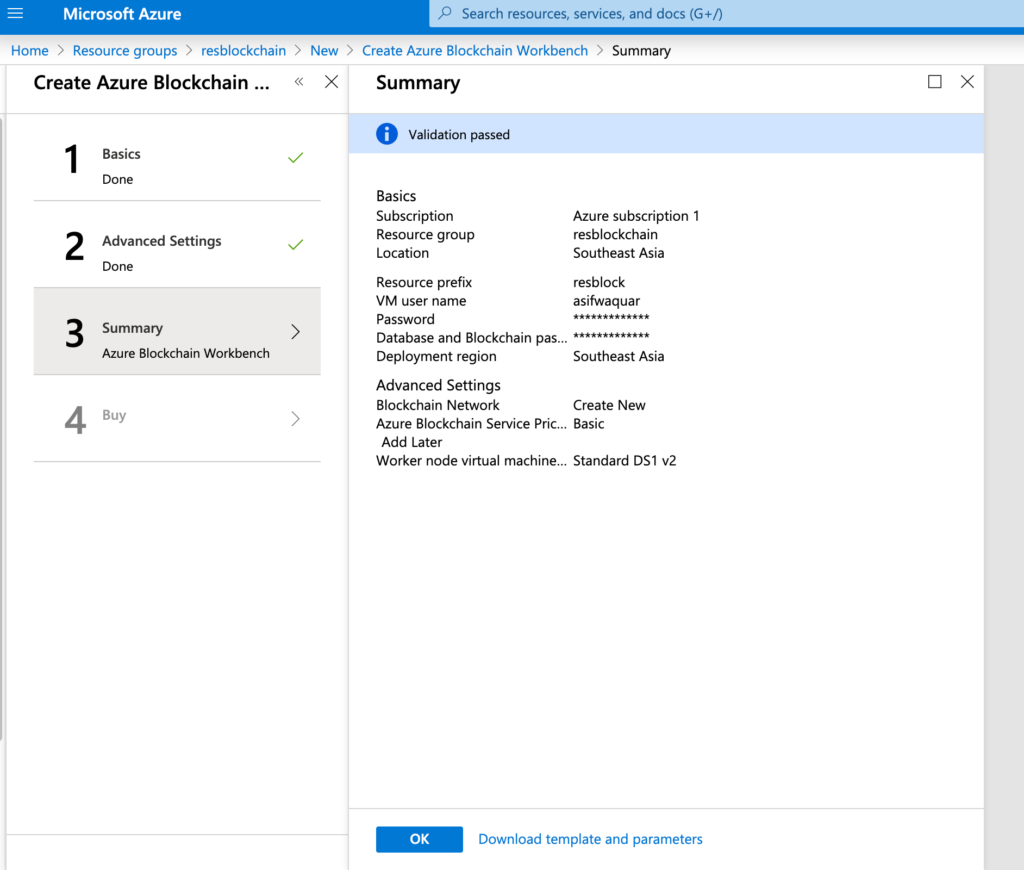
Step-7 Confirm to create network by choosing create option.
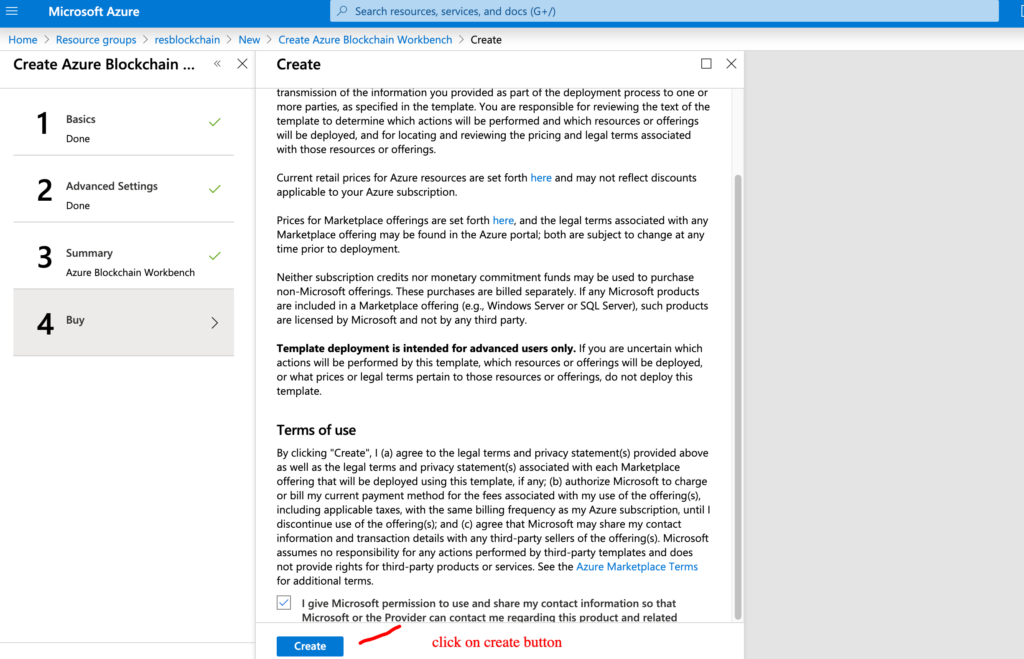
Step-8 Once you click on Create it takes almost 15 to 30 minutes to create the Azure Blockchain Work Bench.To check the deployment status use the below option any time
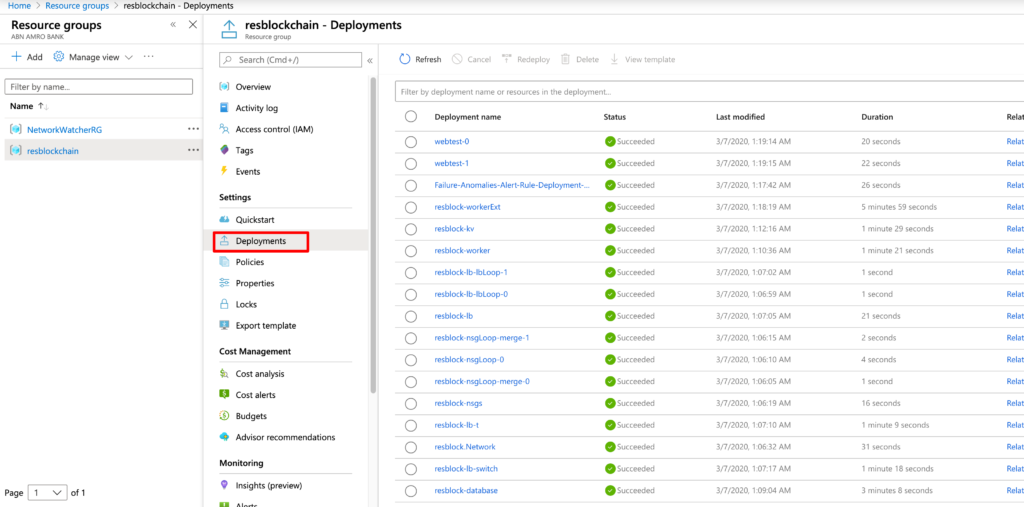
Step-9 Once successfully deployed Navigate to the Overview to check the URL. Choose resource group.

Step-10 You can see all available resources. Sort the Type and then to see the web application in the list
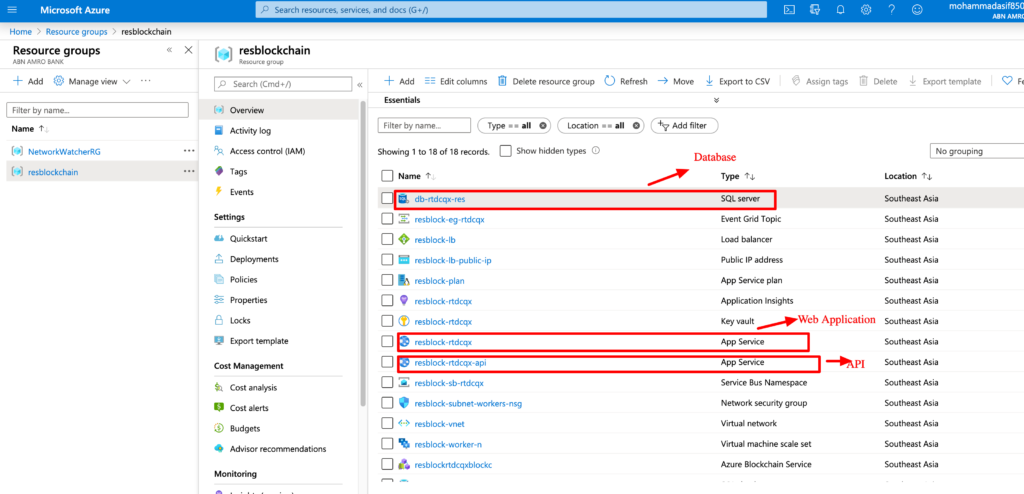
Step-11 Click on the web application to open the screen below and get the link.
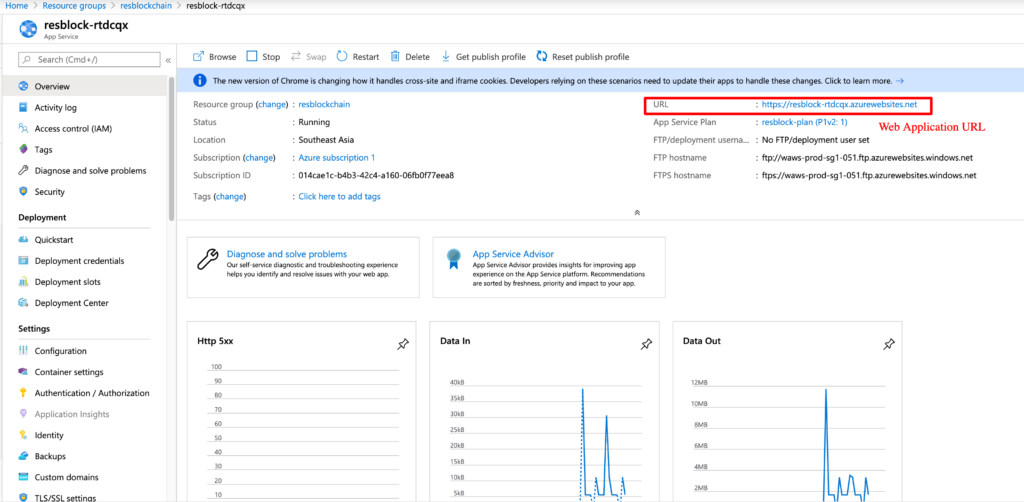
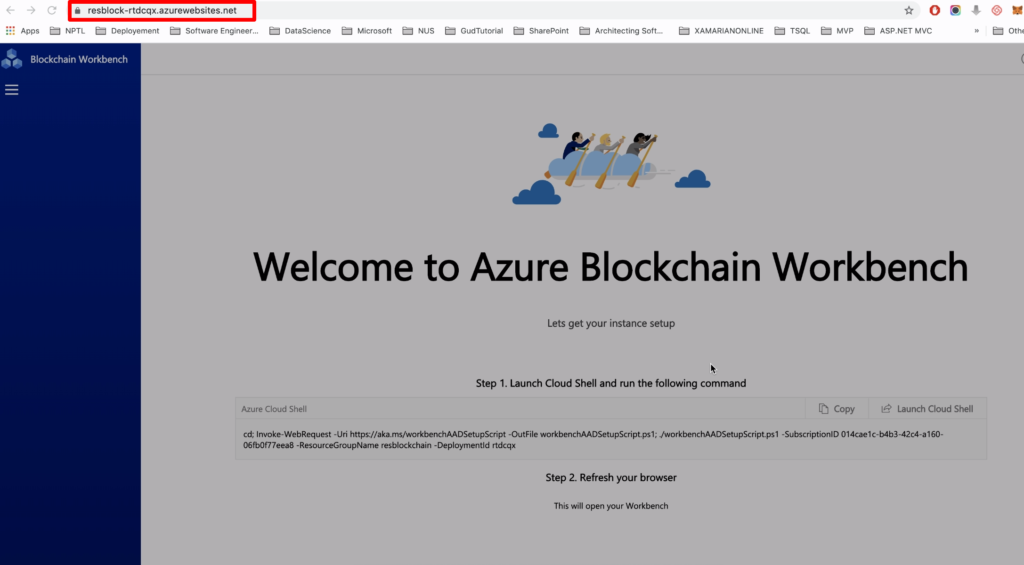
Step-12 Navigate to that URL to open the Blockchain Application
Step-13 Click on the web api to open the screen below and get the link.
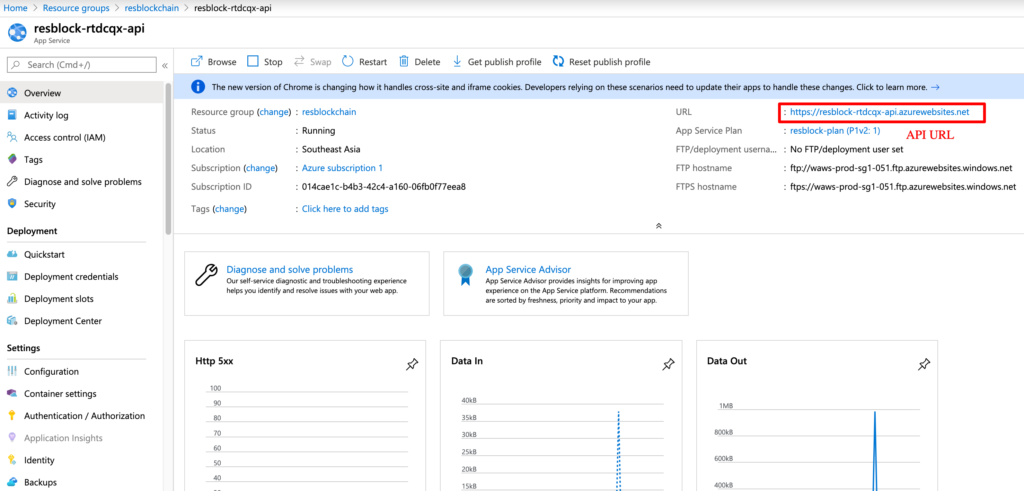
Step-14 -Navigate to that URL to open the Blockchain Api . It will be helpful to read data from smart contract and updating transaction .
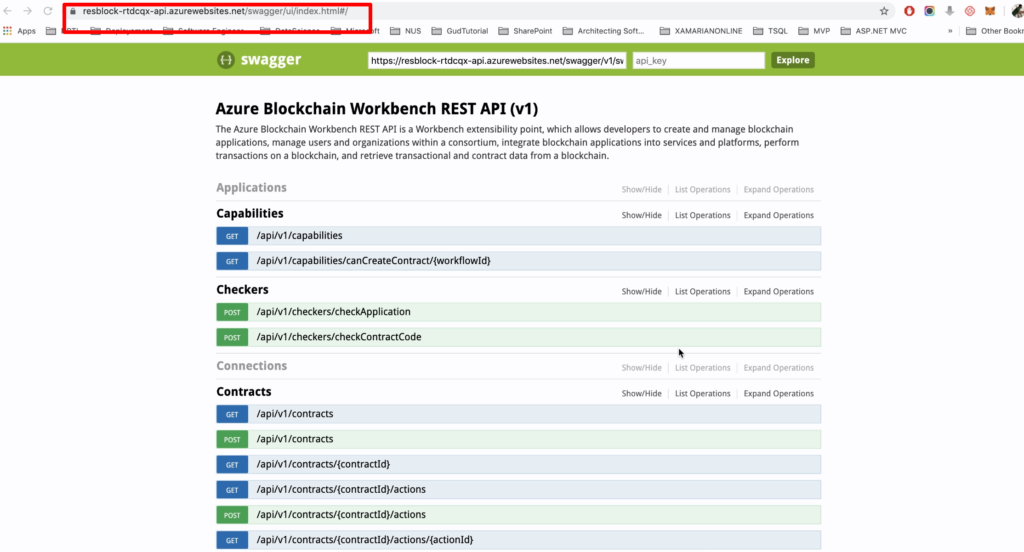
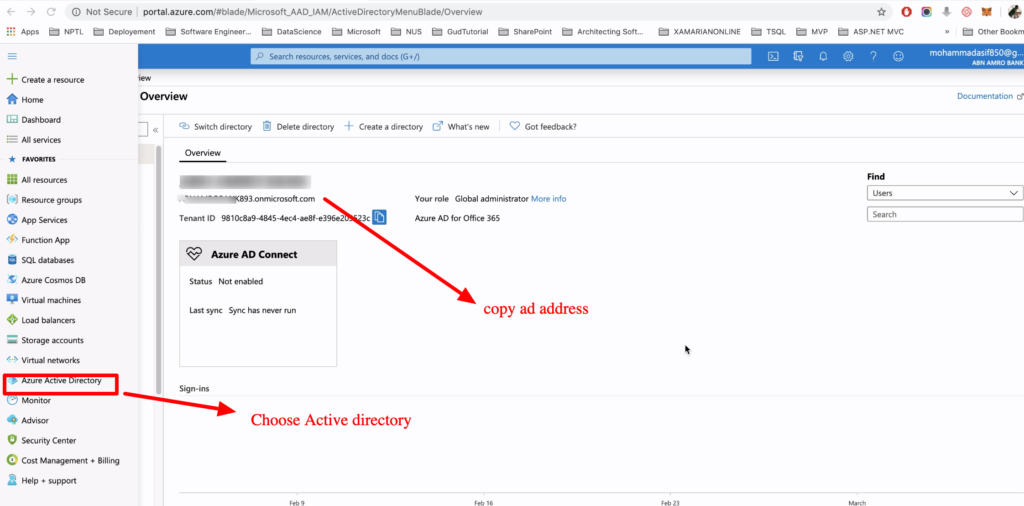
Step-15 –Configuring Blockchain Application – First Navigate to Azure Active Directory to get the AD details .
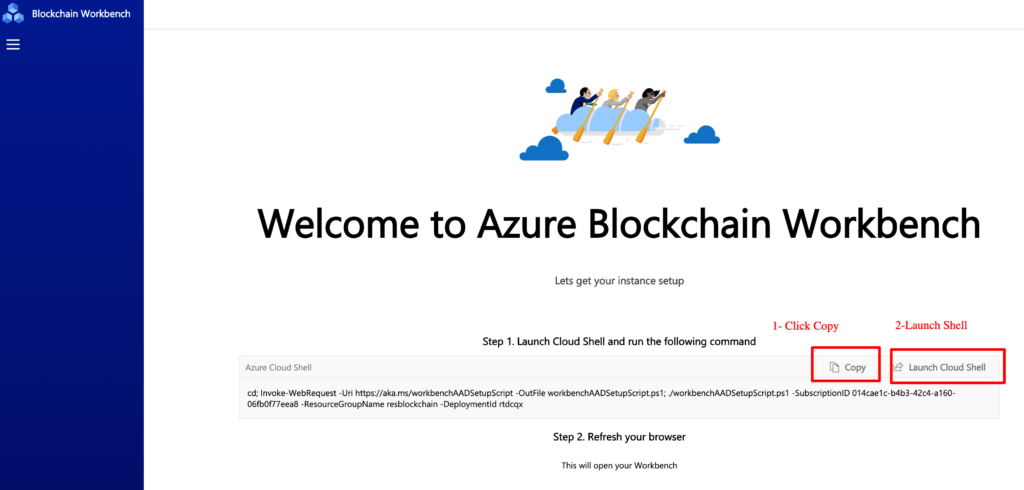
Step-16 .Open the URL which was copied from previous step in the browser to launch work bench. Click on Copy & then Launch Cloud Shell
Step-17 -Select your active directory.

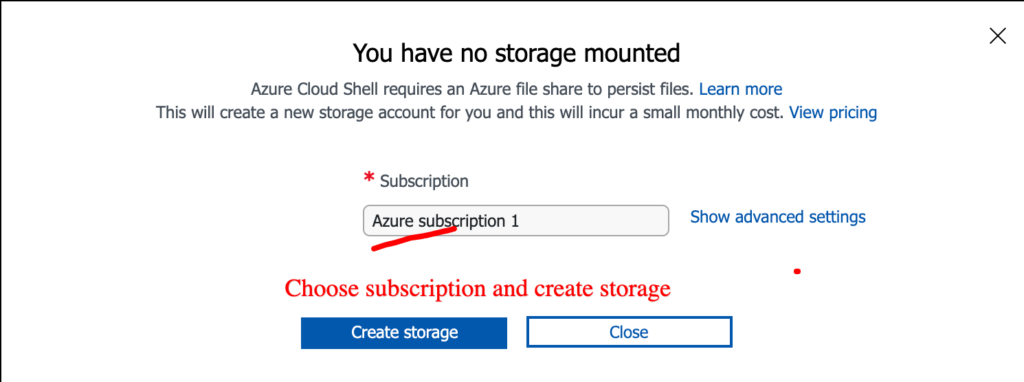
Step-18 Select PowerShell & if the storage account is not already present the below screen will popup. Click on Create Storage. Sometime if you already have storage account then can choose existing one.
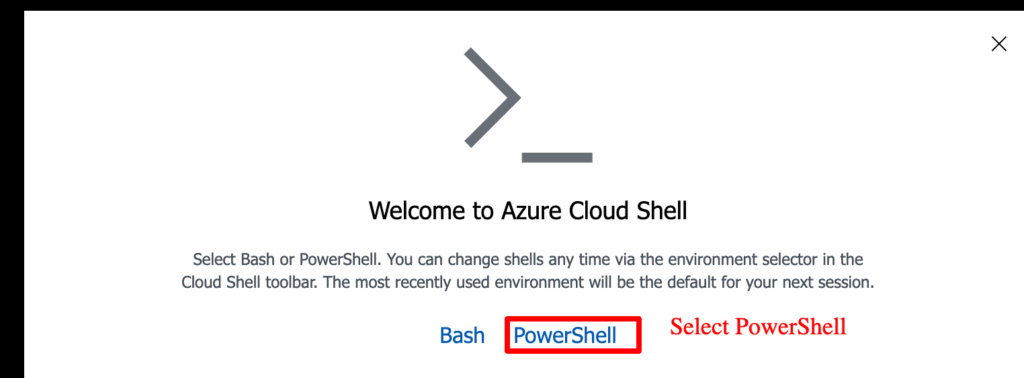
Step-19
Step-20 Once created the below screen will open up and ready for input.
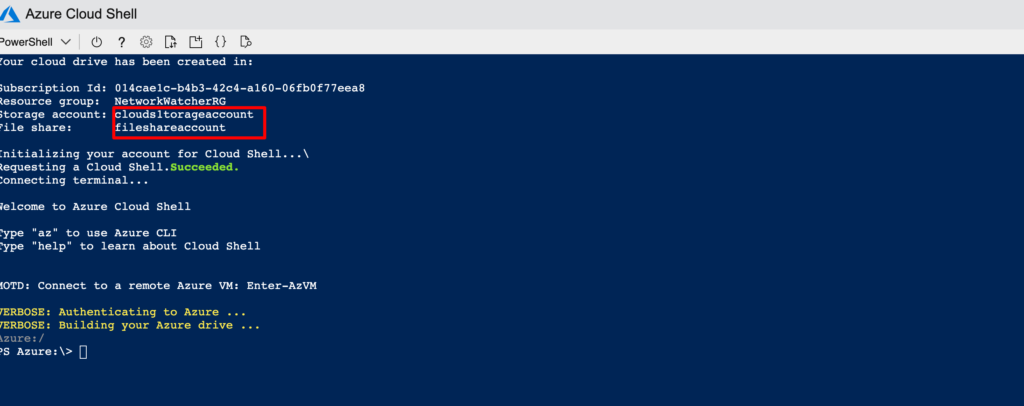
Step-21
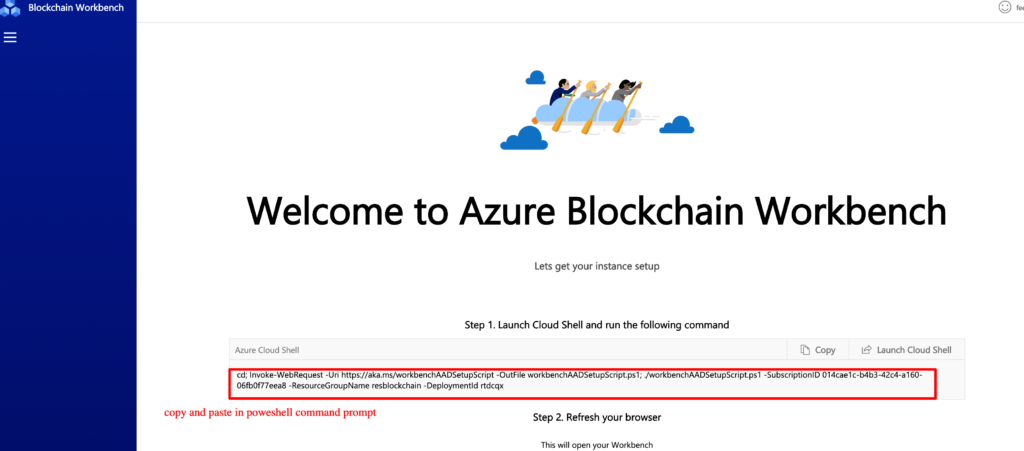
Step-22 -copy path from workbench and paste to power-shell window.
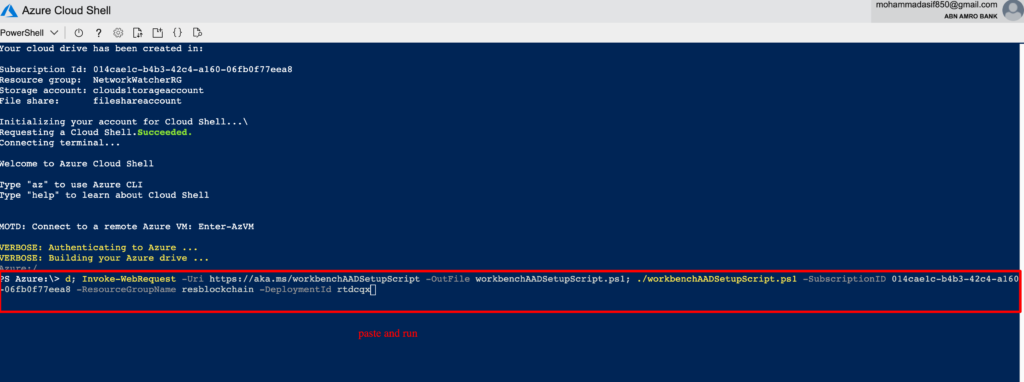
Step-23 After copy paste press enter to run the script. After script execute you will prompt to enter domain detail. In my case domain is XXXX893.onmicrosoft.com
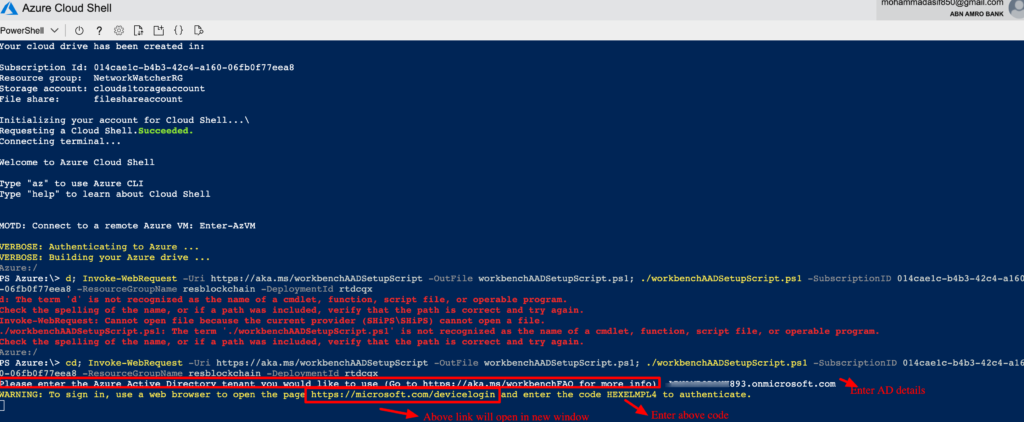
Step-24 After you enter the directory name press enter.
Then you will be given code to authenticate, follow the URL mentioned and type the code to Authenticate

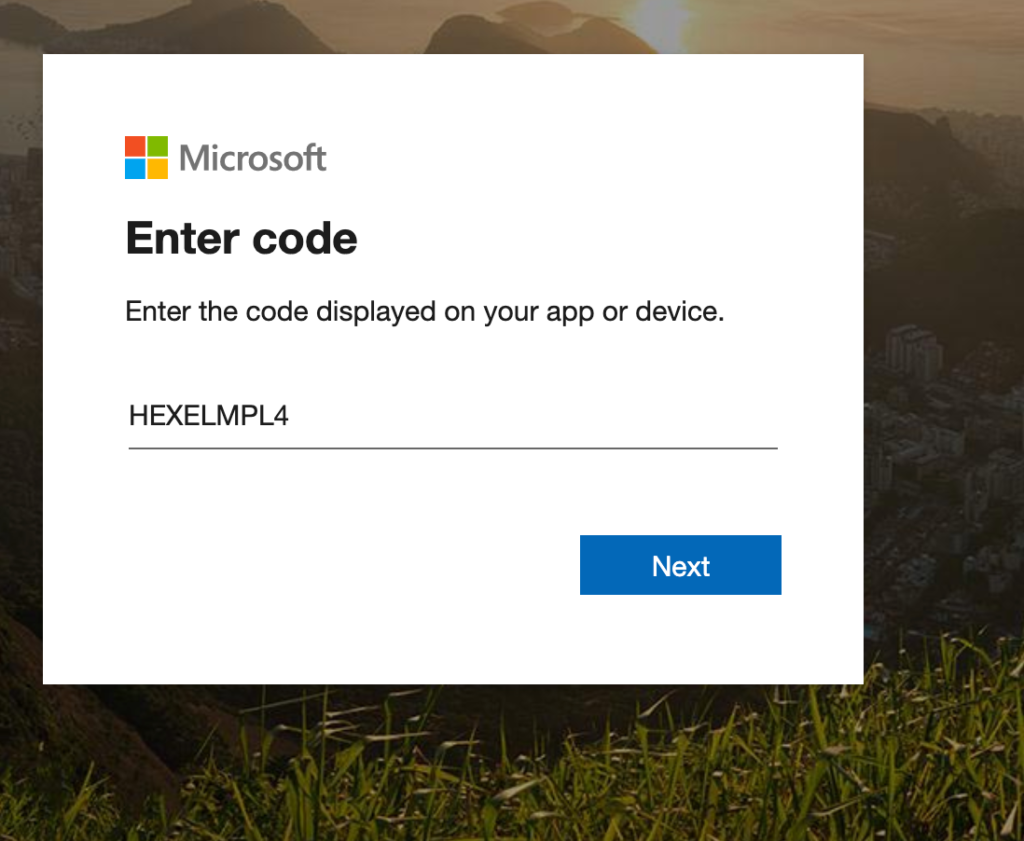
Step-25 Open the URL https://microsoft.com/devicelogin ,Type the code which is from previous step on the PowerShell screen and Click Next
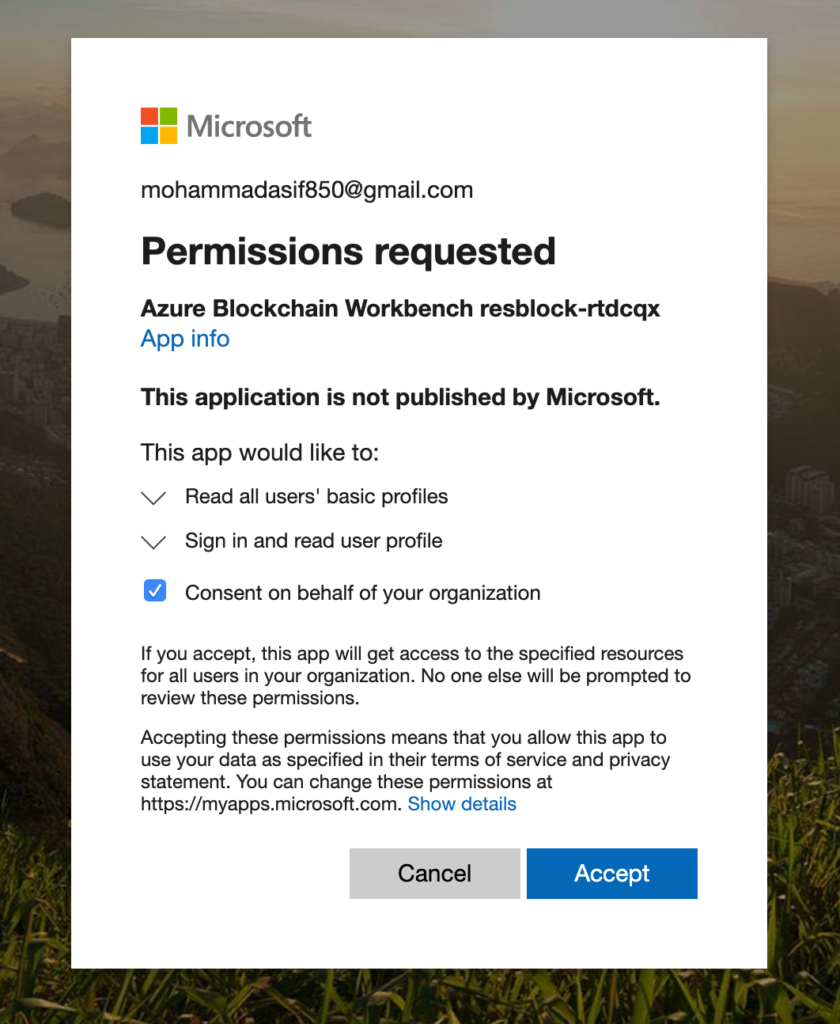
Step-26- Grant permission access to read users basic profiles.
Step-27 Select the account to login, then close the window after successful login.

Step-28 Go back to the PowerShell window now and check the status
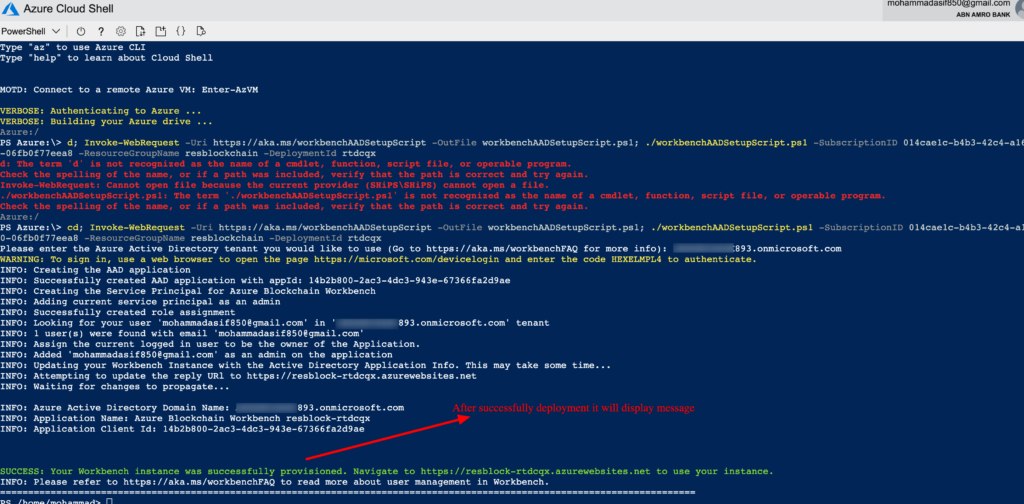
Step-29 After successful deployment you will get the above message . Now refresh browser.
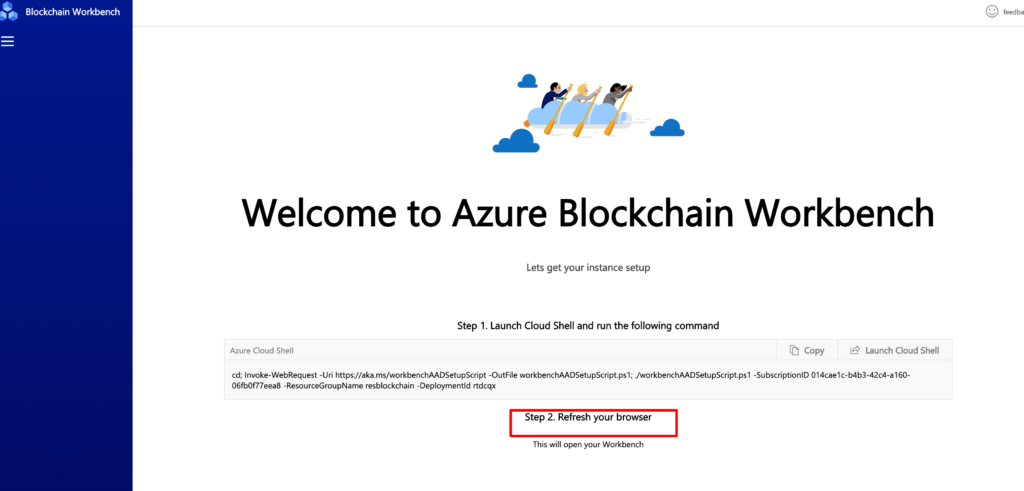
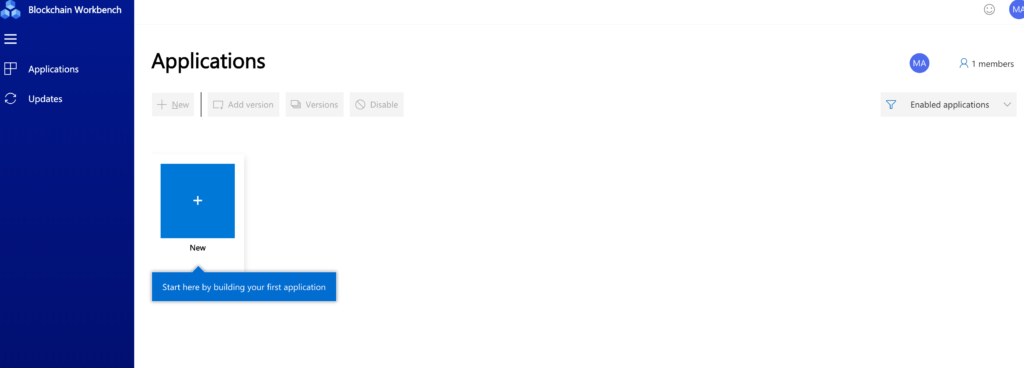
Step-30 You now successfully created a blank Blockchain Application. Now next need to create a Registration API to get details from User account from AD.
Step-31 Now redirect to Active Directory and In the New Application Registration enter the below screen details.
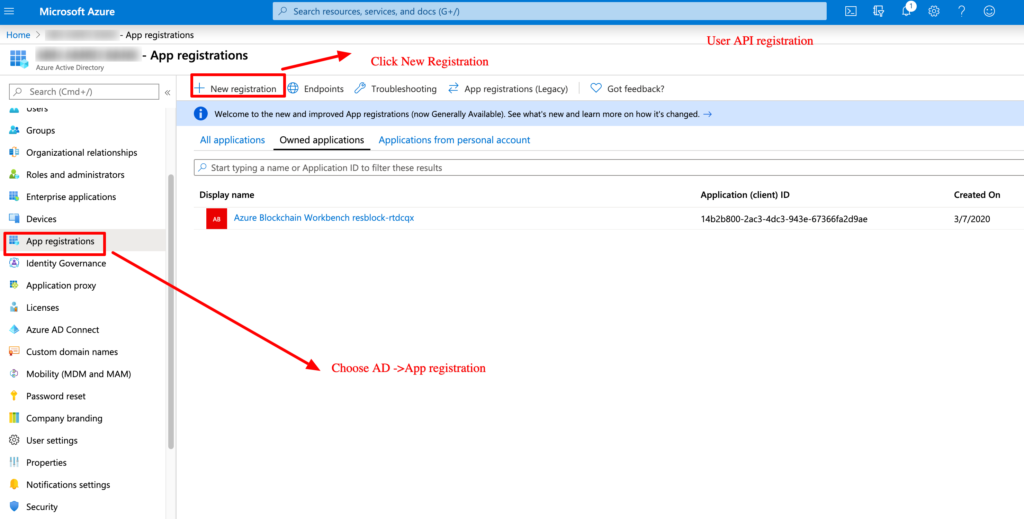
Step-32 In the New Application Registration enter the below screen details.
Name: Blockchain API
URL: https://blockchainapi
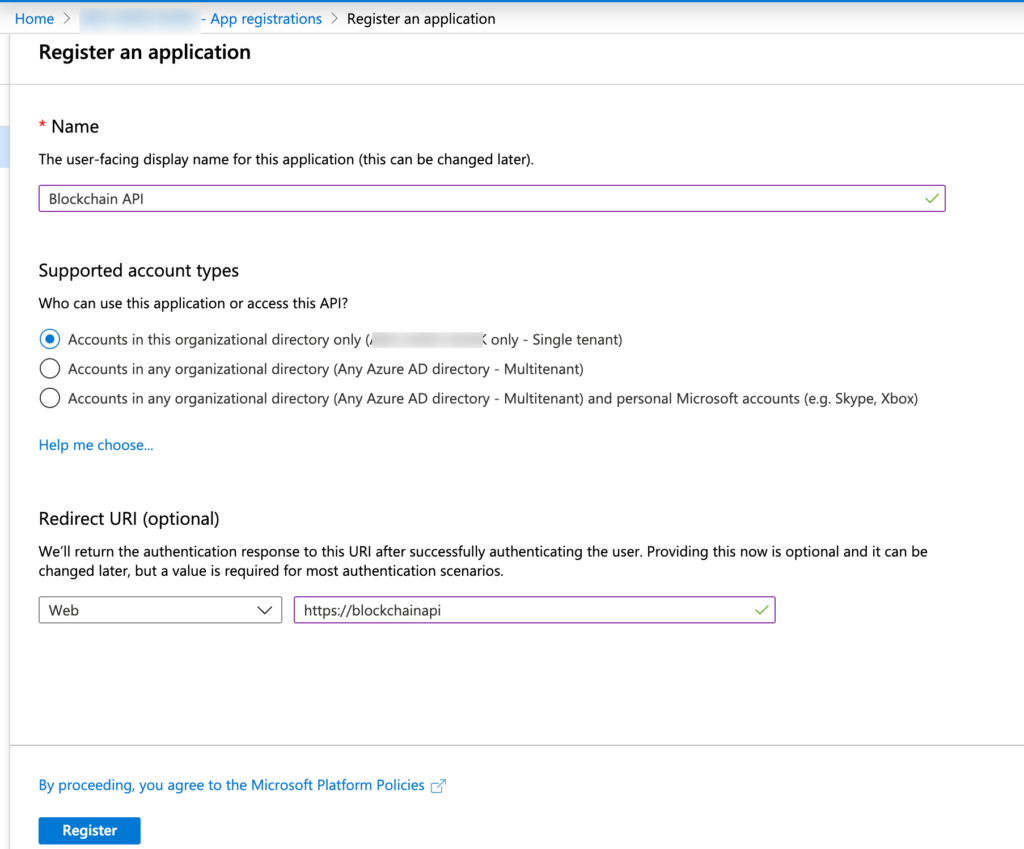
Step-33 Click on Register button after finish entering details as in above screen.
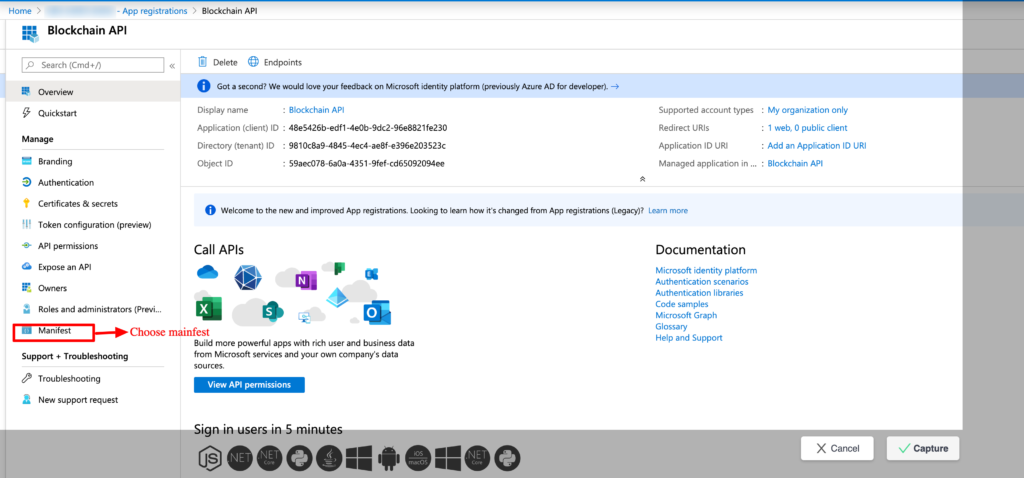
Step-34 Edit the appRoles section of the manifest
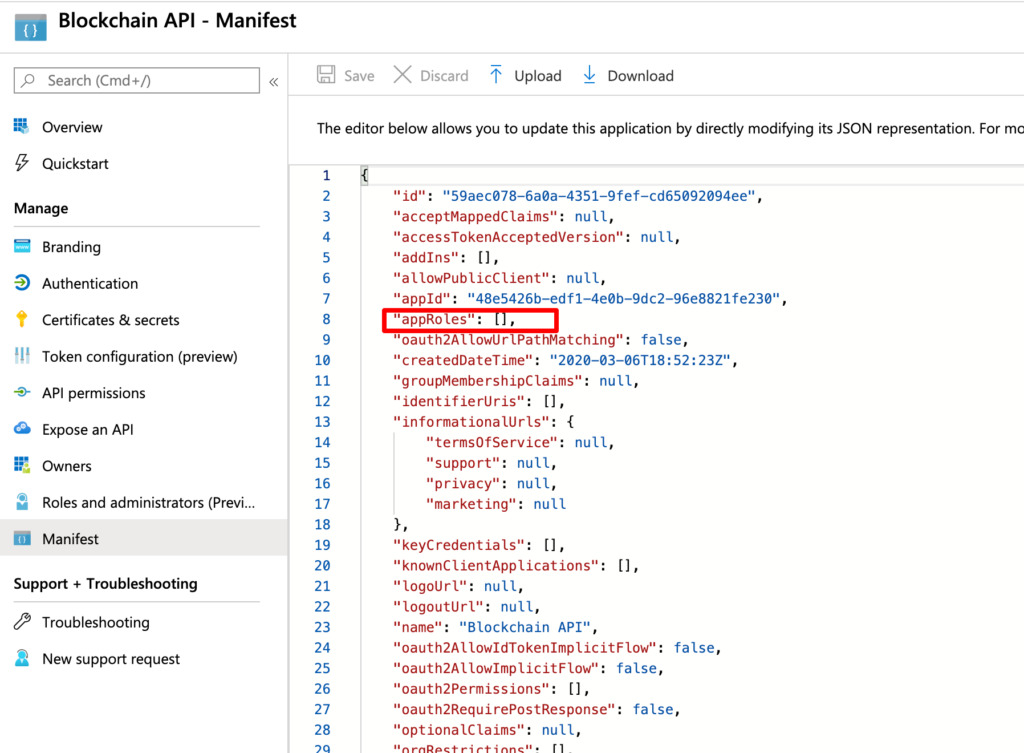
Step-35
Copy this text
“appRoles”: [
{
“allowedMemberTypes”: [
“User”,
“Application”
],
“displayName”: “Administrator”,
“id”: ““,
“isEnabled”: true,
“description”: “Blockchain Workbench administrator role allows creation of applications, user to role assignments, etc.”,
“value”: “Administrator”
}
],
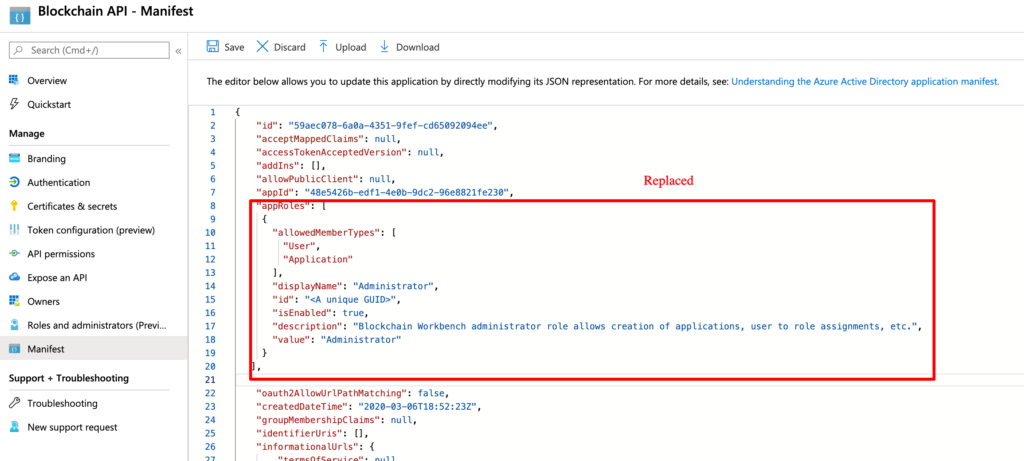
Step-36
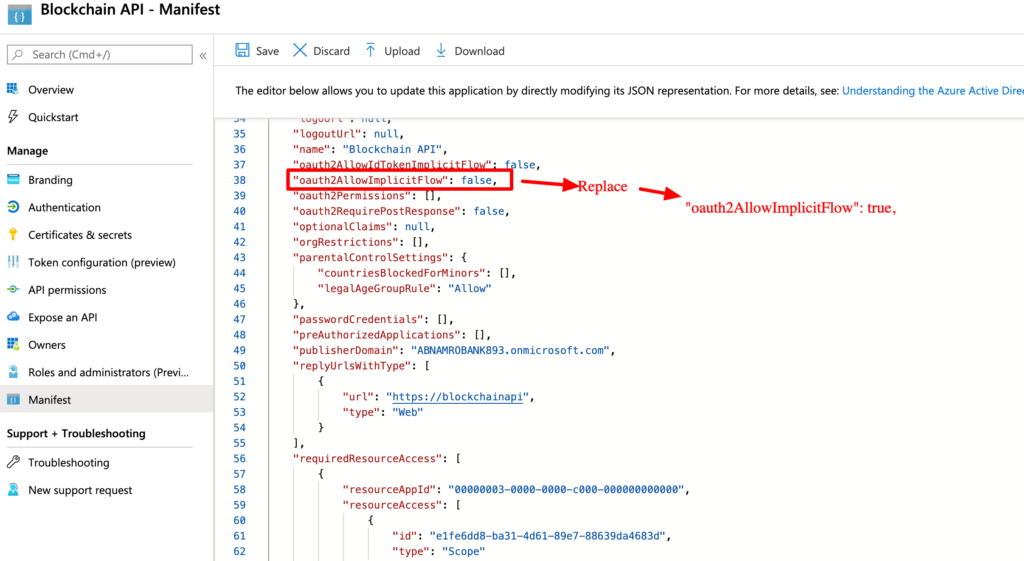
Step-37
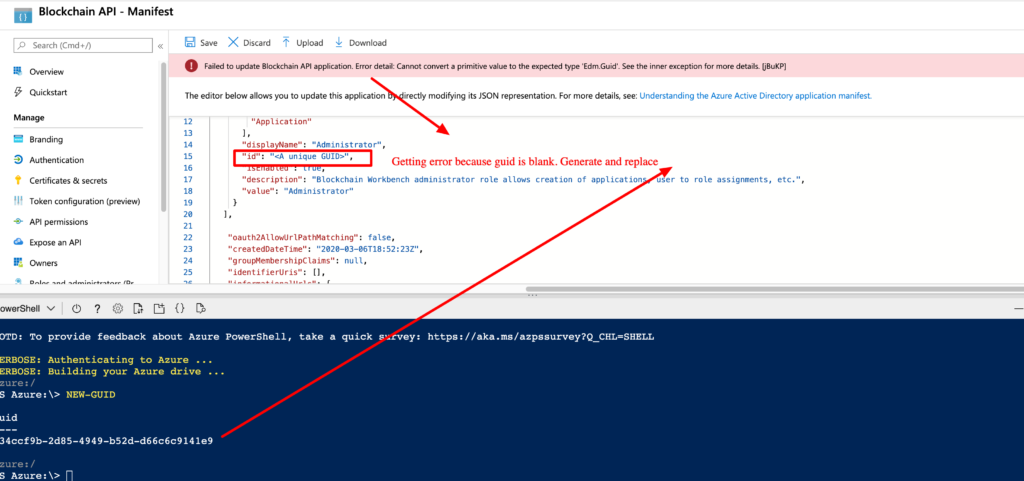
Step-38
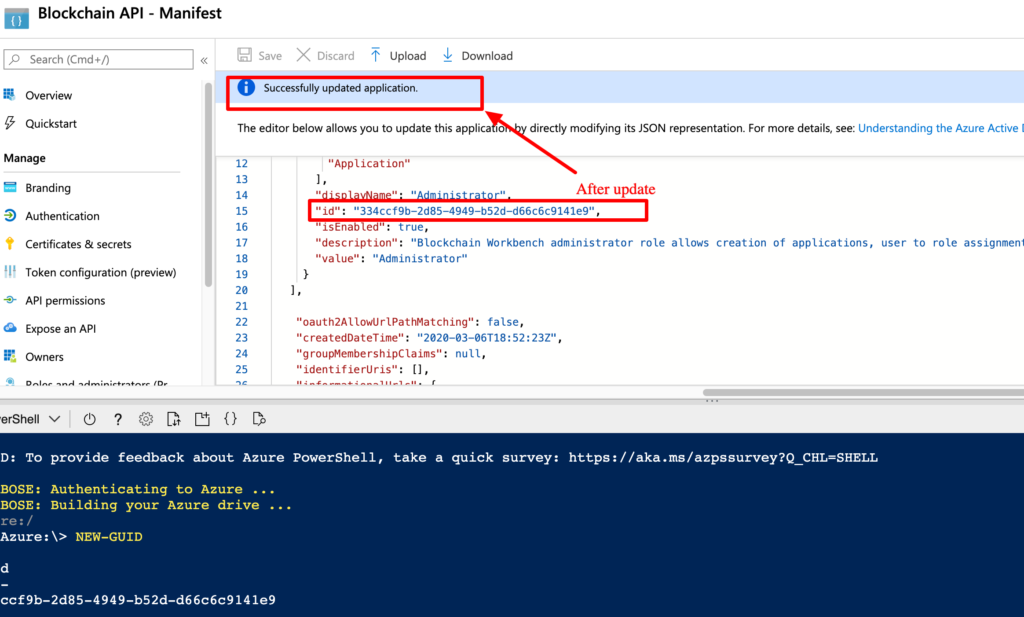
Step-39
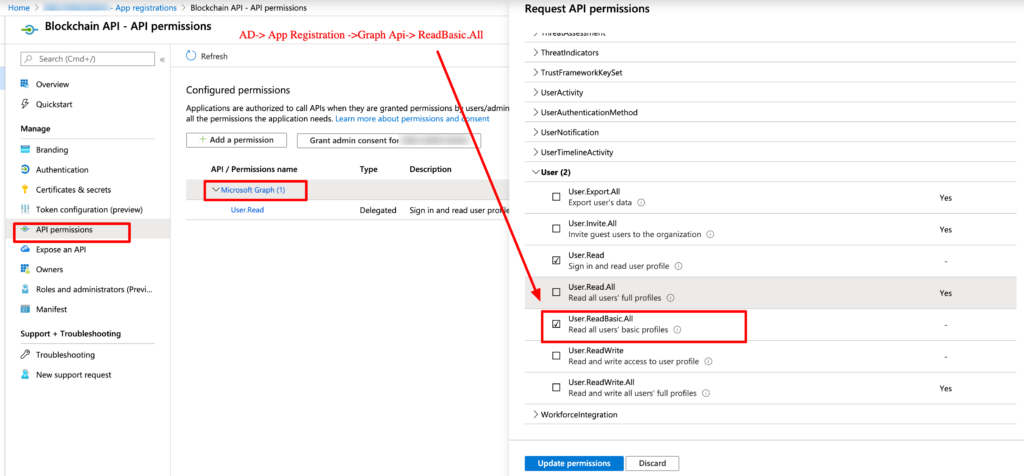
Step-40
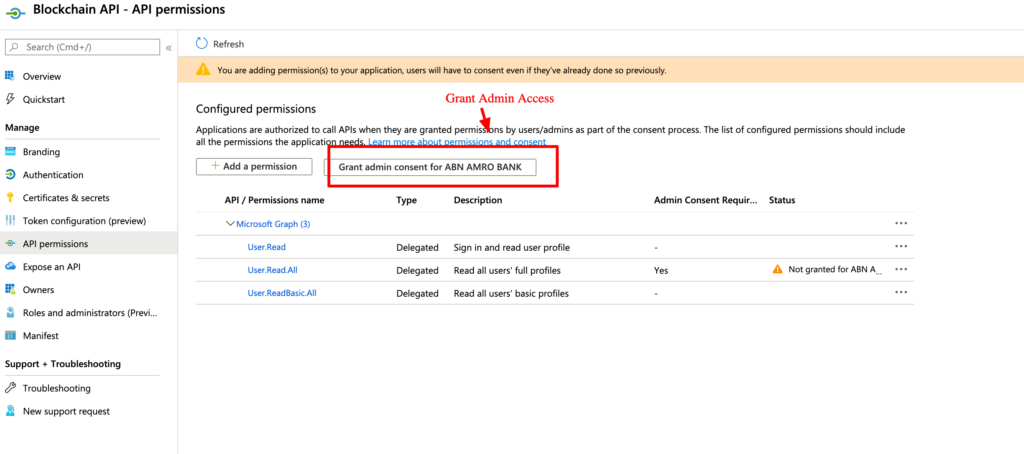
Step-41
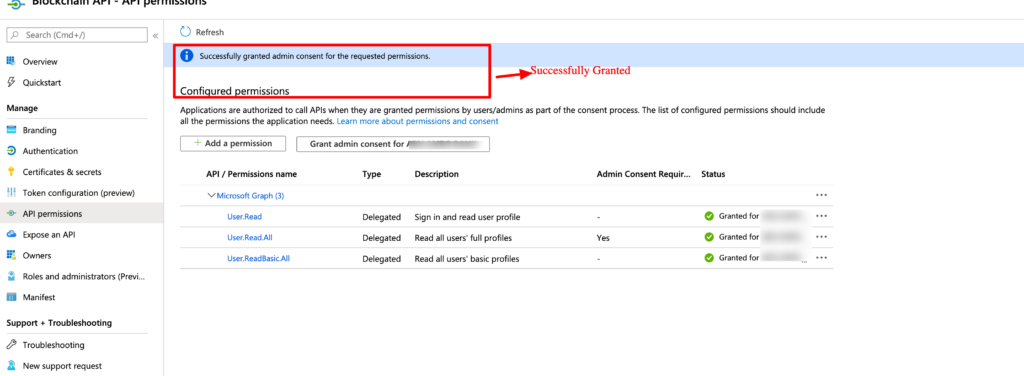
Step-42
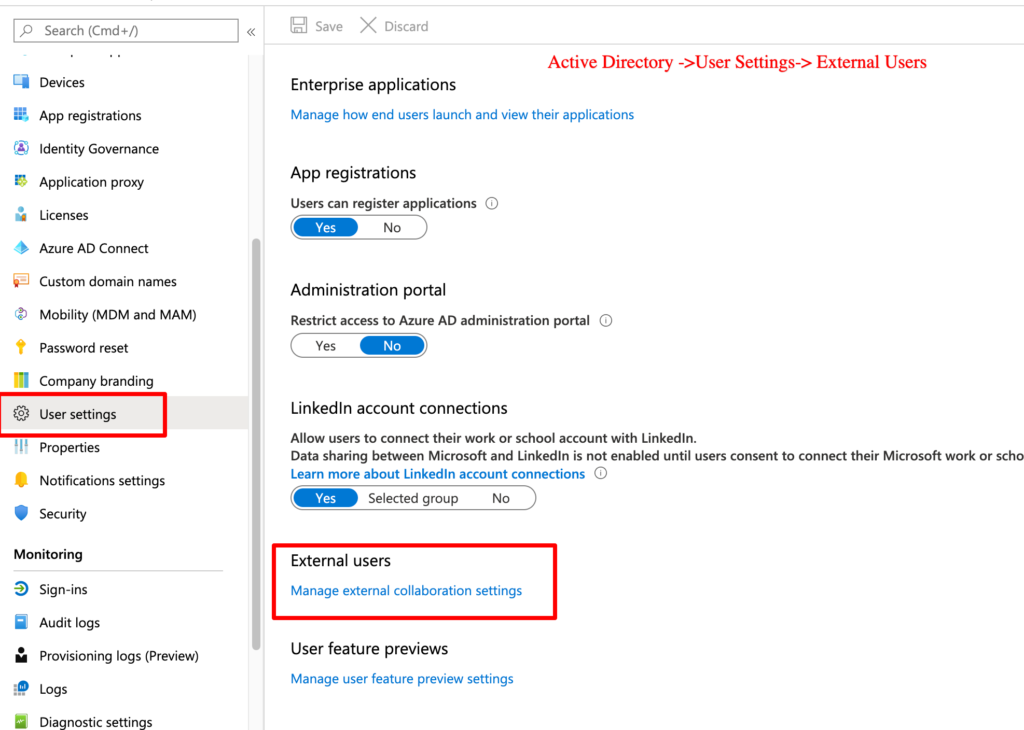
Step-43
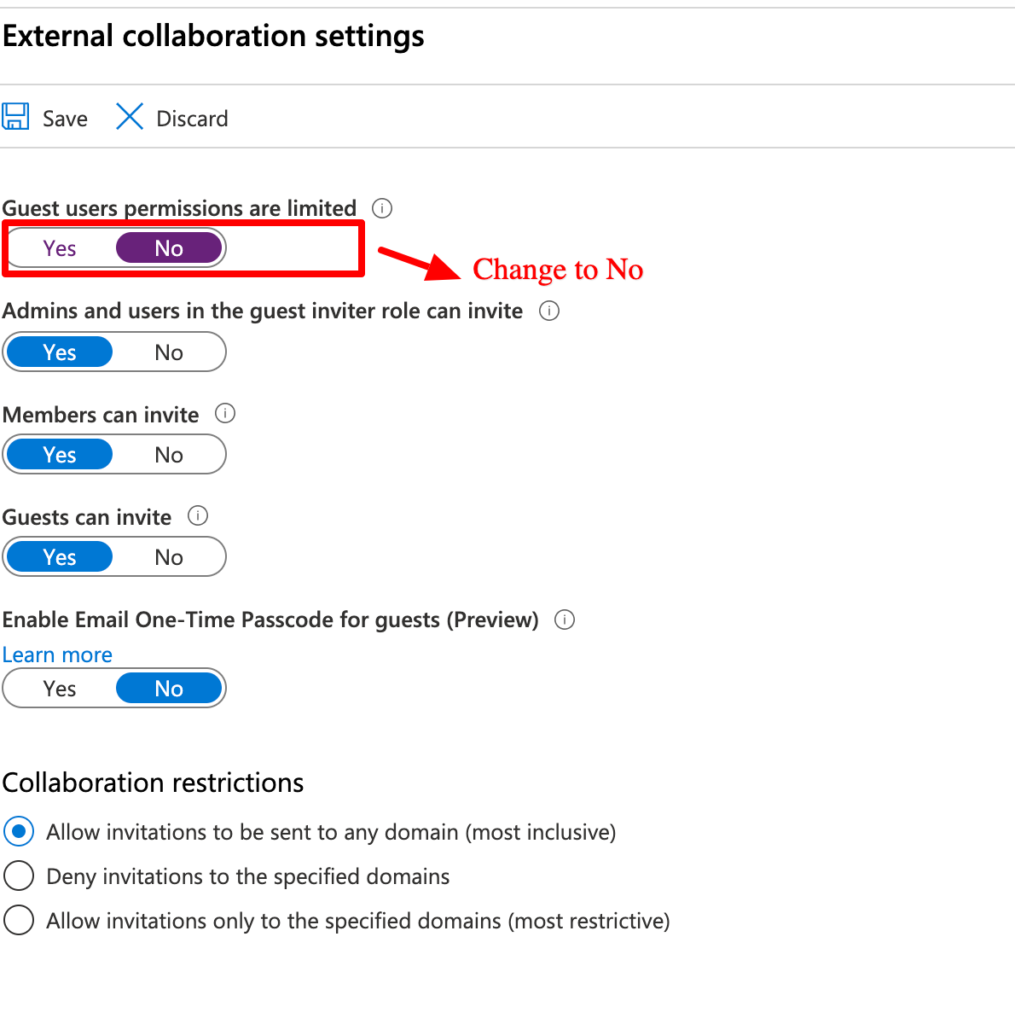
Step-44
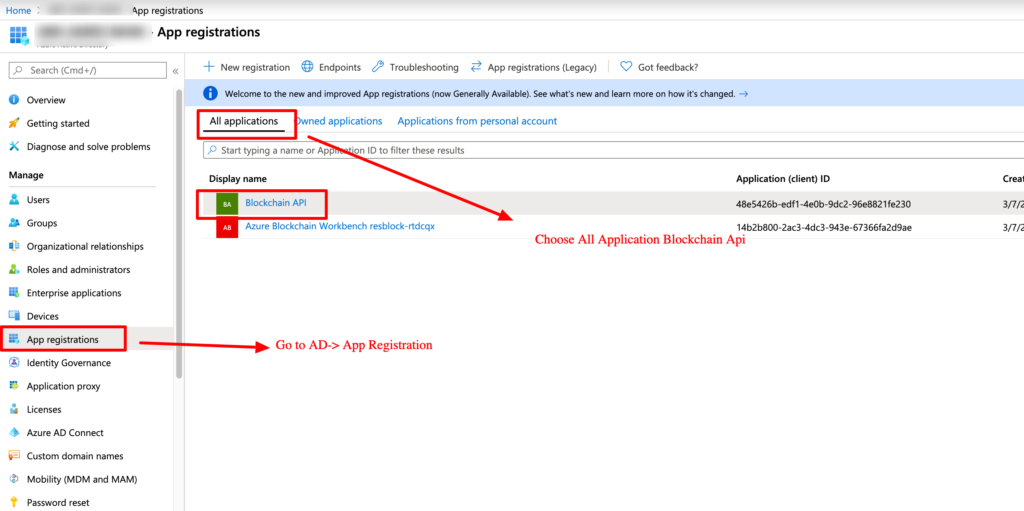
Step-45
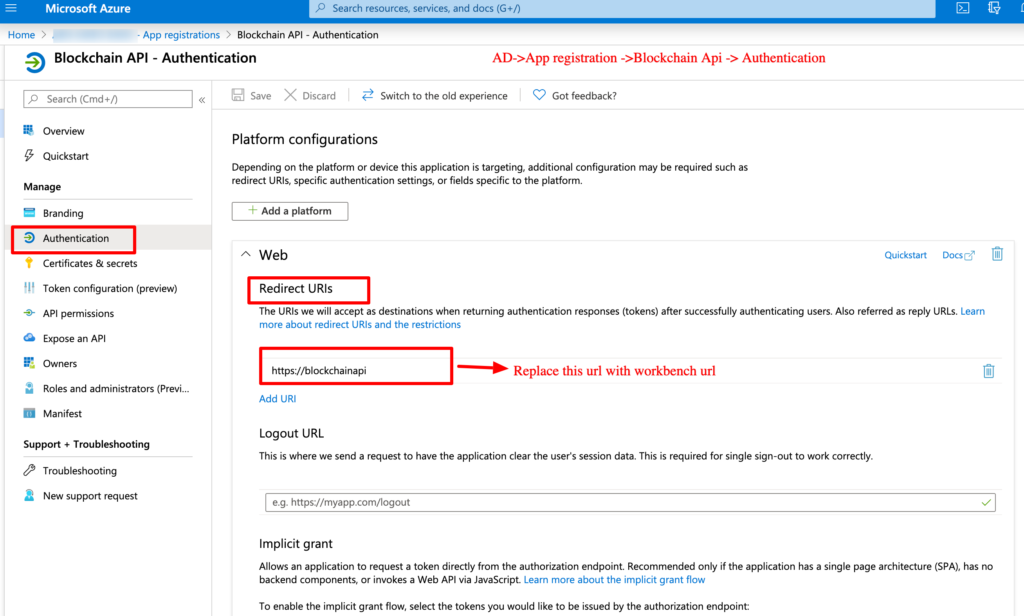
Step-46
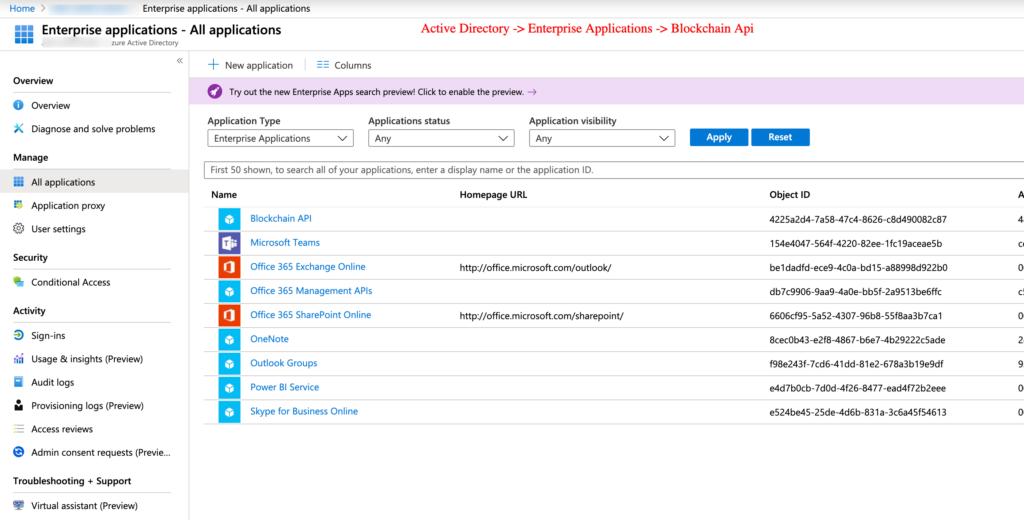
Step-47
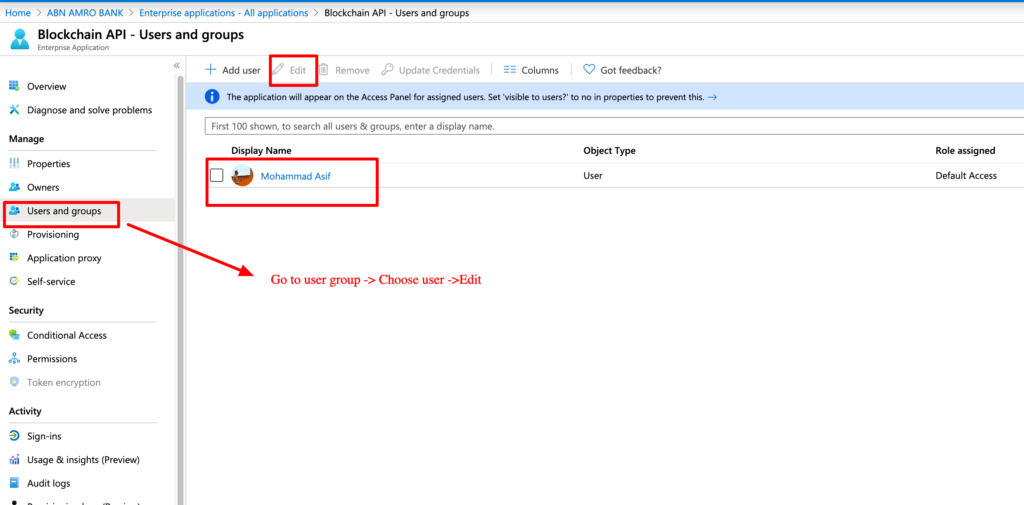
Step-48
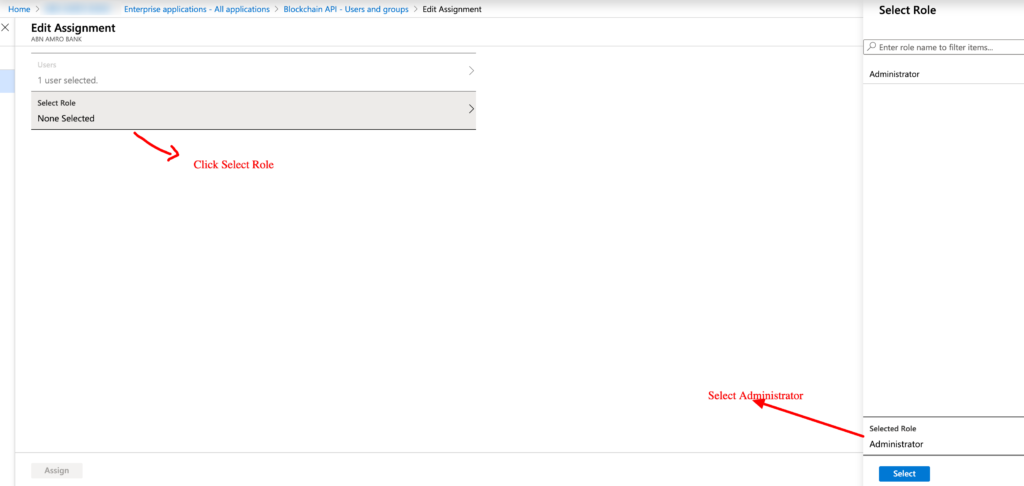
Step-49

Step-50

Step-51
