
There are several ways to secure the connection string in an Azure-based .NET Core app. Here are some options:
- Use Azure Key Vault: Azure Key Vault is a cloud-based service that allows you to securely store and manage cryptographic keys, secrets, and certificates. You can store your connection string as a secret in Azure Key Vault and then retrieve it in your .NET Core app at runtime. This approach helps to keep your connection string secure and away from the codebase.
- Use Azure App Configuration: Azure App Configuration is a service that provides a central location to manage application settings and feature flags. You can store your connection string as a configuration setting in Azure App Configuration and then retrieve it in your .NET Core app at runtime. This approach helps to keep your connection string separate from your codebase and allows you to update it without redeploying your app.
- Use Managed Identity: Managed Identity is a feature in Azure that allows you to authenticate your app to Azure services without needing to manage secrets or credentials. You can enable Managed Identity for your .NET Core app and then grant it access to the Azure resources that require the connection string, such as a database or storage account. This approach eliminates the need to store the connection string in your code or configuration.
- Use Environment Variables: You can store your connection string as an environment variable on the server where your .NET Core app is hosted. Then, you can retrieve the connection string at runtime in your app using the Environment.GetEnvironmentVariable() method. This approach keeps your connection string separate from your codebase, but it requires manual configuration of the environment variables on each server.
Overall, using Azure Key Vault or Azure App Configuration or Managed Identity to store and retrieve your connection string is recommended because they provide a more secure and scalable solution.
In this blog post, we will explore how to use Azure Key Vault to enhance the security of our connection string in .NET Core App using backend database CosmosDB. By leveraging Azure Key Vault, we can store sensitive information such as connection strings securely and retrieve them only when required, significantly reducing the risk of unauthorized access.
Before you start, make sure you have the following prerequisites:
- An Azure subscription with an active Key Vault and a Cosmos DB account.
- Visual Studio 2022 or later installed.
- .NET Core SDK 3.1 or later installed.
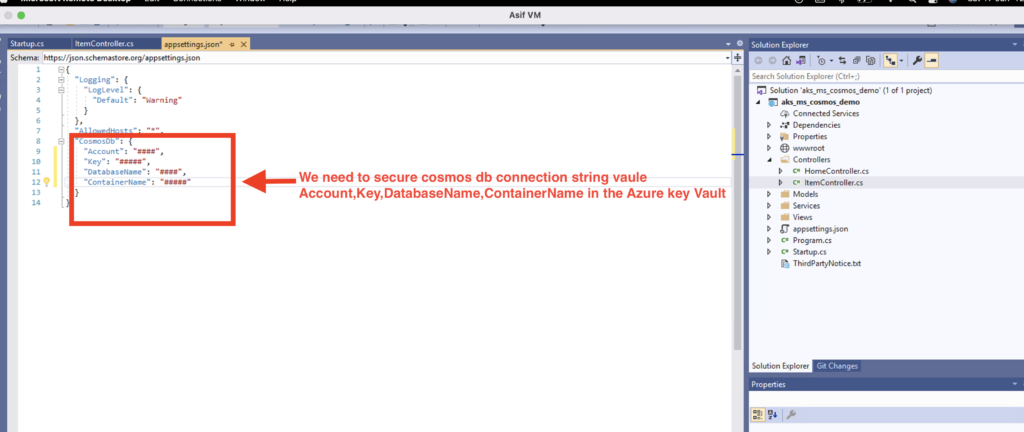
Let’s take an example of .Net Core App using Cosmos DB database. We have requirement to store cosmos db connection string in Azure key Vault and access connection string in secure way. Refer below connection string to secure.
Note– You can store any connection string or connection string value and retrieve in this manner. I have just taken Azure Cosmos DB connection string for reference.
In part -1 of the series, We will see how can we use Azure Key Vault and connect to cosmos db account.
In the part-2 of the series, We will see how can automate this process with the help of Azure DevOps.
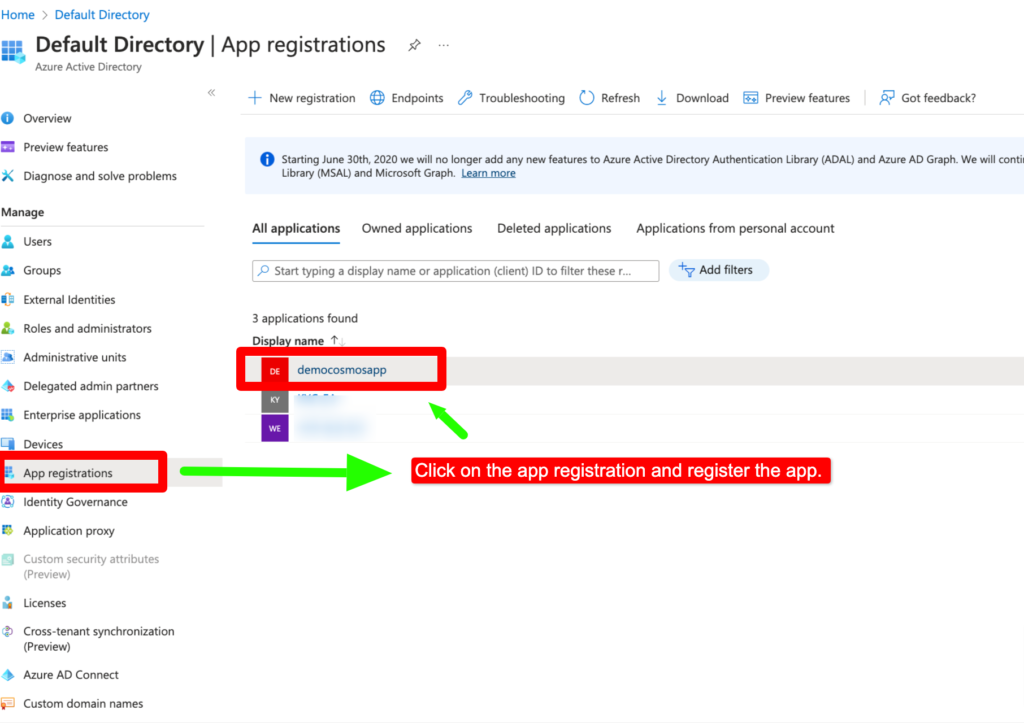
Step -1 Now first let’s create App Registration in Azure Active Directory by clicking on New Registration.
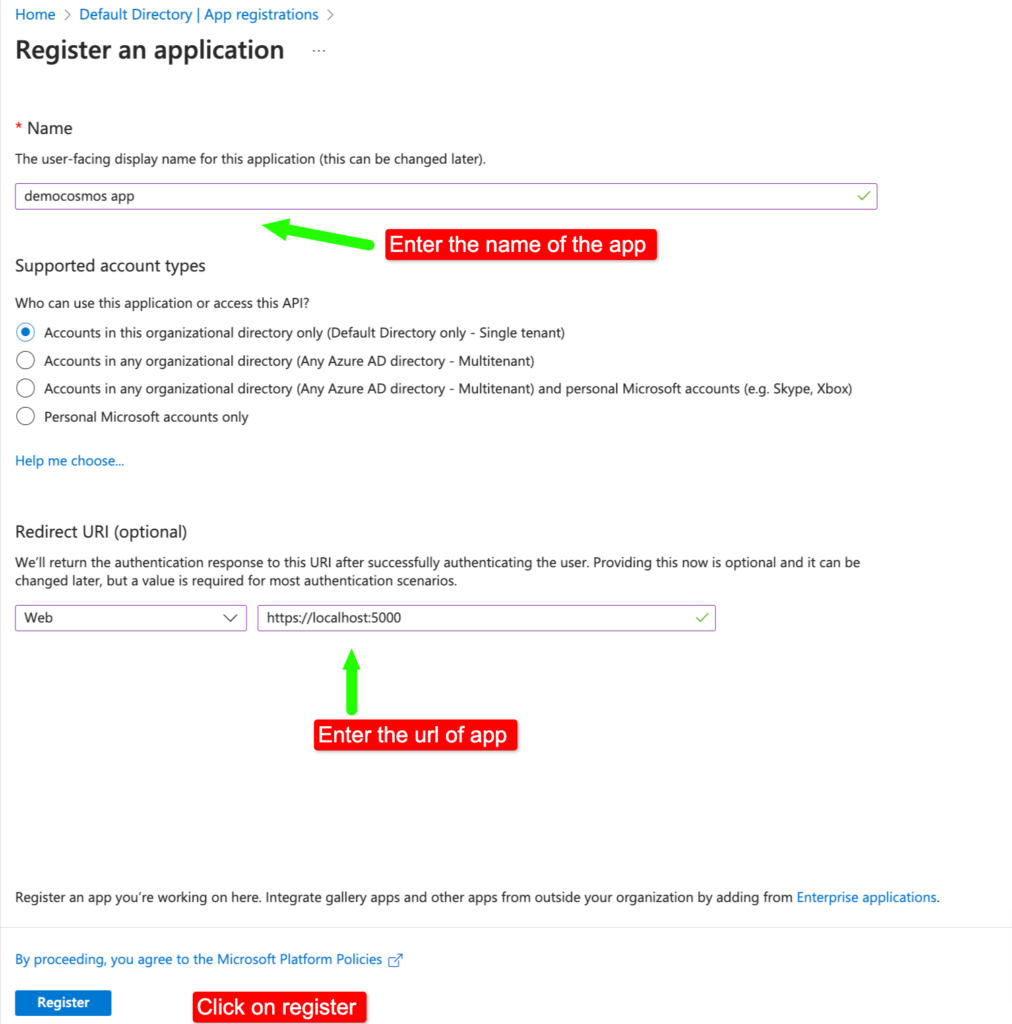
Step 2– Provide app name and redirect uri (Optional) and click on register button.
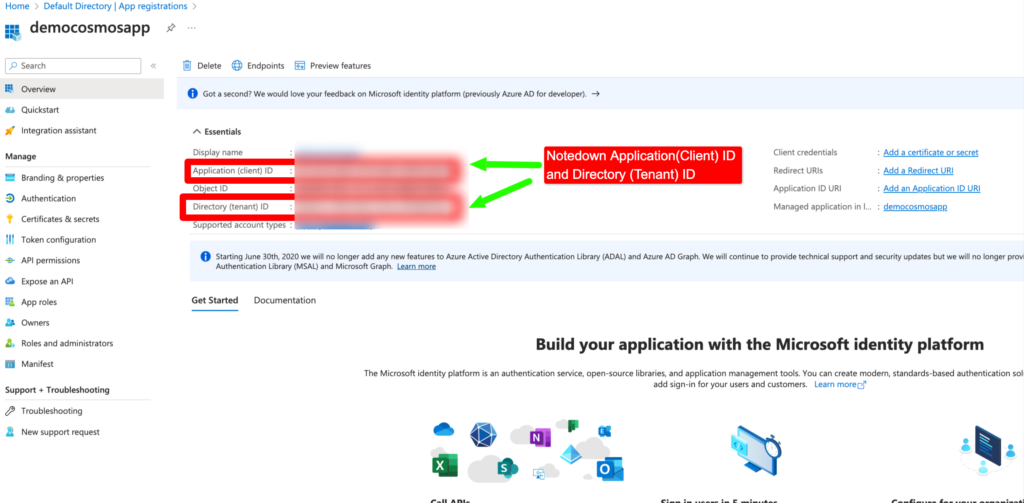
Please copy the Application ID (Client ID) to any secure place. We will use this ID in our Web APP application later.
Step 3 – Create a client secret to read the Connection String value from Azure key Vault.
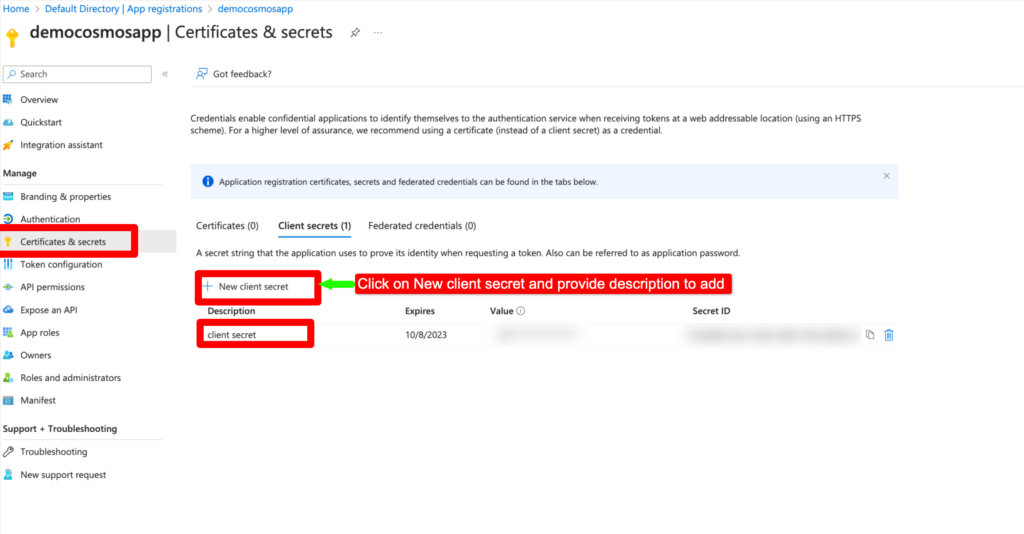
Please make a copy of the secret key above and store it securely, as we will need to use this value in our Web applications.
Step 4 – Add API permissions for Azure Key Vault,Azure Cosmos DB(In current demo I am using Cosmos as Backend DB) and Azure DevOps(If we are going to publish app via azure devops) and Grant admin access.

With the app registration process complete and the necessary values such as client ID and client secret copied, we are now ready to create the Azure Key Vault.
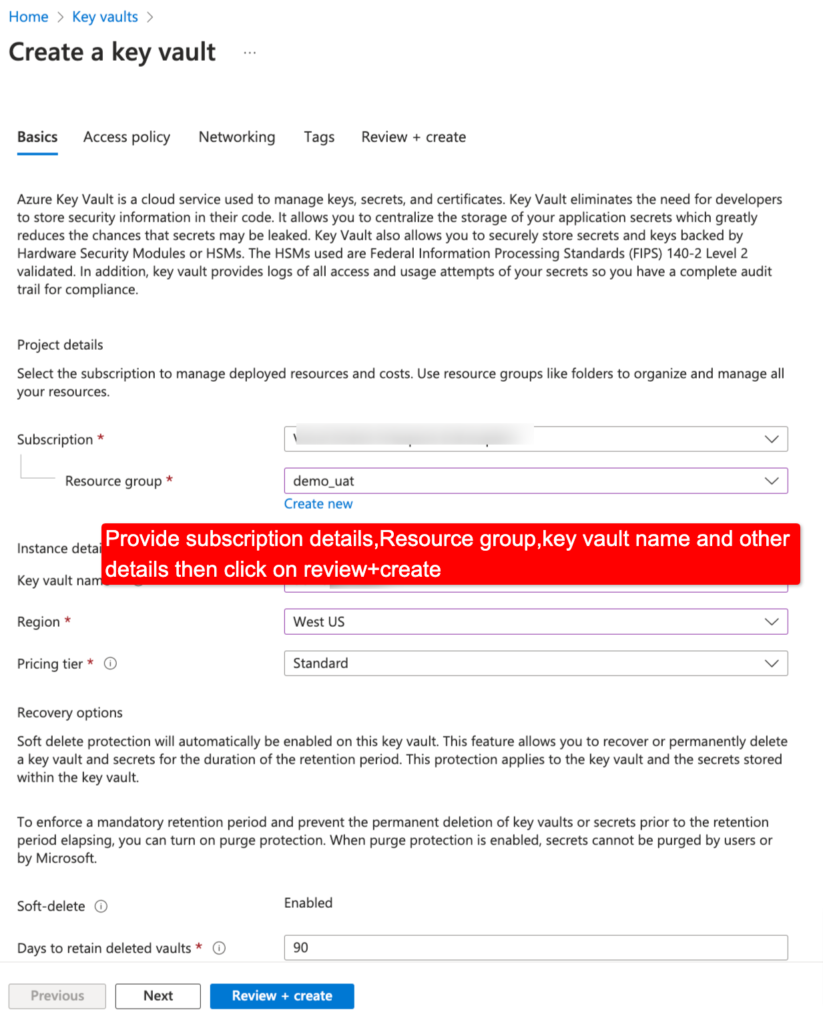
Step 5 – Create an Azure Key Vault resource in your Azure portal and add a secret for your connection string.
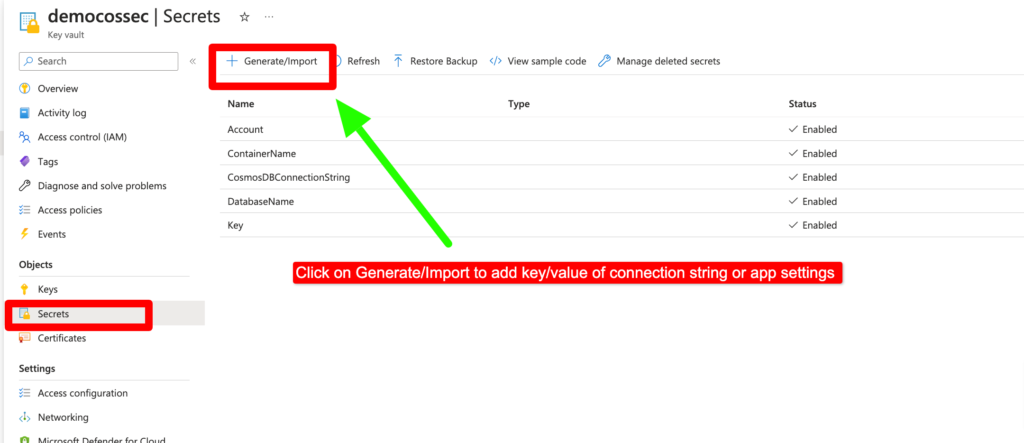
Step 5– Now let’s add secret value of ConnectionString. In my case I am going to store cosmos db connection string value in Azure Key Vault (Account,Key,DatabaseName,ContainerName) which I will use in later steps.
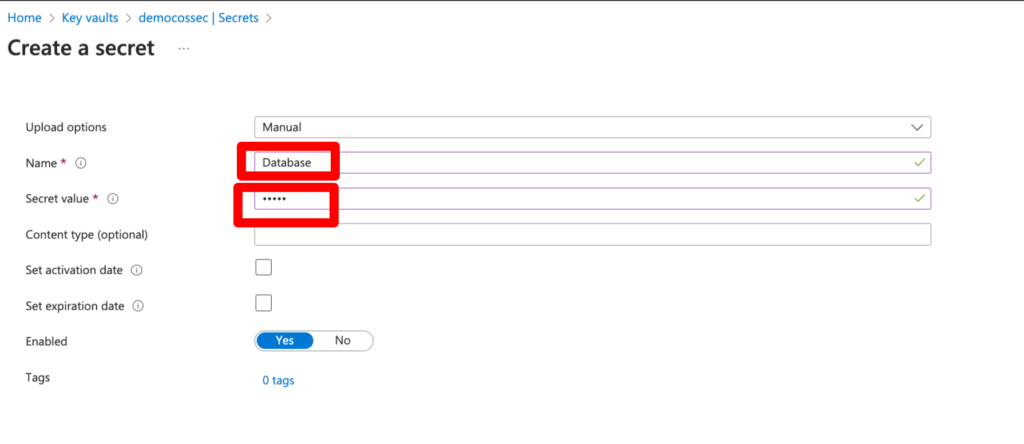
Add Name (Key) and Secret (Value) of connection string or app settings and click create. eg Key=Database , Value=”Name of Database”
Step 6 – Now let’s grant access policies of this Key Vault to app registration (From which app we are going to access Azure Key Vault), which we have created already from App Registration in Step 3,4.
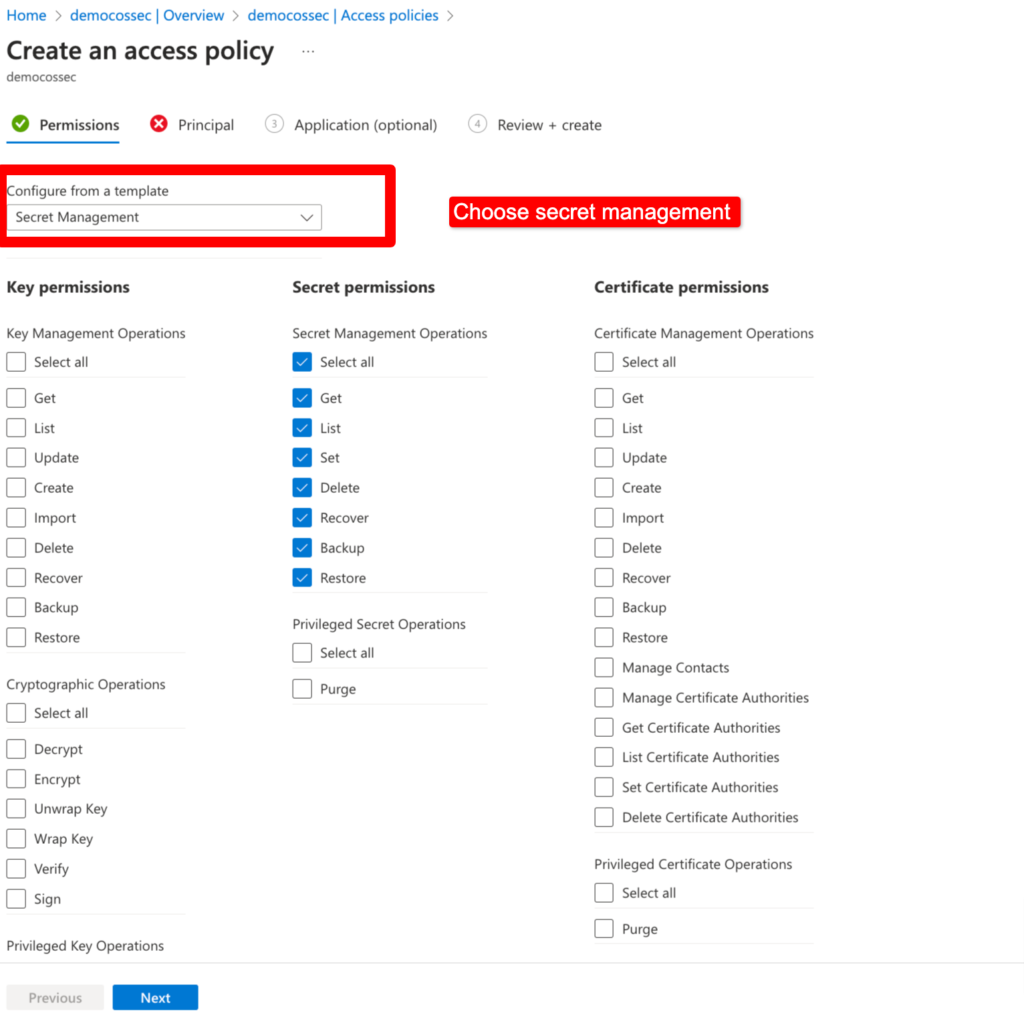
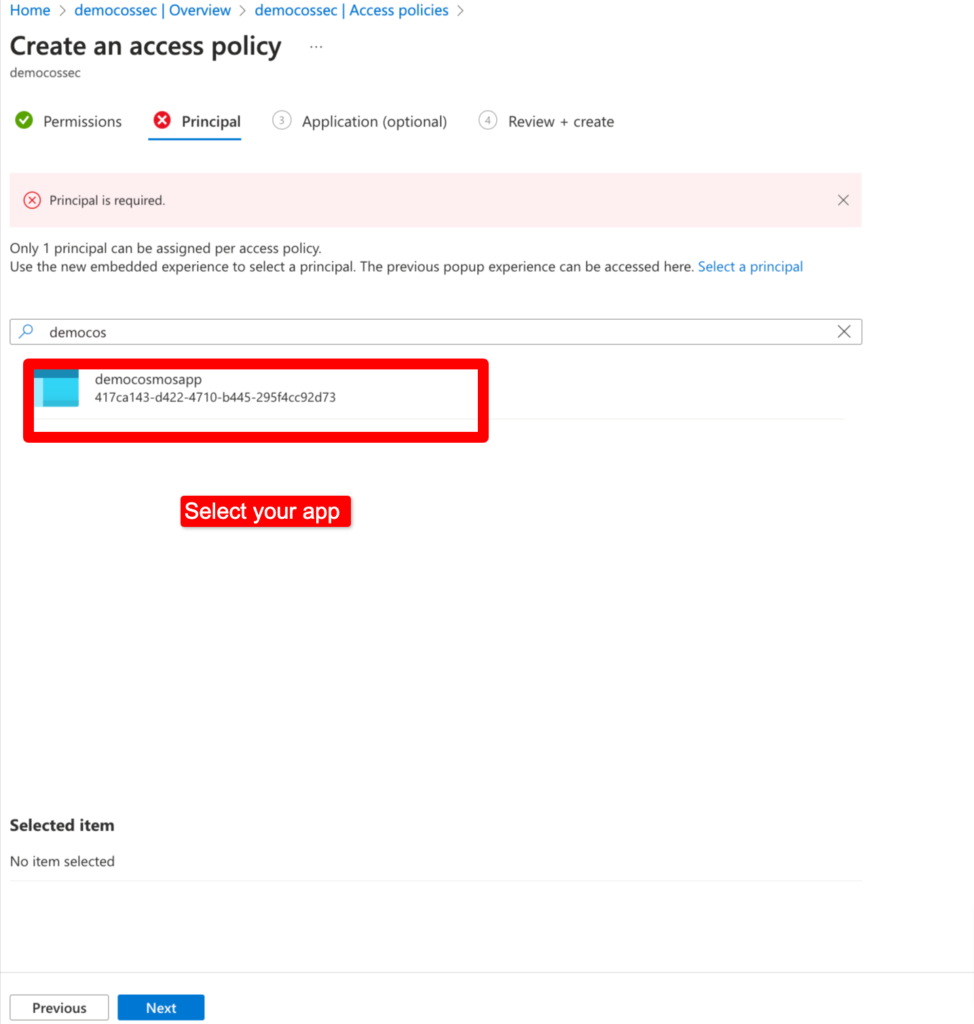
Choose Secret Management and choose app which we have created in App registration or if you have already deployed web app as app service you can choose that.
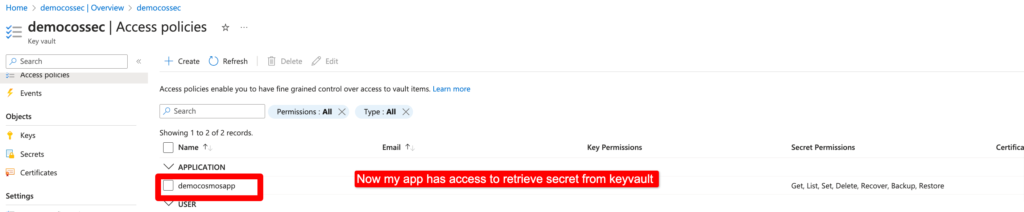
After policy added.
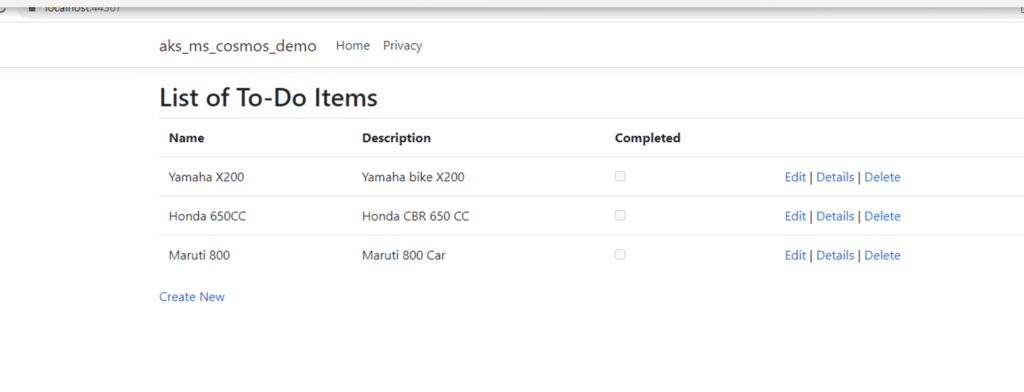
Step 7– We have successfully created Azure Key Vault and Secret key value pairs in above steps. We can create a Web application and consume these details and get secret value from Key Vault.
Let’s create a basic Web API application using the ASP.NET Core template and modify the appsettings.json with the below values.
appsettings.json–
{
  "Logging": {
    "LogLevel": {
      "Default": "Warning"
    }
  },
  "AllowedHosts": "*",
  "KeyVault": {
    "Vault": "My Vault",
    "ClientId": "My cleint Id",
    "ClientSecret": "My Client Secret",
    "Endpoint": "My End Point"
  }
}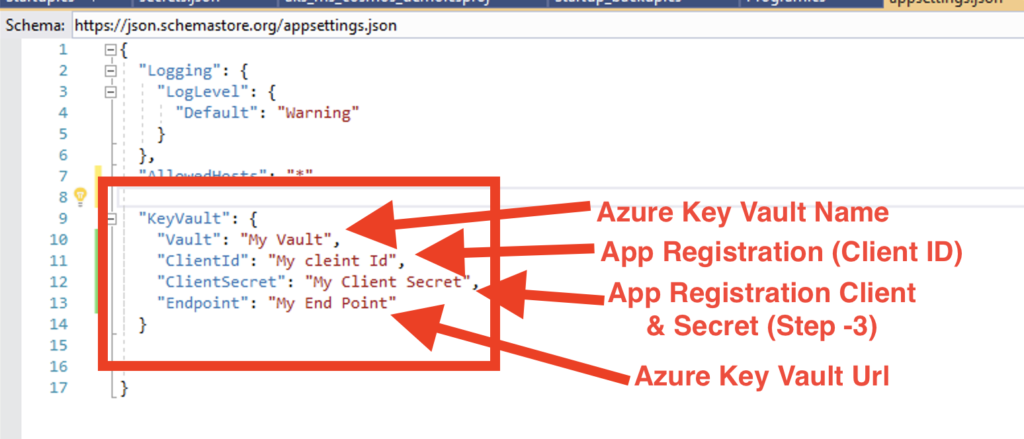
Above keyvault details we will retrieve connection string value (Account,Key,DatabaseName,ContainerName) from Azure Key Vault.
We can use Visual Studio Manage Secret feature to to secure key vault name ,client id,secret, and endpoint in development enviorment.
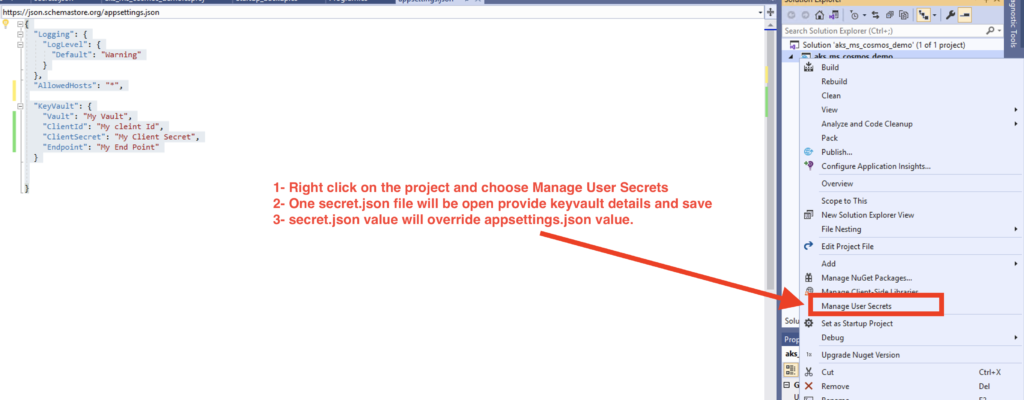
secret.json
{
  "KeyVault": {
    "Vault": "Name of Key Vault",
    "ClientId": "App Registration(Client ID)",
    "ClientSecret": "Value of App Registration Client Secret",
    "Endpoint": "https://KeyVaultName.vault.azure.net/"
  }

}
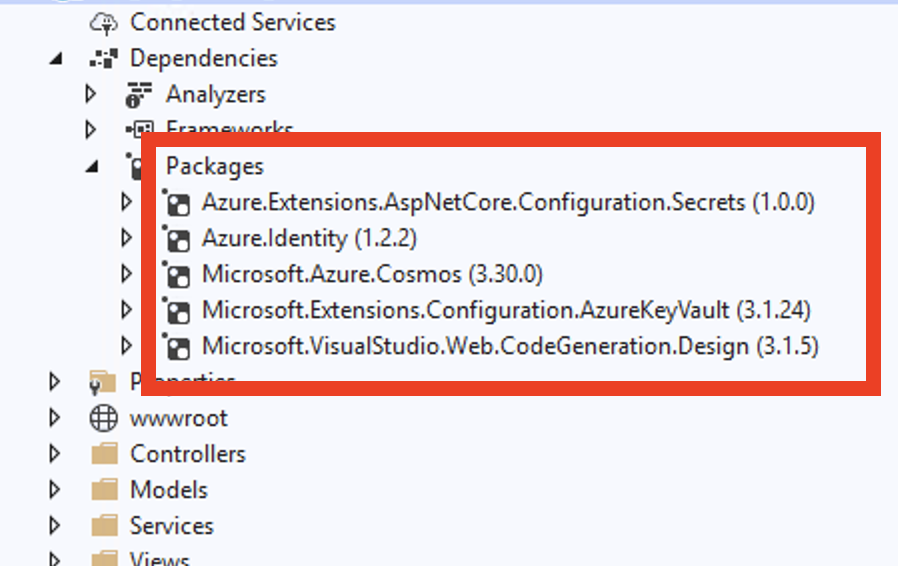
Step 8 – Install the Azure.Extensions.AspNetCore.Configuration.Secrets and Microsoft.Extensions.Configuration.AzureKeyVault NuGet package.
In my case, I am using cosmos db So I have also Installed Microsoft.Azure.Cosmos
Step 9 – Modify the Program.cs file.Replace the contents of the CreateHostBuilder method in the Program.cs file with the following code:
using Microsoft.AspNetCore.Hosting;
using Microsoft.Extensions.Configuration;
using Microsoft.Extensions.Hosting;

namespace aks_ms_cosmos_demo
{
    public class Program
    {
        public static void Main(string[] args)
        {
            CreateHostBuilder(args).Build().Run();
        }

        public static IHostBuilder CreateHostBuilder(string[] args) =>
           Host.CreateDefaultBuilder(args)
            .ConfigureAppConfiguration((context, config) =>
            {

                var root = config.Build();
                config.AddAzureKeyVault($"https://{root["KeyVault:Vault"]}.vault.azure.net/", root["KeyVault:ClientId"], root["KeyVault:ClientSecret"]);
            })
            .ConfigureWebHostDefaults(webBuilder =>
            {
                webBuilder.UseStartup<Startup>();
            });
    }
}
Step 10 – Next, we can obtain the connection string value from Keyvault credentials, as obtained in the previous step, and inject it into the Cosmos DB client by updating the Startup.cs file (if you’re working with a .NET Core application). This will involve retrieving the Cosmos DB connection details (account, key, database name, and container name) and updating the appropriate configuration values.
startup.cs
using aks_ms_cosmos_demo.Services;
using Microsoft.AspNetCore.Builder;
using Microsoft.AspNetCore.Hosting;
using Microsoft.AspNetCore.HttpsPolicy;
using Microsoft.Extensions.Configuration;
using Microsoft.Extensions.DependencyInjection;
using Microsoft.Extensions.Hosting;
using Microsoft.Azure.Services.AppAuthentication;
using Microsoft.Azure.KeyVault;
using Microsoft.Azure.Cosmos;
using Newtonsoft.Json;
using System;
using System.Threading.Tasks;

namespace aks_ms_cosmos_demo
{
    public class Startup
    {
        public IConfiguration Configuration { get; }

        public Startup(IConfiguration configuration)
        {
            Configuration = configuration;
        }

        public void ConfigureServices(IServiceCollection services)
        {
            services.AddControllersWithViews();

            services.AddSingleton<ICosmosDbService>(provider =>
            {
                var cosmosClient = new CosmosClient(Configuration["Account"].ToString(), Configuration["Key"].ToString());
                var cosmosDbService = new CosmosDbService(cosmosClient, Configuration["DatabaseName"].ToString(), Configuration["ContainerName"].ToString());
                var database = cosmosClient.CreateDatabaseIfNotExistsAsync(Configuration["DatabaseName"].ToString()).GetAwaiter().GetResult();
                database.Database.CreateContainerIfNotExistsAsync(Configuration["ContainerName"].ToString(), "/id").GetAwaiter().GetResult();

                return cosmosDbService;
            });
        }

        public void Configure(IApplicationBuilder app, IWebHostEnvironment env)
        {
            if (env.IsDevelopment())
            {
                app.UseDeveloperExceptionPage();
            }
            else
            {
                app.UseExceptionHandler("/Home/Error");
                app.UseHsts();
            }

            app.UseHttpsRedirection();
            app.UseStaticFiles();

            app.UseRouting();

            app.UseEndpoints(endpoints =>
            {
                endpoints.MapControllerRoute(
                    name: "default",
                    pattern: "{controller=Item}/{action=Index}/{id?}");
            });

            app.UseAuthorization();
        }
    }

    public class CosmosDbSettings
    {
        public string Account { get; set; }
        public string Key { get; set; }
        public string DatabaseName { get; set; }
        public string ContainerName { get; set; }
    }
}
If you are using API controller to get value then you can refer below .
ValueController.cs
using Microsoft.AspNetCore.Mvc;
using Microsoft.Extensions.Configuration;

namespace aks_ms_cosmos_demo.Controllers
{
    [Route("api/[controller]")]
    public class ValuesController : Controller
    {
        private readonly IConfiguration _configuration;

        public ValuesController(IConfiguration configuration)
        {
            _configuration = configuration;
        }

        [HttpGet]
        public string Get()
        {
            var value = _configuration["Key Vault Name"];
            return "Value for Secret [Key Vault Name] is : " + value;
        }
    }
} 
Note: Azure Key Vault is a good option if you have sensitive information that needs to be protected, such as connection strings or API keys. It’s also a good option if you need to manage secrets across multiple applications or environments. Azure Key Vault provides fine-grained access control and auditing, and integrates well with other Azure services.
Azure App Configuration is a good option if you need to manage a large number of application settings or configurations, especially if you have multiple applications or environments that share some settings. Azure App Configuration provides versioning, segmentation, and feature flags, which can help you manage configurations more effectively.
Managed Identity is a good option if you have Azure resources, such as databases or storage accounts, that require authentication, and you want to avoid storing credentials in your code or configuration. Managed Identity provides a secure and scalable way to authenticate your application, without requiring any additional infrastructure.
Overall, all three options provide secure and scalable ways to manage your connection strings in Azure. Azure Key Vault is the most secure option, while Azure App Configuration provides more features for managing application configurations. Managed Identity is a good option if you have Azure resources that require authentication, and you want to avoid storing credentials in your code or configuration. The choice depends on your specific requirements and constraints.